|
|
|
K2 Payment terminal
|
|
|
K2 payment terminal via TCP/IP
|
|
|
Supported devices
Payments via a payment terminal are becoming more and more popular, which is why we have connected the payment terminal with the K2 system. Payment terminals can be connected via local or remote desktop. Number of terminals connected to the K2 system is not limited, the connection of a specific cash desk and a specific payment terminal can be realized by the name of the computer or the logged-in K2 user.
By using a payment terminal, user will increase control over the correctness of the entered payments. The request for a specific amount, currency or variable symbol is sent to the payment terminal K2 (Retail sale).
Supported is only payment terminal connection via TCP/IP protocol in which is terminal working in so called server mode. Terminals are connected via Ethernet. Wireless terminals must communicate via WiFi. Terminals using bluetooth are not supported. Communication with Ingenico iCT 220, VX520 and iwl 220 payment terminals has been established. Connection with other terminals is possible but not certified. The payment terminal must allow the printing of a receipt for the card transaction.
Communication protocols may vary across banks, and GPE - Global Payments Europe protocols are supported and certified ( e. g. Česká spořitelna, KB) and ČSOB B-protokol ( protocol adapted to the needs of ČSOB bank).
|
|
|
Settings
To connect to payment terminal it is necessary to know the IP address, port number and compatible mode. The Function 785 is used to set these terminal parameters.
In the Payment Terminal Settings window, user must first select the configuration type. In individual types of settings, the connection between K2 and the payment terminal can be verified for a specific configuration using the "Test connection with terminal” button or the "Test connection with bank” button to verify the connection between the payment terminal and the bank.
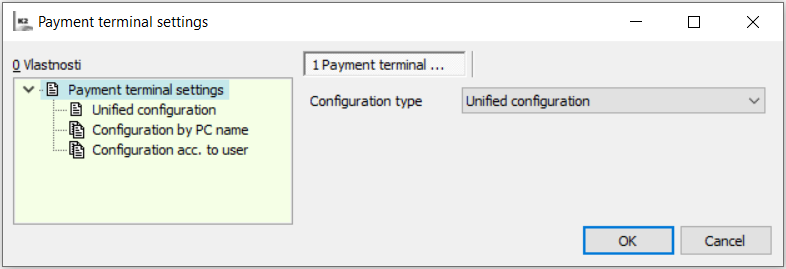
Picture: Payment Terminal Settings
If more than one payment terminal is connected to K2, Configuration by PC name or Configuration by usermust be selected. These 2 types have a list of items into which the required data is filled.
Configuration by PC name is suitable in Case where different users operate the same payment terminal. The computer name field differs uppercase and lowercase letters. If user is connecting to K2 via remote desktop, the name of the client computer (the name of the computer where the user is sitting) is used.
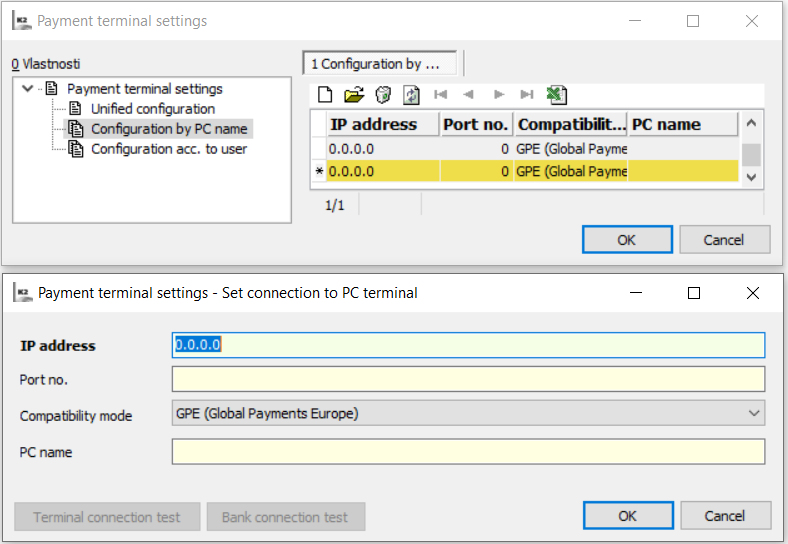
Picture: Configuration by PC name
Configuration by user is suitable in Case when a specific user always operates a specific payment terminal. User can be easily selected from preview tables.
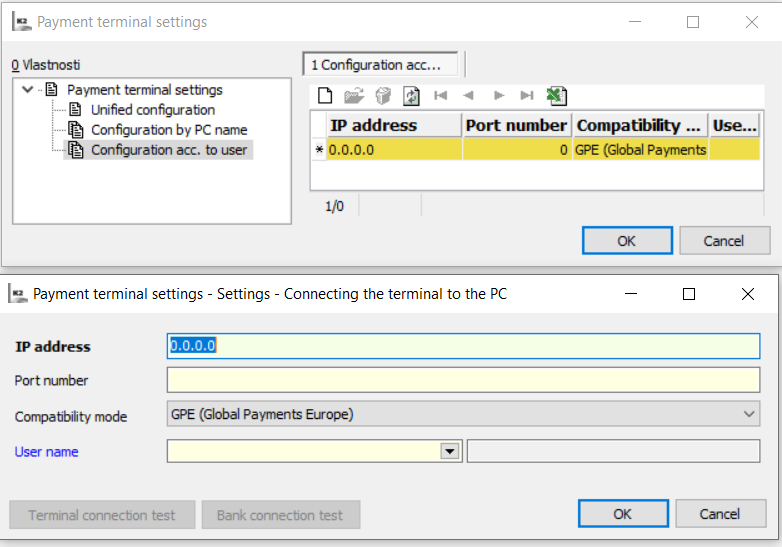
Picture: Configuration by user
|
|
|
Script
Objects enabling synchronous communication were published in the script. Each of these objects sends a request of that type and waits until it receives a response as to whether the transaction was successful or not. If K2 does not receive a response within 60 seconds, the transaction fails. The user can view a localized transaction status report that is in property LocalizedResponseDescription.
If the client has already been created for a specific payment terminal and another one is created before the transaction is completed, the older one will drop the connection with the terminal. The new client connects and can perform its methods. However, the correct procedure is to first release the client using Free and then create another. An example of using a terminal in a script is written in Prikl_142.PAS unit.
Published objects in the script:
- TPaymentClient – make a standard payment. Mandatory parameters are amount and currency, as an optional parameter is a variable symbol.
- TPaymentWithCashbackClient - make a cashback payment. Mandatory parameters are the amount to be paid, the amount to be withdrawn and the currency, the optional parameter is a variable symbol.
- TReversalClient – make a storno of last transaction. Mandatory parameters are amount, currency and verification code.
- TReturnClient - make return, the amount is transferred to the account number from the payment card. Mandatory parameters are amount and currency, as an optional parameter is a variable symbol.
- TCloseTotalsClient – make the closing. Methods has no parameters.
|
|
|
Logging
All transactions are logged in the "PointOfSale" folder in the user directory. The name of the log file corresponds to the time of its creation in the format “YYYY-MM-DD_hh-mm-ss.log”. If problems during setting up or using payment terminal show up The fastest way how to find out what happened is use the log.
|
|
|
K2 Installer
|
|
|
Introduction
This document serves as a manual for using the K2 installer and the individual installations which it offers.
The chapter Description of the installer is dedicated to introduce the user interface of the installer. Its basic functions and advantages are described here.
The next chapter Use is already a guide on how to work with the installer, what are the requirements for software and hardware and what to do if any of the installations fail.
The last but one chapter Available installations is a description of the individual installations offered by the installer. For each installation, the individual input screens are described in detail, so that the user has no problem successfully completing any of the installations. If some installer screens are the same, then only the difference between these installations is described.
The last chapter Extensibility with additional installations discusses the possibility of extending the K2 installer with new installations.
|
|
|
K2 Installer
The main idea of the K2 installer is to unify all installations connected to the K2 IS into one place, from where each can be repeatedly installed as a so-called new instance. Each such instance can be managed by the installer, i.e. repaired, updated or uninstalled. Administration can also be performed in bulk for selected instances across different installations.
|
|
|
User registration for FTP infoservice
Versions for download and installation via the K2 installer are always distributed to the FTP infoservice. It is therefore necessary that the user is registered into the Infoservice and has a password set to FTP. Only then he/she will have access to new installations.
The password for access to FTP can be set in the infoservice in the User details. Here it is necessary to press the Change button to go to the user change.
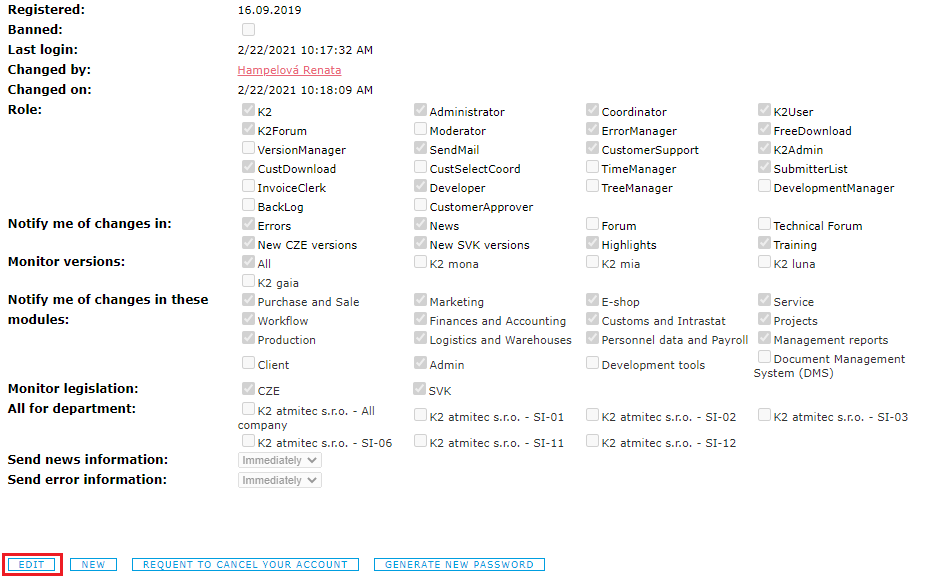
Picture: Infoservice - User details
The fields for entering the password are displayed in the change of details of the infoservice user. These are Password on ftp and Password on ftp (again). In these fields, it is necessary to set and confirm the password for the given user for access to the FTP infoservice and to distributed installations.
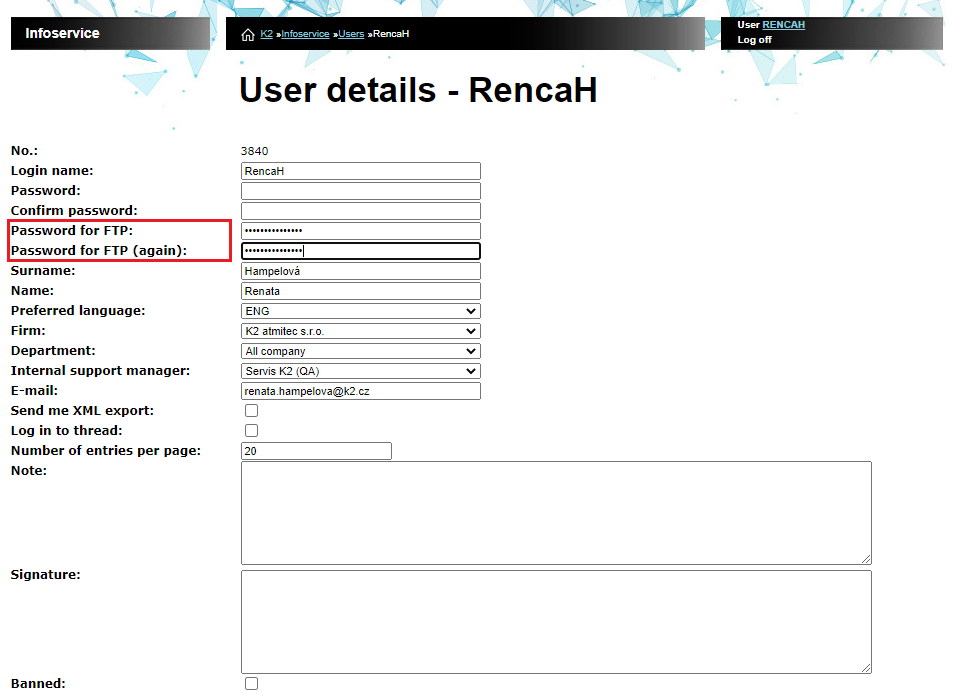
Picture: User details - settings of ftp password
User then save the changes by pressing the Save changes button. Changes made in this way by the infoservice user will always take effect within 24 hours of their storage!
|
|
|
Installer description
K2 installer is an application that is used to install and manage installations of K2 atmitec spol. s r.o. The K2 installer must be installed before use. During the installation, it is possible to choose the location of this installation.
|
|
|
The user interface
The main desktop of the installer contains tabs - New installations, Installed, Other installations, Settings, Help.
|
|
|
Other installations
On the Other installations tab, there are installations of programs that are not necessary for the functionality of IS K2, but can be useful. This is an installation of Adobe Acrobat Reader, Oracle Call Interface (OCI) client 11.1. and Microsoft .NET Framework 4.5.1. There are also installations of IIS extensions (IIS URL Rewrite 2.0 x64 and PHP 5.3 for IIS) and Microsoft Visual C ++, which are necessary for a smooth installation of the K2 E-shop product.
|
|
|
Settings
Tab for setting the basic properties of the K2 installer.
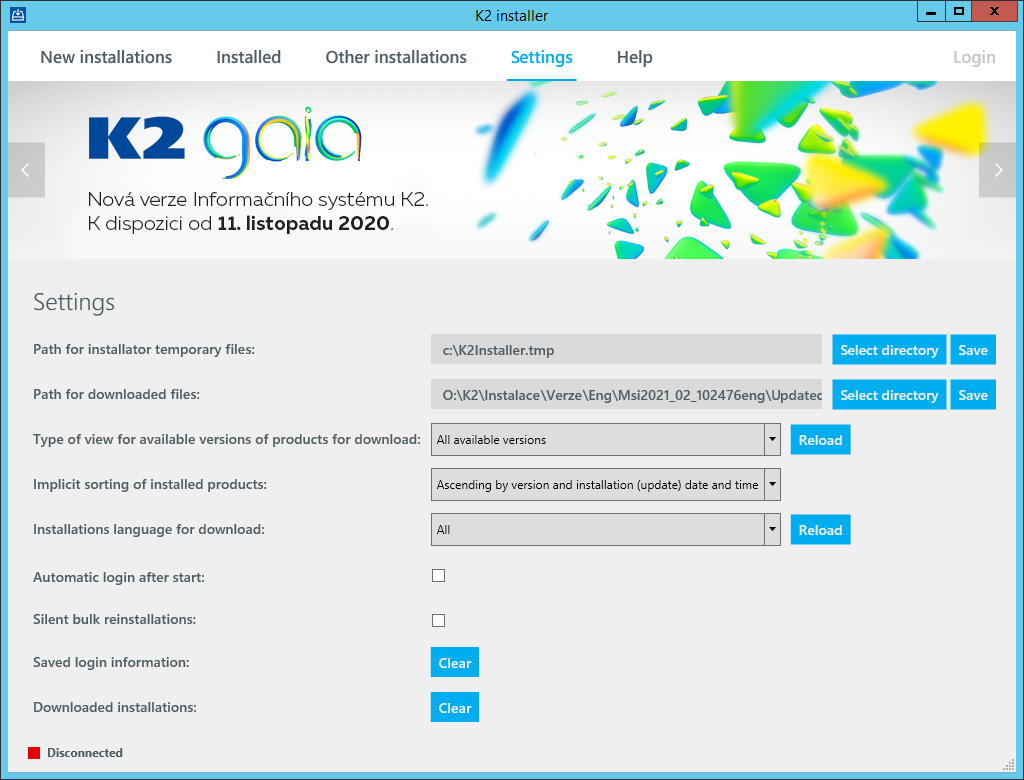
Picture: K2 Installer - Settings tab
Description of Fields:
Name |
Description |
Path to temporary installer files |
Field for setting the path to temporary installer files. |
Path to downloaded installations |
Setting the path to saved installations (updates). The installer then launches the selected and downloaded installations from this storage. |
View available versions of products for download |
Using this option, it is possible to filter the versions offered for installation from the FTP infoservice to the logged in user on the New installations tab. All available versions - on the New installations tab, all available versions from the FTP infoservice will be available.
|
Default sorting of installed products |
In this field it is possible to set the method of sorting installed products in individual groups on the Installed tab. |
Installation language to download |
Here it is possible to select the language localization of IS K2 installations, which will be offered to the logged-in user for download and use. This option only applies to IS K2 installations. |
Log in automatically after running |
If this option is checked, the user will log in to the FTP infoservice automatically after starting the installer. |
Perform bulk reinstallations in silence |
If this flag is checked, bulk reinstallations are performed in "silence", without the need to confirm individual steps. This option can be used for all products except reinstallations of IS K2. |
Saved login data |
The Delete button will delete the saved user login data to the FTP infoservice and the login will be required again after starting the installer. |
Downloaded installations |
The Delete button deletes all downloaded installations from the disk. |
|
|
|
Help
The Help tab lists the K2 version of the installer. There are also important links for help and technical support. At the bottom of this tab, the system information of the computer on which the K2 installer is installed and running are available.
|
|
|
Localization
The K2 installer is fully localized into Czech and English. Each installation that is available within the installer is also fully localized into Czech and English. The language is always used depending on the OS Windows environment.
By translating the texts, the installer can be easily extended to other languages.
|
|
|
Use
|
|
|
Starting the installer
The K2 installer is automatically started in administrator mode. The K2 installer is started using the "K2Installer.exe" file. Users of older operating systems, such as Windows XP and Windows Server 2003, must run the "K2InstallerCompatibilityMode.exe" file. These users have certain limitations in compatibility mode. They can only work in the offline mode of the installer, i. e. they cannot log in to the FTP infoservice, and they are limited by the speed of the installer in this mode.
A necessary prerequisite is to provide the necessary software and hardware equipment of the computer on which user will use the installer.
Software requirements
- Client operating system - Windows 7 and higher
- Server operating system - Windows Server 2008 SP2 and higher
- .NET Framework 4.5
- Windows Installer 3.1 and higher
Hardware requirements
- Processor - 1 GHz
- Memory RAM – 512 MB
- Hard Disk - The installer requires at least as much C: disk space as is the running package size is + 20 MB to successfully run the installation.
|
|
|
What to do in case of problems?
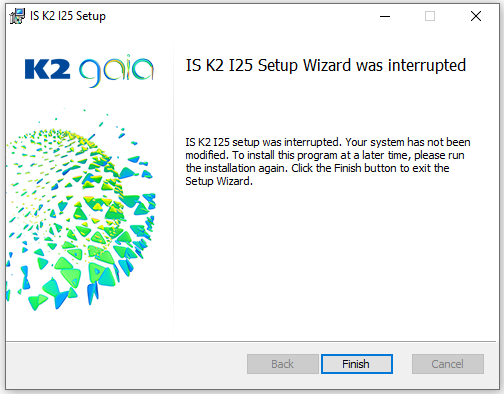
If any error appears during the installation that prevents it from continuing, a window will appear describing that this installation has been interrupted, see Pict.: Early termination. In this case, user needs to check the log file for more detailed error information. The log file is saved in the temporary folder of the K2Installer.tmp installer on disk C :, which is only available at installation time, and is called log.txt. In order to get this log file, it is necessary to leave the dialogue open, see Pict.: Early termination, means do not confirm the dialogue with the Finish button. User will find this log file in the mentioned directory. After confirming the dialogue with the Finish button, the temporary directory with the log file will be deleted.
For easier detection and following correction of the error, we recommend sending a log file to the infoservice.
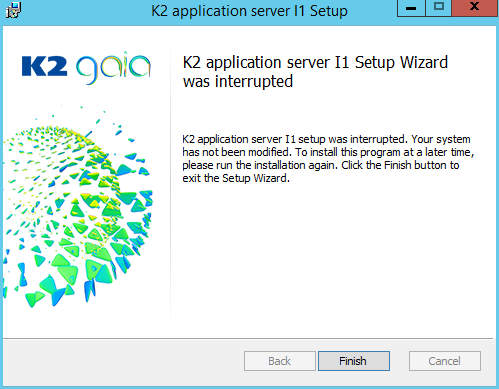
Picture: Early termination
|
|
|
Available installations
The following chapter is an instruction on how to install the individual installation packages available in the main menu of the K2 installer.
|
|
|
K2 IS installations
|
|
|
Description
This installation package is used to install the K2 information system.
For existing user
From the "MONDE" version, the K2 installation is available using the MSI installation package. The original installer will no longer be distributed. Changing the installer also leads to a change in the installation philosophy required by the use of the MSI package. Especially for the purposes of installing K2, it is necessary to reserve one device from which K2 will be installed. Records of installed applications are kept in the registry of the given computer and the installations from another station knows nothing about installed products.
|
|
|
Software requirements
Compare to K2Installeru, Microsoft .NET Framework 4.5 is required or higher which can be downloaded and installed from http://www.microsoft.com/cs-cz/download/details.aspx?id=30653. The MSI package cannot detect this fact, so it is good to first look in the control panel in the remove program section to see if the above module is installed.
|
|
|
New installation
After starting the installation and meeting the above requirements, the first dialogue will be displayed, informing the user that the installer for the “K2“, product is running, see Pict .: Start K2 installation.
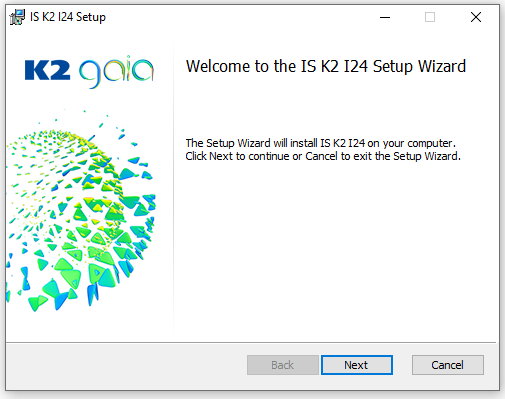
Picture: Start K2 installation
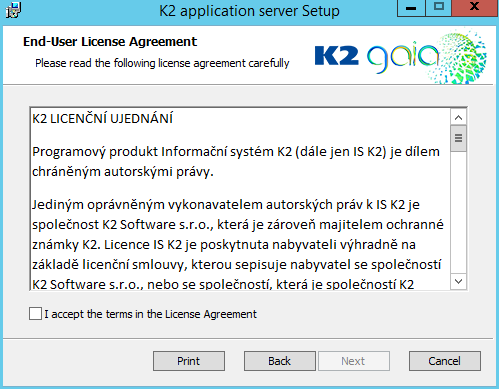
After pressing the Next button, user will proceed to the second dialogue, which contains the license agreement, which user must accept after reading to continue. User accepts the agreement by checking I accept the terms and conditions of the license agreement option, see Pict.: K2 License agreement.
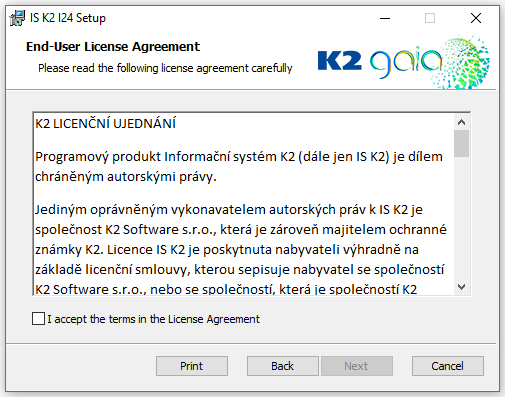
Picture: K2 License agreement
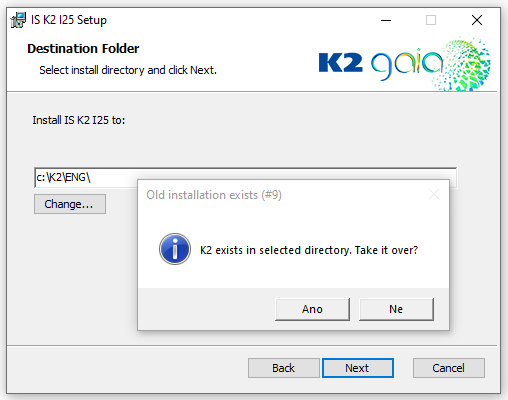
The Next button takes user to the third dialogue, where the user is prompted to enter the path where the IS K2 is to be installed, see Pict.: K2 Target directory. With the Change button user can browse the classic directory dialogue on physical disks or on the network.
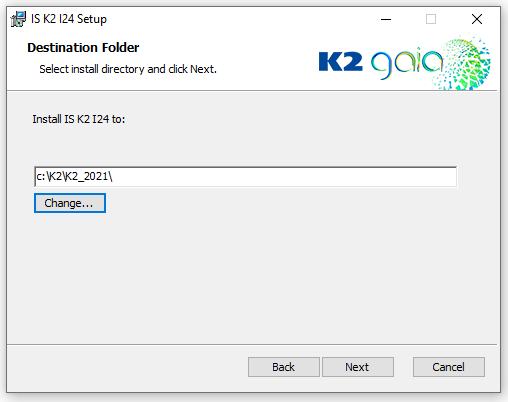
Picture: K2 Target directory
After selecting the directory and pressing the Next button, a form will be displayed prompting the user to select the database platform, see Pict.: Database platform selection - MS SQL. It is always necessary to choose the name of the server, which is automatically filled in as the name of the computer from which IS K2 is installed, and also the name of the main catalogue, which is automatically filled in according to the selected directory.

Picture: Database platform selection - MS SQL
If the installation on "Oracle" is selected, it is necessary to fill in even more data for the server connection, namely the user, password and table space, see Pct.: Database platform selection - Oracle.
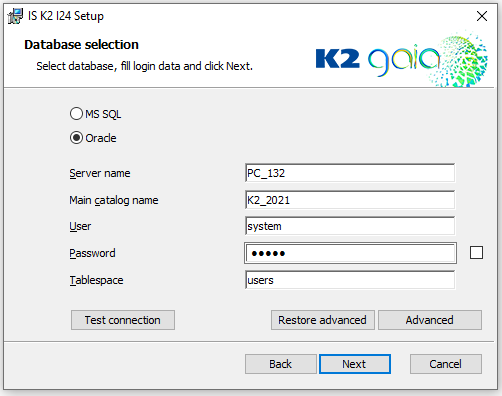
Picture: Database platform selection - Oracle
The dialogue contains three more buttons. The Test connection button is used to verify the connection according to the entered data. It is not necessary to run the test, because it continues even when the Next button is pressed. Users are informed of the test result by three possible windows. The first informs about a successful connection, see Pict.: Successful connection, second about the missing login details see Pict.: Unsuccessful connection and third about conflict of catalogue names, see Pict.: Database exists. An unsuccessful connection appears if the server or user and password are entered incorrectly (on Oracle) or the combination of values in the language settings of the catalogues is incorrect, see. Advanced button.
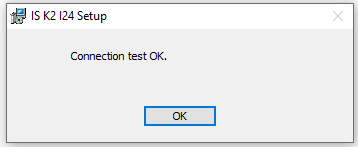
Picture: Successful connection
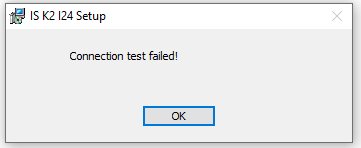
Picture: Unsuccessful connection
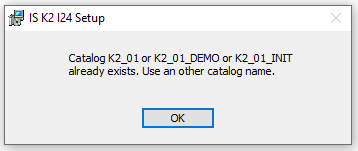
Picture: Database exists
The Advanced button is used for language settings of catalogues. It is not necessary to set if the used K2 language does not match the installation language. According to the IS K2 language in the MSI package, the values are filled in automatically. If they do not meet the requirements of the IS K2 user, it is possible to change them, see Pict.: Setting language variables. This setting should be made by a person who is familiar with the problem, otherwise it is not guaranteed that K2 will work properly when communicating with databases.
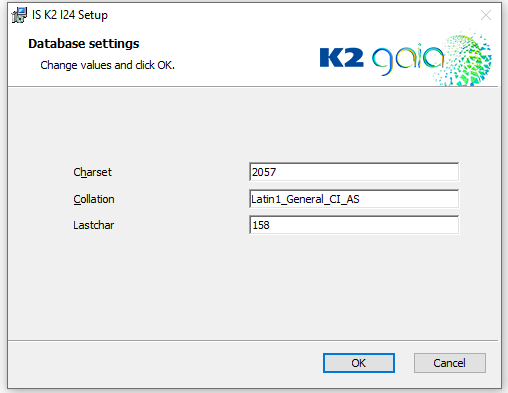
Picture: Setting language variables
The Reset Advanced button resets the language settings to the IS K2 language in the MSI package.
After successfully settings and pressing the Next button, user will select the license file for the given version of the K2 system from the next form.
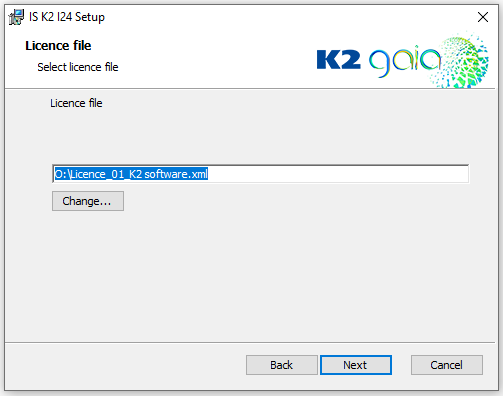
Picture: Licence file selection
If user does not fill in the path to the license file, the installer will ask him/her to load this file again at the end of the installation.
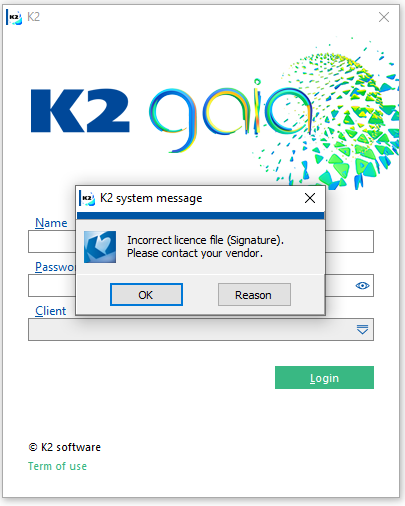
Picture: Report about Incorrect license
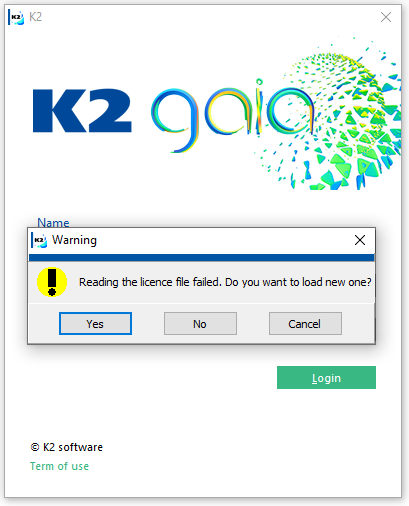
Picture: Report about possibility to load a new license
After pressing the Next button on the form to fill in the path to the installation license file, the form of installation options of some optional parts of IS K2 will be displayed, Setting of optional installation parts. Picture: Settings of the optional parts of the installation Currently, user can only change the settings of R language components.
In this form, users set the Status of K2, which is used for the purpose of sending information about the use of the license to K2 atmitec. If user checks the Production K2 field, IS K2 will be registered as production, if user does not check the box, IS K2 will be test and its functionality will be limited.
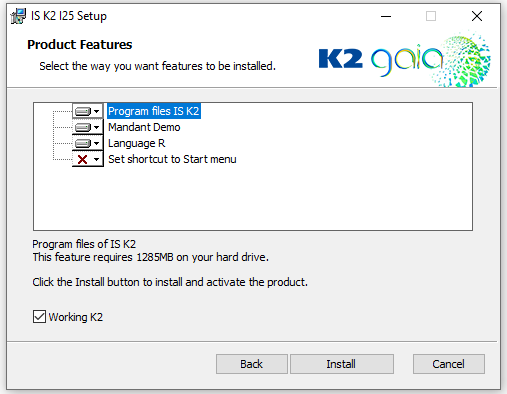
Picture: Settings of the optional parts of the installation
After pressing the Install button, the IS K2 installation will start. Users are informed about its duration by the progress indicator, see Pict.: Installation progress. It can happen that the pointer stops and it looks like nothing is happening. In this case, it's a good idea to look at the taskbar or system processes to see if K2 programs are already running, either "k2_sqlrs" or "k2wimport", which are hidden behind a window showing the progress of the installation.
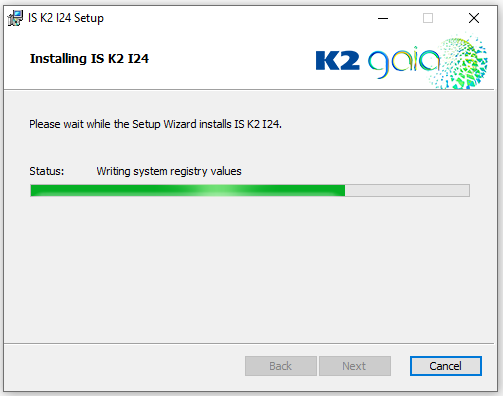
Picture: Installation progress
The following dialogue box informs user about the successful installation, see Pict.: Completing the installation The Run K2 check box is available on this screen. If this box is checked, a dialogue box for starting IS K2 will be displayed immediately after the installation is completed.
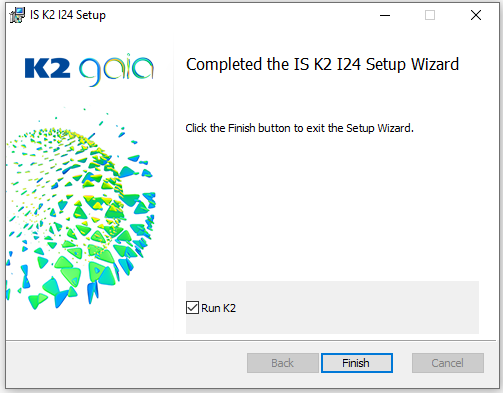
Picture: Completing the installation
In case of an error during installation, a window will be displayed, see Pict .: Unsuccessful installation.
Picture: Unsuccessful installation
|
|
|
Taking over the existing K2
Taking over an existing IS K2 installation is an action in which K2 is installed in an existing directory with an existing K2 installed by the old installer, i.e. during the transition 133 -> MONDE, or in case it was necessary to uninstall IS K2 for some reason. The presence of the files "k2_3main.ini" in the case of version 133 or "k2.ini" in the case of MONDE and higher and the file "sysk2.ini" is important. The informations needed for a successful K2 installation are read from these ini files. K2 installation settings. The transfer takes place in the same way as the installation of IS K2. The difference is the display of the database platform settings dialogue box, where some fields are greyed out, because it is not desirable to change them. For Oracle, user only needs to fill in the user and password data.
Picture: Question to take over an existing installation
|
|
|
Local installation
|
|
|
Principle of local installation
This type of installation is available from version K2 mona. It is an installation of IS K2 on a local computer, with the fact that it is data-connected to the server installation and thus ensures that they will always have the same versions. Therefore, the local installation can be reinstalled automatically if the server installation is updated.
The local installation contains all binaries, localization files, and help files. All other data files are shared by the local installation with the server installation.
|
|
|
Solving known problems
If the K2 system cannot be started and the login screen remains, it must be started in the correct mode. Loading our k2p _ *. Bpl is prevented by the internal Windows antivirus.
To turn it off in a web browser, go to Settings ® Security Updates ® Windows Security ® Virus and Threat Protection ® Real-Time Protection.
|
|
|
K2 update service
The K2 Update Service ensures version consistency between the server and local K2 IS installation. This service ensures the update of the local K2 installation, even if the user does not have the right to install any applications on the given computer.
|
|
|
Installation of update service
Installer for K2 update service is in K2 server directory and in location SupportFiles\LocalInstall\Packages\UpdateService. Therefore, we should always run the K2 update service installer from the server K2 directory, to which we have the local K2 installed.
Run the installer from the specified location using the "K2UpdateServiceInstallation.msi" file. After starting, the installer screen will be displayed with information about the installation of the K2 update service product, see Pict. Starting the installation of the K2 update service.

Picture: Starting the installation of update service
After pressing the Next button, user will proceed to the second dialogue, which contains the license agreement, which user must accept after reading to continue. User accepts the agreement by checking I accept the terms and conditions of the license agreement option, see Pict. K2 License agreement.
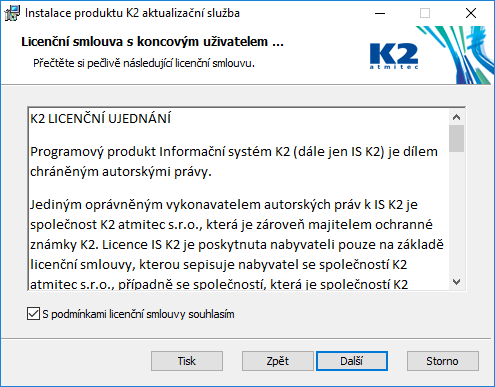
Picture: K2 License agreement
Using the Next button, we get to the third dialogue, where the user is prompted to select the target directory for the installation of the K2 update service, see Pict. Selecting target directory. User can change the directory in which the K2 update service will be installed using the Change button.
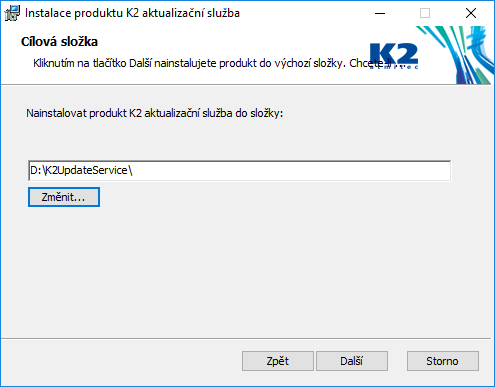
Picture: Selecting target directory
In the next step of the installation, the Run event notification application for users check box is selected. If this box is checked, an application that notifies update service events will be launched for each user. In Windows, an icon will then appear indicating the status of the update service. If you do not check this box during installation, the application will not start. We recommend that you do not enable this option for terminal servers
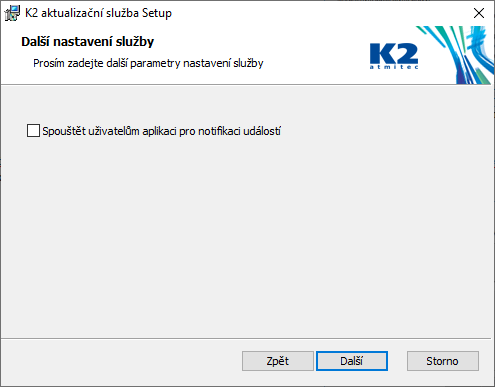
Picture: Launch the event notification application
The next step of the installation is to enter the name and password of the user under which the K2 update service will run. It is possible to use a local system account, see Pict. Local system account or domain user account, see Pict. This account. The condition is that the account is the administrator of the given computer, and at the same time the server K2 must be visible for this user.
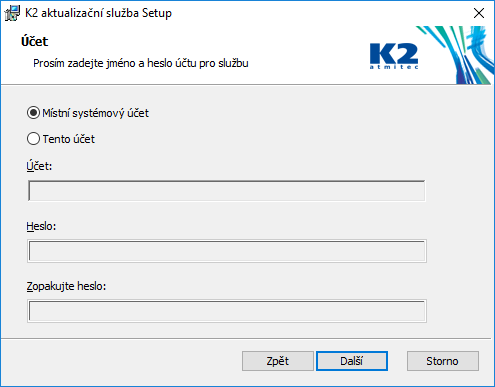
Picture: Local system account
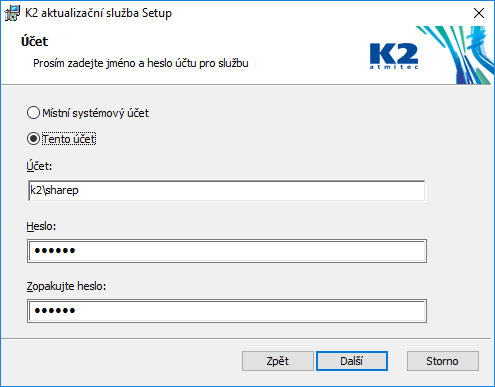
Picture: This account
After pressing the Next button, the passwords are checked for compliance. If they are not same, the user is prompted to correct them.
The next screen that appears after pressing the Next button is only an overview of the installation readiness, see Pict. Installation confirmation.
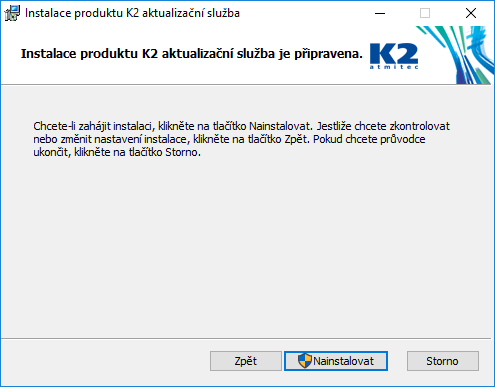
Picture: Installation confirmation
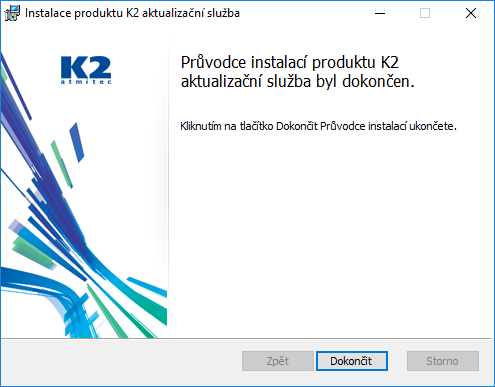
The user is informed about the successful installation of the K2 update service in the next dialogue box, see Pict. Completing the installation.
Picture: Completing the installation
Press the Finish button to end the K2 update service installation.
|
|
|
Principle of local installation update
After installing the K2 update service, the icon of this service will appear among the running services in Windows. This icon reflects the 3 states of the K2 update service:
 - K2 update service is running.
  - K2 update service is stopped.
  - The K2 update service updates the local K2 installation.
After starting the local IS K2, using the file "K2.exe", the server K2 with which the given local K2 is data-linked is always checked. If both of these K2s are the same (have the same version), the local K2 will be started. If the server K2 is a different version than the local K2, the K2 request is sent to the update service, and the service reinstalls the local K2 to match the server K2 version. The service then removes the local K2 and reinstalls it, and then starts the local IS K2.
If, after starting the local K2, the difference between the local K2 and the server K2 is detected and there is no connection to the K2 update service, e.g. if the service is not running or not installed, the server K2 will start. In this case, IS K2 reports that the server version of K2 is running.
|
|
|
K2 remote management of local installations
This application allows the K2 IS administrator to remotely manage local installations of a given K2 server installation. This application must always be run from the root directory of the K2 server and also from the Admin folder. Here user will find the file "K2RemoteUpdateManager.exe", which will be used to start the application for remote management of local installations. All operations done by K2 Remote management of local installations require that the K2 Update Service be running on that remote computer.
The text file "LocalInstallations.k2" is also available in the Admin directory. This file lists all local K2 IS installations that have been installed on the given K2 server. The application for remote management of local installations is based on this text file.
The application for remote management of local installations contains two tabs Installation and Services.
|
|
|
K2 Update Service distribution and Local Installation using domain group policy (GPO)
The purpose of the following text is to describe the distribution of the K2 update service and the local installation by using Group Policy on computers that are included in a domain. This manual is divided into two parts. The first deals with setting up target computers and the second part describes scripts for remote installation.
|
|
|
K2 Application server
|
|
|
Description
This installation package is used to install the K2 IS version 3 application server. The application server is then used to serve web clients that connect to the application server.
|
|
|
Software requirements
The first requirement of the application server installer is that user must have the installation running with administrator privileges. Since this condition must already be met by the K2 installer itself, this ensures that this permission is also transferred to all installations running from the K2 installer. To be sure, this permission is tested by each installation, so if the permission is deficient, the installer would display a message.
The second requirement is the need to have IS K2 installed, namely the version that corresponds to the version of the application server, at least at the level of the release version, i. e. 3.135.3.
If the above conditions are met, then user can start the installation.
|
|
|
Installation
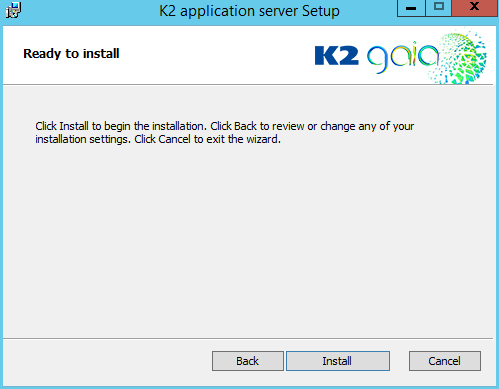
After starting the installation, the first dialogue will be displayed, informing the user that the installer for the K2 Application Server product is running, and in addition it will display the version number that will be installed, see Pict.: Start of AS installation
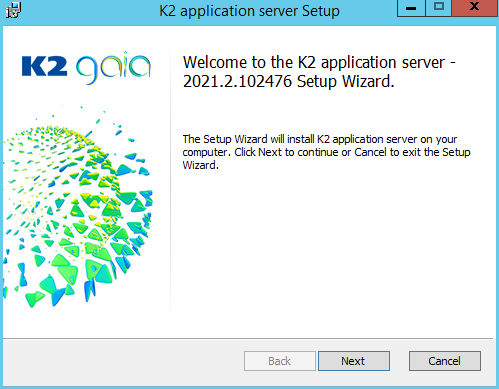
Picture: Start of AS installation
After pressing the Next button, user will proceed to the second dialogue, which contains the license agreements, which user must accept to continue. User accepts the agreement, by checking the option I agree with the terms of the license agreement, see Fig .: AS license agreement.
Picture: AS.png license agreement
Click Next to get to the third dialogue, where the user is prompted to enter the path to the installed K2, see Pict.: Path to IS K2. With the Change button user can browse the classic directory dialogue on physical disks or on the network.
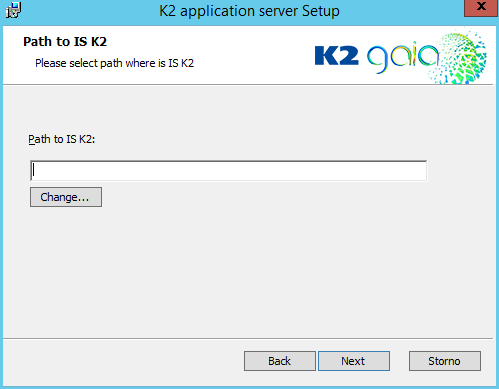
Picture: Path to IS K2
If IS K2 is not installed in the selected directory, then a warning message is displayed when attempting to continue the installation, which will not allow the installation to continue until a valid path is selected, see Pict .: IS K2 not found
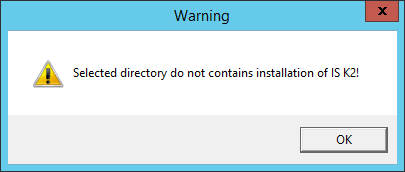
Picture: IS K2 not found
If a valid IS K2 installation is found in the directory, the installation continues to the next dialogue after pressing the Next button, which is used to select the installation path. That is, the path where the application will be installed. With the Change button user can browse the classic directory dialogue on physical disks.
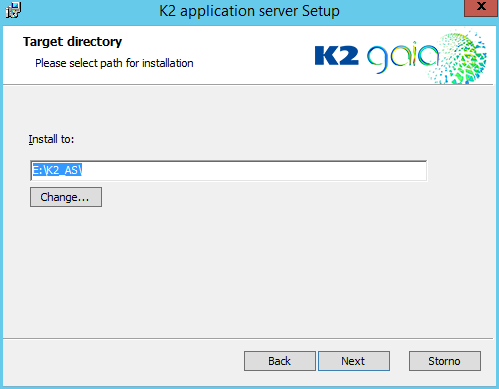
Picture: Installation directory
After selecting the installation directory and pressing the Next button, a dialogue will appear prompting the user to enter the name of the application server, including a description (designed to make it easier to identify the application server) and the client, see Pict.: Name of K2 application server. This value serves as a unique identification of a particular application server among multiple installations of those application servers. Using this identification, web clients will then connect to the correct application servers.
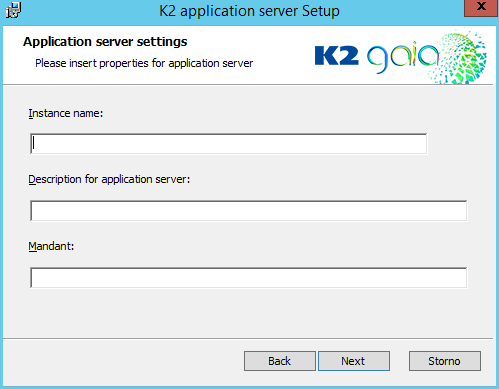
Picture: Name of K2 application server
Fill the field Installation name and Description of application server. In the Client field, enter the client for which the application server should be the default.
Picture: Installation name
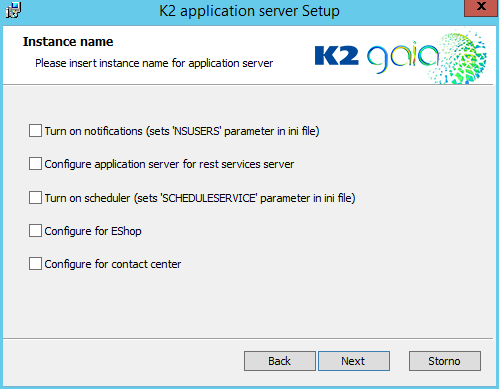
The Notifications on option enables notifications on the AS, i. e. the parameter "NSUSERS = K2" is added to the file "K2.INI". Using the Scheduler on option, the scheduler is switched on on the AS and the "SCHEDULESERVICE = 1" parameter is added to the "K2.INI" file.
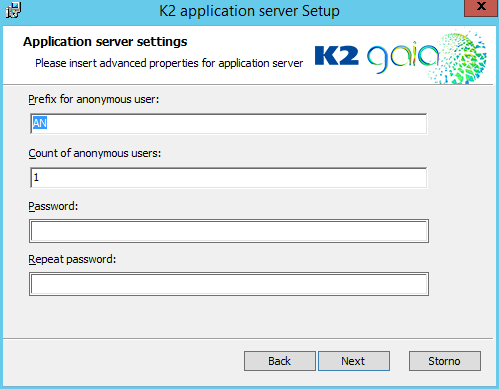
If the Configure application server also for web services server option is checked, then a dialogue follows, see Pict: Application server settings that prompts user for an anonymous user prefix, number of users, and user password. These users must be created in IS K2 before the installation of AS and should be numbered in ascending order, e.g. AN1, AN2, etc. where AN is the prefix followed by the serial number. All of these users must have same password.
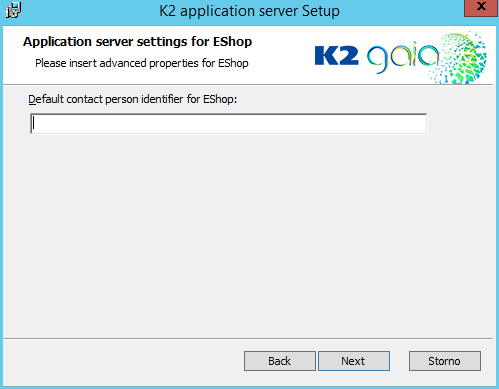
If the Configure for eshop option is checked, the dialogue for Application server for Eshop settings will be displayed as the next installation step, see Pict. Number of the default contact person for EShop. Here user enters the number of the contact person through whom the anonymous e-shop user logs in. This contact person must have a registration assigned. The "AS3ContactPerson" parameter is also included in the "K2.INI" application server.
If the Configure for contact center option is checked, a dialogue will also be displayed within the application server installation, see Pict. K2 user for the contact center. On this screen, enter the name of the user under which the contact center is running in IS K2 and also the password. The values entered here are then added to the "K2.INI" application server as the "CCUSER" and "CCPASWORD" parameters. The parameter "CONTACTCENTERSERVICE = 1" is also added to "K2.INI".
Picture: Application server settings
Picture: Number of the default contact person for EShop
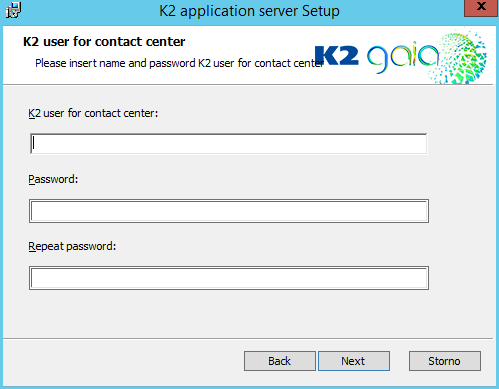
Picture: K2 user for contact centre
Next dialogue in installation is entering the name and password of the user under which the application server service will run. A local system account can be used, see Pict. Local system account - AS or a Windows account of a user who requires a password, see Pict..: Windows user 2 - AS
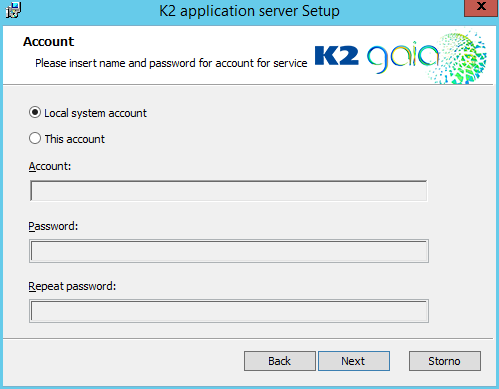
Picture: Local system account - AS
A domain user can also be used with a password, see Pict.: Windows user 2 - AS
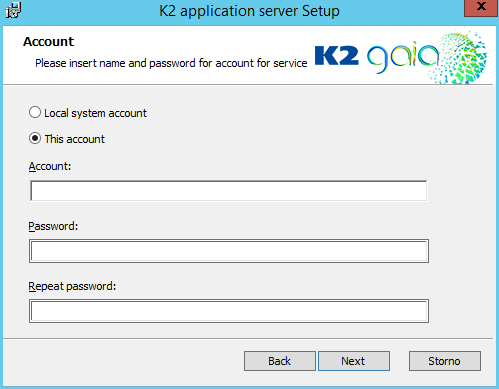
Picture: Windows user 2 - AS
After pressing the Next button, the passwords are checked for compliance. If they are not same, the user is prompted to correct them. Another dialogue in the installation is to enter the K2 user under which the application server will connect to the IS K2. It is possible to use an already created user or create a special user that will only be used to connect to the AS. It is not necessary to have a reserved license for users who will connect to the AS, see Pict.: K2 user - AS
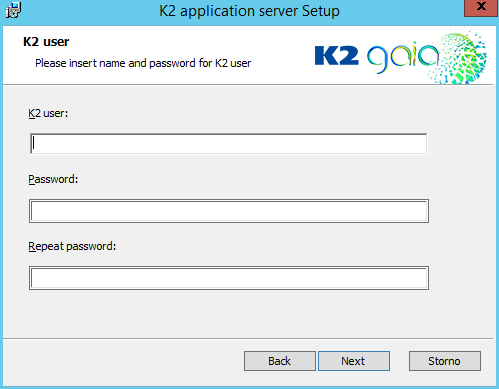
Picture: K2 user - AS
After pressing the Next button, the passwords are checked for compliance. If they are not same, the user is prompted to correct them.
If the passwords are the same, then a dialogue will be displayed informing the user that the installation is ready. Clicking the Install button will then start the installation process itself.
Picture: Installation confirmation
After a successful installation, the user is shown the last dialogue about a successful installation, see Pict.: End of installation
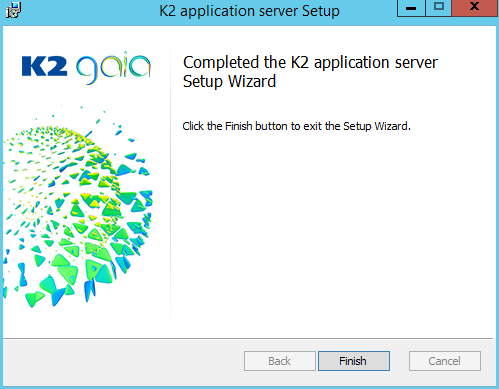
Picture: End of installation
At the end of the installation or reinstallation of the Application Server, a text file with a list of users may be displayed. The reason is the stricter security policy of IS K2 user accounts.
Individual users can be denied access from the web to IS K2 and all users have this access denied after reinstallation. In the text file, at the end of the installation, a list of all users who have a link to the contact person and are also denied access via the web is displayed. These will not be able to use some features, such as approving wkfl from email. For these users, it is necessary to set access from the web in the book Users - password settings.
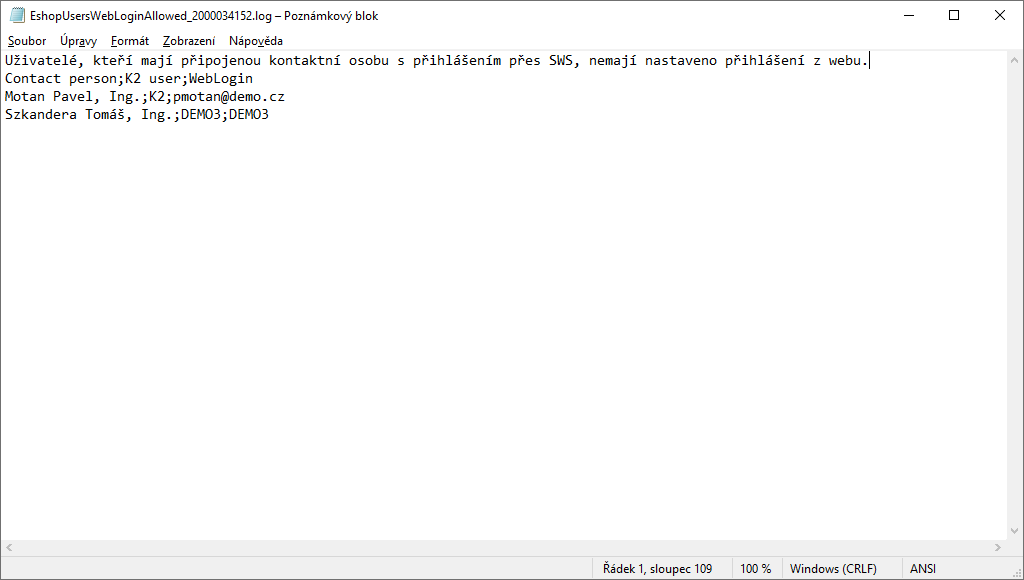
Picture: Text file with list of users
|
|
|
K2 Application server 64 bit
|
|
|
Description
Installation package for installing the IS K2 application server in the 64-bit version. The application server is then used to serve web clients that connect to the application server.
|
|
|
Software requirements
An important requirement for installing a 64-bit application server is the existence of a 64-bit operating system. Other software requirements are no different from installing a 32-bit application server.
|
|
|
Installation
Installing a 64-bit application server involves the same installation steps and input dialogue boxes as installing a 32-bit application server.
|
|
|
K2 4WEB
|
|
|
Description
This installation package is used to install web client K2 4web and all its components.
All other web client installations are based on this installation. Therefore, this installation will now be described in detail, in contrast to other installations of web clients, where only the differences from the basic installation of K2 4web will be described.
|
|
|
Web K2
|
|
|
Description
This installation package is used to install the Web K2. This is a web client that uses HTML5 technology.
The installer is the same as the general web client installation (K24WEB).
|
|
|
K2 web services server
|
|
|
Description
This installation package is used to install the K2 web services server. Using these web services, clients can communicate with this server.
The installer is the same as the general web client installation (K24WEB).
The software requirements is the same as the general web client installation (K24WEB)
|
|
|
K2 callcenter
|
|
|
Description
This installation package is used to install the web client K2 Callcenter.
The installer contains, in addition to the general installation of a web client, one additional input screen. Therefore, only this input screen will be described in the Installation section. All other screens are the same as in the general web client installation, see chapter K2 4WEB installation.
|
|
|
Software requirements
The first requirement for the installation of the K2 CallCenter web client is an existing installation of the Asterisk server service, see Asterisk server service, for which user knows the connection parameters.
Other software requirements are the same as for the general web client installation.
|
|
|
Asterisk server service
|
|
|
Description
This installation package is used to install the Asterisk server service, which is used to mediate communication between the Asterisk contact centre and the K2 CallCenter web client.
The installer contains the same dialogues (license, installation directory, etc.) as the previous installation, so only those that are specific to this installation will be described here.
|
|
|
Software requirements
The requirement is to have a running installation with administrator privileges.
|
|
|
K2 Outlook server plug-in module
|
|
|
K2 Outlook client plug-in module
|
|
|
Description
This installation package is used to install the plug-in module into MS Outlook application, which will allow the user to create from individual e-mails activities in IS K2.
|
|
|
Software requirements
The first requirement is to have a running installation with administrator privileges.
The second requirement is an existing installation of the K2 Outlook server plug-in module. If user did not perform this installation, he/she must at least know the URL address of this web client.
|
|
|
K2 E-shop
|
|
|
Description
This installation package is used to install the K2 online store. The K2 E-shop application runs within the Internet information service. The K2 E-shop uses web services to connect to the K2 IS and then the application server. The installation of the K2 E-shop therefore already assumes their existence.
|
|
|
K2 E-shop, company websites
|
|
|
Description
This installation package is used to install the K2 E-shop and company websites product. This application runs within the Internet information service. The K2 E-shop and company websites uses web services to connect to the K2 IS and then the application server. The installation therefore already assumes their existence.
|
|
|
Software requirements
The condition is the installation of support PHP version 7.1 and higher to IIS. If this support is not installed, the installer informs you with the displayed message.
Other software requirements are the same as for the K2 E-shop installation.
|
|
|
Installation
The individual installation steps are the same as the installation of the K2 e-shop.
|
|
|
Extensibility with additional installations
The K2 installer is designed so that it can be extended by any number of other installations. Each installation must meet the requirements of the installer so as to ensure the functional management of this installation and its possible instances. The requirements are described in the following subchapter.
|
|
|
Requirements for installation package
In order to use the installation in the K2 installer, it must meet several conditions. This list is not an instruction of how the conditions are to be implemented. Their description is not the subject of this manual. These requirements can only be met by a qualified worker who is familiar with the issue.
- Guides (identifiers) must be generated for n available instances
- it must be prevented that the record of the installed instance can be managed using Add and Remove Programs in Windows.
- all input values must be saved in the registry so that they can be read when the program is updated.
|
|
|
Implementing into the K2 installer
If user has already created an msi installation package that meets the above requirements, then we he/she incorporate it into the K2 installer as follows.
The first requirement is to copy the new installation packages. In the directory structure of the installer, there is a subdirectory Packages, which contains other subdirectories, which are named according to the location. User will copy new "msi" packages according to location to these directories. This means that user has a new installation package, which we have localized into Czech and English. We have two installation packages, one of which is Czech and the other English. We will copy the Czech version to the cs-CZ directory and the English version to the en-US directory. This ensures that the installer will run packages with the correct localization according to the local environment of the computer.
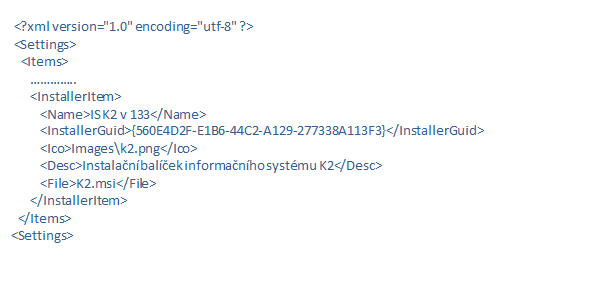
The second requirement is to extend the K2 installer configuration file. The file is called Settings.xml and is located in the K2 directory of the installer. This is a "* .xml" file that contains the Settings root element. It then contains the Items element, which contains all available installations. Each installation is described by the InstallerItem element and its internal elements. Where the Name element specifies the name of the installation package, the Desc element describes the installation package, and the Ico element contains the path to the image, which, like the name and description, forms a graphical identification of the installation in the list of installations in the K2 installer. The image must be located in some subdirectory of the K2 installer directory. The path is then defined from the level of the first subdirectory in which it is located, see example. The InstallerGuid element contains a unique identifier for the installation. This identifier cannot be ever changed! The last element is File, which contains the file name of the installation package, which user copied to the appropriate directories according to the previous step.
Example: Extending of the K2 installer configuration file
The following example shows how to extend the configuration file with a new installation type. In the file, the existing section of individual installations is replaced by the text "…………", a new section then immediately follows.