|
|
|
Notification System - Formatters
The appearance of notifications for systems of different types of devices is defined on this tab.
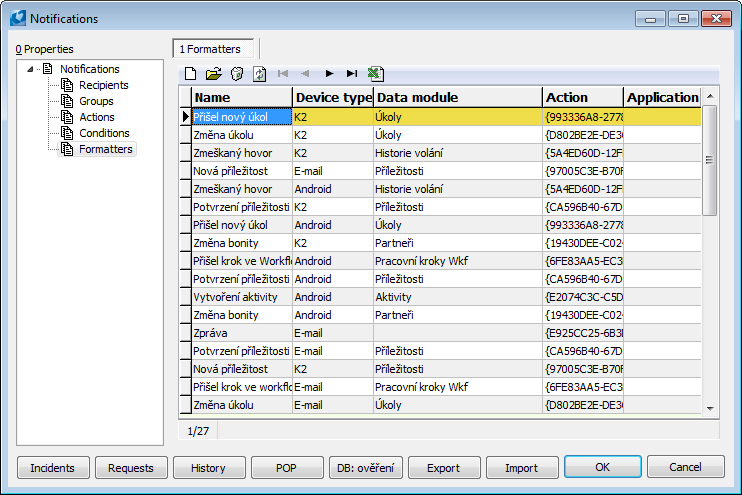
Picture: The K2 Notification System form - Formatters tab
Device type:
- Windows - it is used for the full version of K2,
- Email - it is used for sending notifications on e-mail,
- SMS - not supported yet,
- Android - it is used for the "simplified" K2 version in the Android system,
- iOS - it is set for the "simplified" K2 version in the iOS system.
The tab Formatter
Use the Insert key or the button ![]() to open the form for setting the message format.
to open the form for setting the message format.
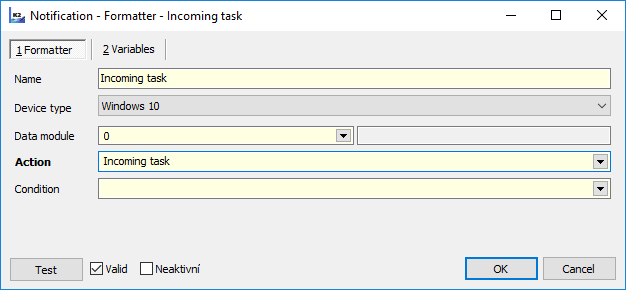
Picture: Formatter tab
Field Description:
Name |
A condition name. |
Device type |
Device on which the notification will take place. |
Data module |
The data module over which the action will be monitored. |
Action |
An action on which somebody will be alerted. It is selected from the list of Actions. |
Condition |
The condition for which the formatter will be applied. If the formatter does not exist on the condition (or exists only for conditions that do not match the incident), the general formatter for that action is used. The user receives as many notifications as many formatters are defined for the condition. |
Valid |
If this option is checked, then a formatter is valid for the selected condition. |
Test |
The button for performing test of a formatter. This verification can detect the use of non-existent fields in the formatter variables. |
Inactive |
If this option is checked, then this formatter is temporarily disabled. The formatter can be re-activated at any time by unchecking the "Inactive" option. |
The Variables tab
The tab uses to set the format of the fields from which the notification message will be composed.
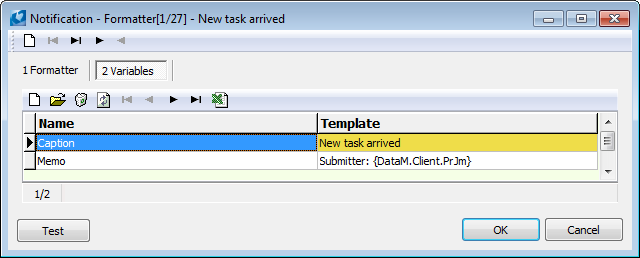
Picture: The K2 Notification System form - the tab Fields
The fields, which are supported by the given device type, are pre-filled according to the device type. However, the new fields can also be inserted. Use the Insert key or the button ![]() to open the form for setting the fields format.
to open the form for setting the fields format.
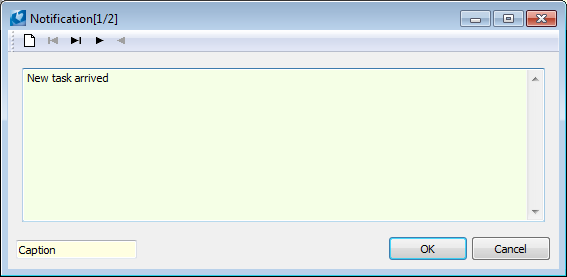
Picture: The form for setting a field's format
Into the small window in the left bottom corner set a type of the field. The "Caption" type is used to set the message header that appears immediately after receiving the notification. Use the "Memo" type to set the text of message.
Into the large window of the form write what will be displayed in the text.
MC - Module caption (Module name)
RC - Report caption (Header of a report)
PK - Primary key
After such a setting, as shown in the pictures, and subsequent confirmation of an invoice, the notification will come into the K2 IS, see the Notifications - Receiving a message chapter.
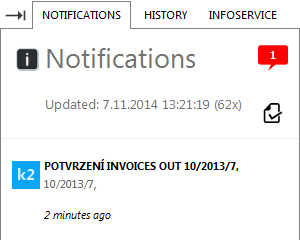
Picture: Notifications - notification on invoice confirmation
There are also Export and Import buttons except the earlier mentioned buttons (History, Clipboard, ...) in the Formatters tab. The Export (Ctrl+Shift+E) button enables to save a list of all formatters to the "*.xml" file. A content of such a file can be loaded into K2 by using Import (Ctrl+Shift+I) button. There is the "TNotifyFormatter.xml" file, containing a setting of the most widely used formatters for notifications, inthe "K2\SupportFiles\NotifyFormatters" directory.