|
|
|
Advances Received
Advances Received are a part of the documents in the Purchase module. The Book of Advances Received is used to issue advances for customers and to their record.
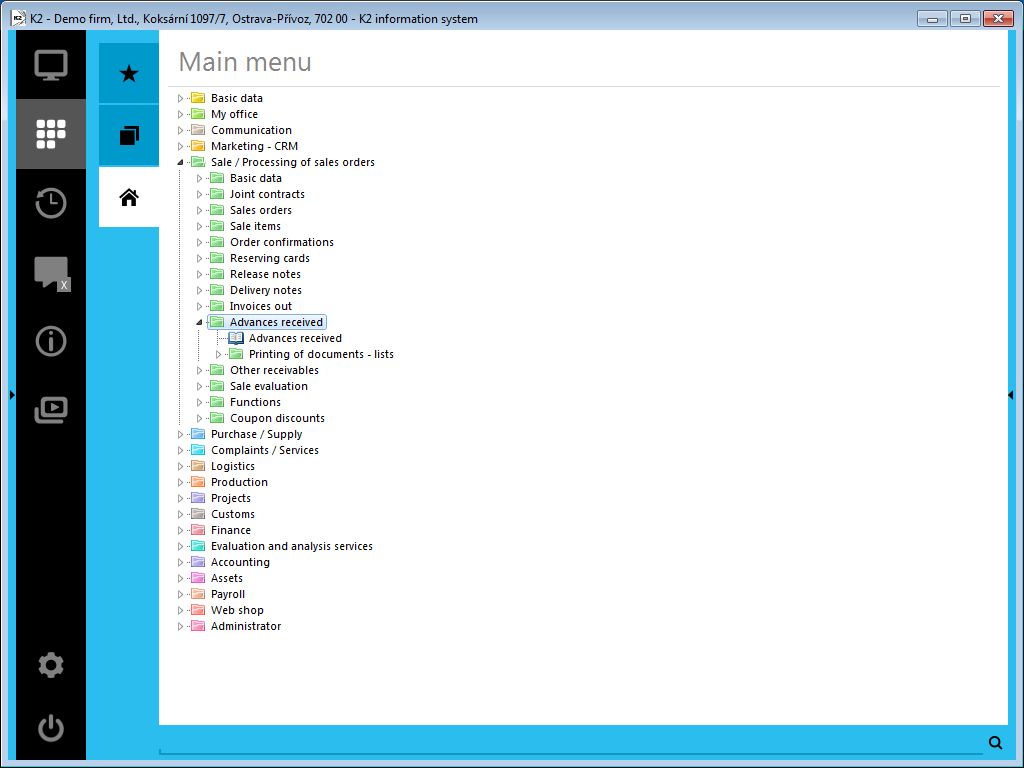
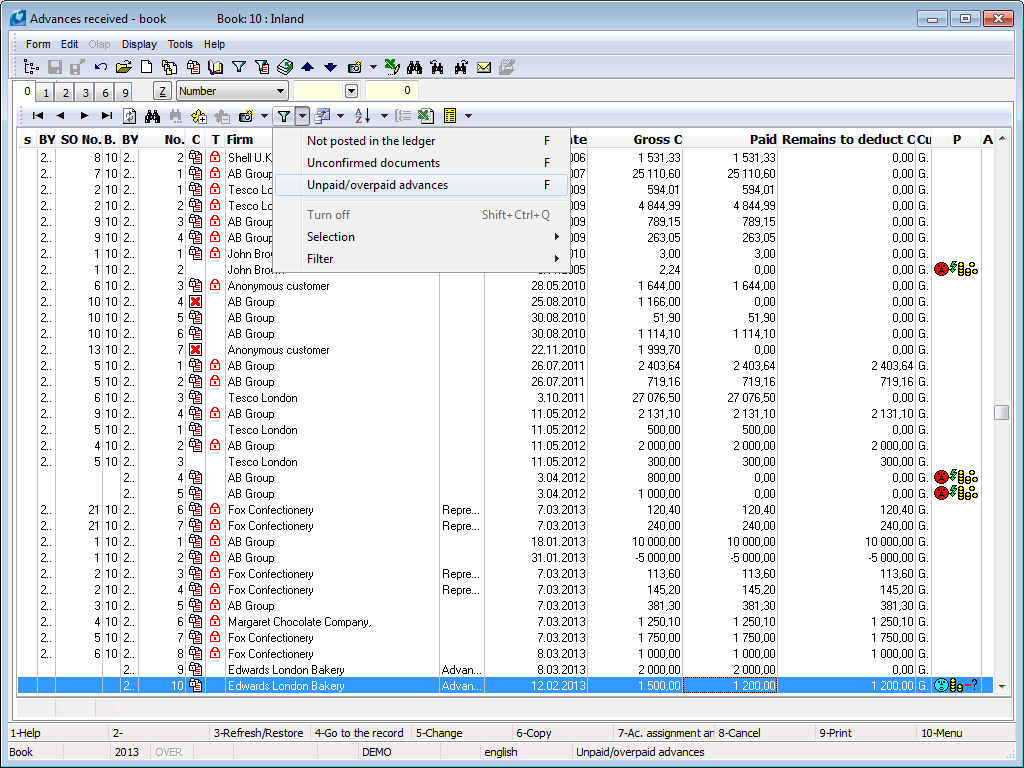
Picture: Opened menu of the Sale - Processing of Sales Orders - Advances Received module
Both the advance amount and VAT rate are entered on the 1st page of the document. Other VAT rates may be entered in items on the 2nd page of the advance.
Individual advances may be linked to a Sales Order, respectively one or more advances may be attached to a particular Sales Order. Such an advance is called Advance linked with Sales Order. Advances without this link are considered as Advances linked with Customer.
There is information about the created advances to the given Sales Order available directly on the Sales Order:
- on the 5th page of the Sales Order in the Advances Received tab.
Advances may be switched to the Tax Document mode, which is another significant difference of advances from other documents of Purchase. It is possible to switch a confirmed and paid tax advance into this status; such advance enters the Value Added Tax Return. The tax document cannot be edited, cancelled, paid.
Advances are matched with payments the same way as other documents of Sale, i.e. we understand a matched cash voucher or a bank statement as the payment; a matched banker's order as the settlement. Advances can enter the Payment Calendar (if the Client's parameter Create Item of Payment Calendar is set).
A paid advance is ready to be deducted on invoices, which is done on the 2nd page of the invoice. There is a table in the bottom part of the form, which displays the advance deductions on the current invoice. The Insert button can add a deduction of another advance in the table while the K2 IS offers non-deducted advance items which are available. You can also use the buttons Apply Adv. linked w. Sales Ord, Apply Adv. linked w. Customer, with which the K2 IS offers not only the non-deducted advance items, but also offers amounts to deduct up to maximum possible limit.
Unless the advance is not switched into the Tax Document mode, it is deducted as a non-tax one regardless of the VAT being calculated on the document and the VAT field being checked. During the deduction of this advance on an invoice, the advance is subtracted with the VAT rate and tax type set in the Client parameters on the 2nd page, in the fields VAT Rate for Subtraction of Non-Tax Advance and Tax Type for Subtraction of Non-Tax Advance.
If the Enable Advance Deduction from the Same Book Onlyfield on the 3rd page of the Client parameters is checked, then only an advance issued in the same book may be deducted on the invoice. Otherwise, an advance issued in any book can be deducted on the invoice.
|
|
|
Book of Advances Received
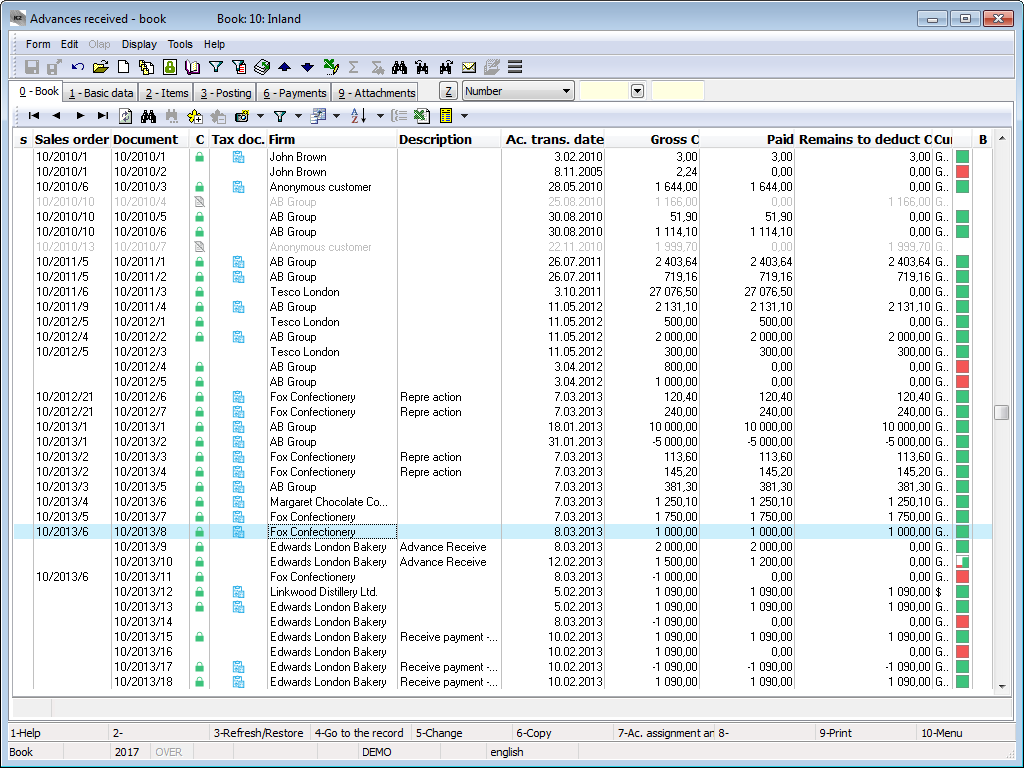
Picture: The Book of Advances Received
|
|
|
Document Advance Received
|
|
|
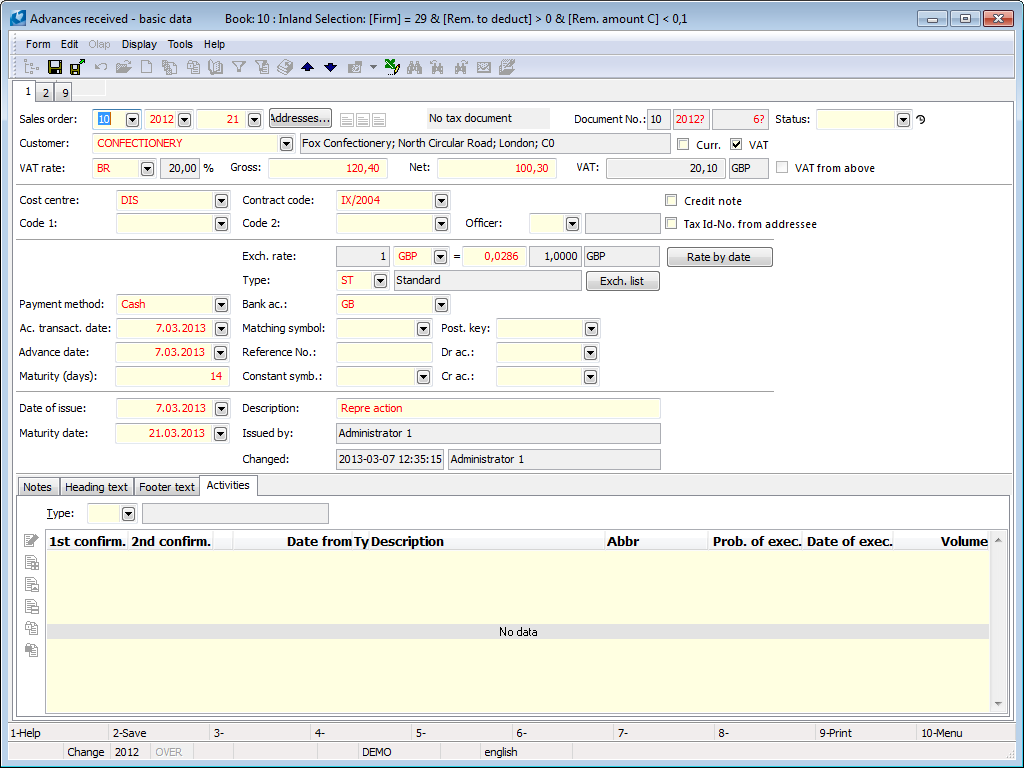
The first page of Advances Received serves to display the identification and basic data about an Advance, and some additional information such as payment method, date of issue, maturity date etc.
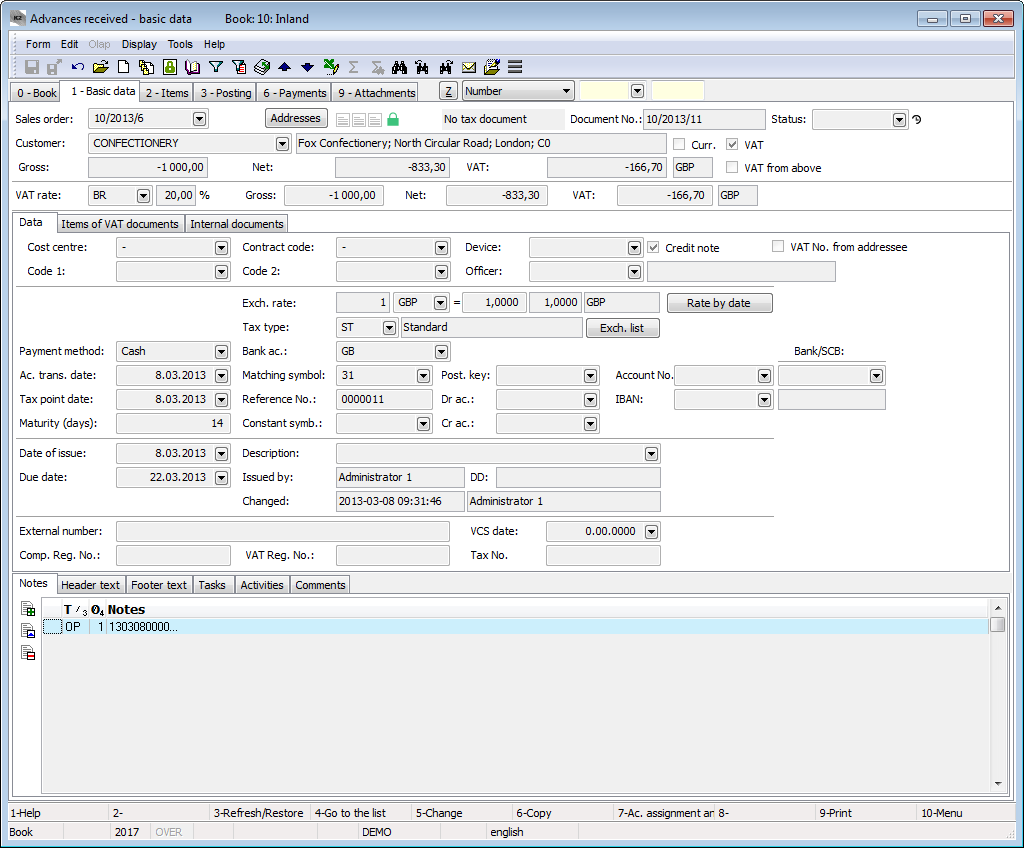
Picture: Advances Received - 1st page
Field description:
Contract |
The field serves for the definition of the number of a Sales Order to which the Advance Received is created. If an Advance is issued to a customer only, the field remains empty. |
Addresses |
The button to display an addressee or the superior company. Closer description is in the chap. Addressee. |
No Tax Document |
Information about the Advance status from the tax perspective. If an Advance Received is confirmed and paid and the VAT field is checked, it is possible to switch it into the Tax Document status. |
Document Number |
The book, business year, and the number of an Advance Received. |
Status |
The field for selecting from a code list that enables filtering of documents according to the selected status. |
Customer |
A business partner's name that you insert by selecting it from Suppl./Cust. book. |
VAT Rate |
The VAT rate which an Advance is issued for. We choose from Book Taxes. |
Gross |
The gross amount in the currency of the advance. |
Net |
The net amount in the currency of the Advance. |
VAT |
The VAT amount in the currency of the Advance. The field cannot be edited. |
|
If an Advance is in a foreign currency, the amount in the currency of the Client is also displayed under the amounts in the currency of the Advance. |
Currency |
The flag defines that an Advance is issued in a foreign currency. |
VAT |
If the field is checked, the Advance includes tax. |
VAT from Above |
Sets the Gross amount in items as default. The VAT is calculated by a coefficient set in the VAT Rates book, and Net is calculated as a difference between the Gross and the VAT amount. |
It is possible to assign random types and kinds of notes to Advances; eventually, it is possible to use the Header Text or the Footer Text. Further work description with The notes is listed in the Basic Code Lists and Supporting Modules K2 – Notes chapter There are also the Tasks and Activities tabs. A closer description of work with the folders is stated in the Tasks - Document Folder and the Activities - Document Folder chapters.
|
|
|
The Data tab contains basic information of the document header.
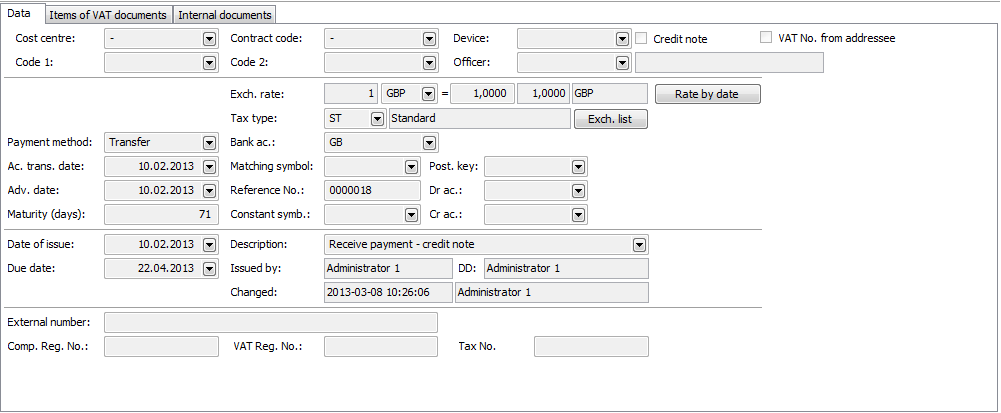
Picture: Data - Advance Received (1st page)
Field description:
Cost Centre, Contract Code, Device, Article Code, Code 1, Code 2, Officer |
The data used to sort the company's activities. Closer description is in the chap. the Basic Code Lists and Supporting Modules K2 – Notes. |
Credit Note |
By ticking this field, we will mark the issued advance as a credit note. |
VAT No. From Addressee |
If the field is checked and the advance is included in Summary Report, then the VAT Reg.No. of the firm indicated in the addressee will be entered. |
Exchange Rate |
The document currency and the exch. rate for recalculation to the domestic currency. The rate valid to the date of issue is selected. If the Invoice Exch. Rate According to Acc. Trans. Date option is checked in the Client Paramaters, an exch. rate to the acc. trans. date is filled in. This field cannot be edited any more after you pay and reprice this document. |
Exchange Rate According to Date |
This button enters an exchange rate from the exchange list that is valid to the date depending on the Exchange Rate According to the Date of Accounting Transaction parameter. |
Type |
This concerns the way how the VAT will added tax is paid. By choosing from the selection menu, indicate whether it is a domestic Advance (DO - Domestic), Import, Export, etc. |
Exch. List |
This button opens the preview of an exchange list of the given currency and sets the cursor on the rate valid on the date of issue of the Invoice. |
Payment Method |
The method of payment for an Invoice. Note: The Payment Method can influence the rounding of Invoices. For further description, see the Rounding of Advances chapter. |
Bank account |
The bank account of our "Company" to which the payment is to be sent. If the Uniform Bank Connection for IO client parameter is on, the bank account from the customer in the own company is entered, otherwise the bank account set in the Suppl./Cust. card is entered. |
Specific Symbol |
A Specific Symbol for the payment. |
Accounting Transaction Date |
Acc. trans. date enters the Accounting. |
Matching Symbol |
The Matching symbol for the accounting documents (see the Accounting - Matching symbols chapter). |
Posting key |
By selecting a posting key, we will determine how the document will be posted. It is entered from the Book of Sale. |
Account Number, Bank/SCB, IBAN |
The customer bank account number. It is possible to select the account entered in the Customer card (it is not filled in automatically), or enter the value manually. |
Invoice Date |
The Invoice date enters the VAT Return. If the Invoice date is null, the document does not enter the VAT Return. |
Variable Symbol |
The field for the reference number of an Advance Received. It can be created automatically according to the settings in Books of Sale. The program notifies you of any eventual duplicities of variable symbols. |
Dr Account, Cr Account |
The Dr account and Cr account of an Advance. The account set in the Book of Sale is automatically inserted into the field. If the fields are not filled in in the Book of Sale, the accounts are entered from the Suppl./Cust. card. |
No. of Mat. Days |
Number of maturity days. |
Constant Symbol |
The constant symbol added by selecting from a The menu. |
External Number |
External number (60-character text). |
Control Statement Date |
The date of the Control Statement. It is necessary to be filled only if it differs from the Invoice Date. |
Comp. Reg. No. |
Comp. Reg. No. of a customer. If it is not defined here, the Comp. Reg. No. from the Customer card is applied. |
VAT Reg. No. |
VAT Reg. No. of a customer. If it is not defined here, the VAT Reg. No. from the Customer card is applied. |
Tax No. |
Tax number of a customer. If it is not entered, the tax No. from the Customer card is applied. |
Date of Issue |
The date of doc. issue. It is automatically updated when setting "Tax Document" status. |
Due Date |
The due date of document. According to the settings in the Derive Due Date from Accounting Trans. Date client parameter, the Due date is automatically entered by adding the number of Maturity Days to the value of the Date of Issue field or to the Acc. Trans. Date field. If the Floating Maturity is checked on the Suppl./Cust. card in the Payment Conditions tab, the Due date is filled in according to the Month Shift and Days From The Beginning of Month values. |
Description |
Here, it is possible to insert a description manually or by selecting it from menu. |
Issued by |
The name of the employee who has issued the document. |
DD |
Name of the employee who has switched the Advance into a Tax Document. |
Changed By |
The date and name of the employee who made the last change of the document. |
|
|
|
It displays the VAT documents items in which an Advance Received is entered.
Picture: Advance Received - 1st page with the items of VAT documents
|
|
|
Internal documents, in which an Advance Received is stated in the heading of an internal document in the Document field, are displayed.
Picture: Advance Received - 1st page - Internal Documents tab
|
|
|
In the upper part of the 2nd page of a document, you can insert the items of the Advance.
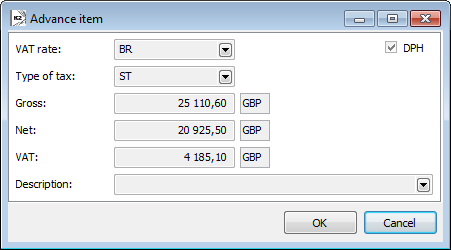
Picture: Advances Received - 2nd page - item form
Field description:
VAT Rate |
The VAT rate of the item of the Advance. We choose from Code list Taxes. |
VAT |
A VAT flag indicating whether an item includes or excludes the VAT. When clearing or checking the VAT checkbox in the header of an Advance, the VAT flag on each item is automatically updated. |
Type of Tax |
Tax type of an Advance item. We choose from theTax Type code list. |
Gross |
The gross amount in the currency of the advance. |
Net |
The net amount in the currency of the Advance. |
VAT |
The VAT amount in the currency of the Advance. The field cannot be edited. |
Description |
Description of an item. It can be edited or selected from the Description code list. |
Account |
The account of an item. |
Cost centre |
Selection from the Cost Centres code list. |
Contract Code |
Selection from the Contract Codes code list. |
Code 1 |
Selection from the Code 1 code list. |
Code 2 |
Selection from the Code 2 code list. |
Officer |
Selection from the Officer code list. |
Article Code |
Selection from the Article Codes code list. |
Matching Symbol |
Selection from the Matching Symbol code list. |
Device |
Selection from the Device code list. |
In the bottom part of the 2nd page of the document are Invoices from which an Advance has been deducted.
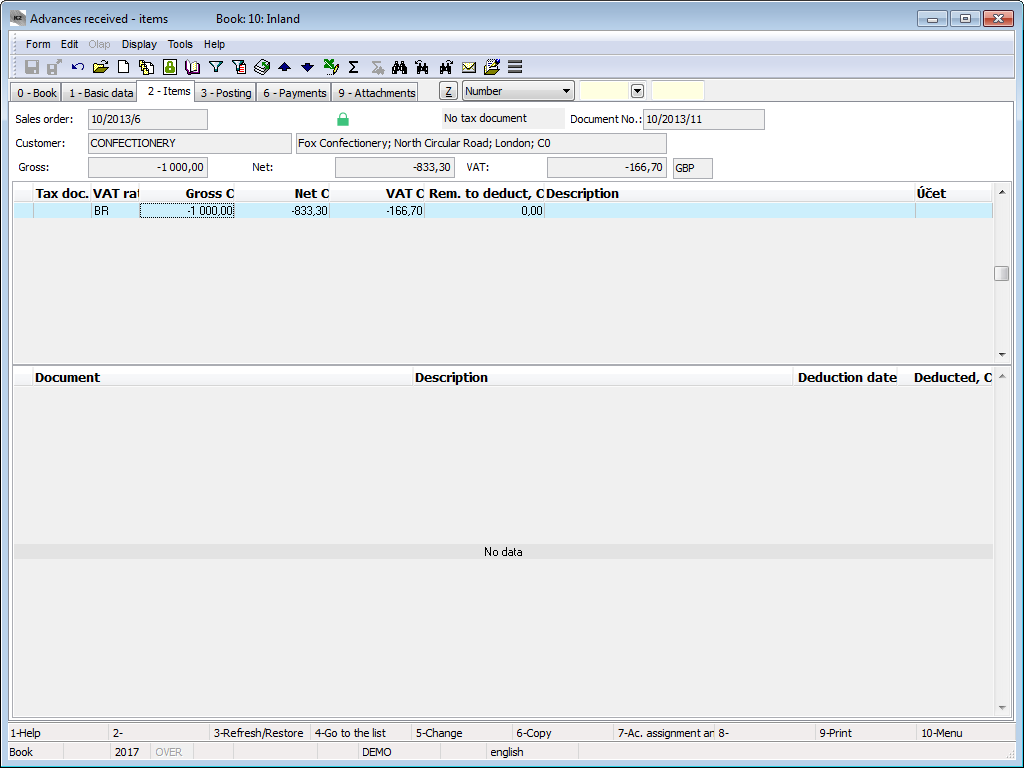
Picture: Advances Received - 2nd page
|
|
|
A Received Advance contains the Debit account and the Credit account directly in the header of the document. Both accounts can be predefined in the Books of Sale, which means you can ensure the inserting of Debit and Credit accounts into all newly created Advances Received in the book. For the pre-definition in the Books of Sale, select the most frequently used accounts for posting of Advances Received. If you record an Advance that should be posted to different accounts in the book, you can change the accounts immediately when creating the Advance, eventually later via the Change Posting Key bulk action (Form / Bulk Actions / Change Posting Key).
As well as the accounts, a posting key by which the Advance will be posted is inserted into a Received Advance. The Posting key of an Advance Received may be predefined in the Books of Sale. The predefined posting key can be naturally edited similarly as described above for the Credit and Debit accounts, i.e. via the Change Posting Key function (Form / Bulk Actions / Change Posting Key).
An Advance Received which has a Credit and a Debit side account and a Posting key defined, and which is also confirmed, is ready tobe posted. Posting: Only confirmed Advances should be posted.
The 3rd The 3rd page of the document is used to posting. The bottom part of this page is designated to post the document.
Note: Closer description is in The Accounting– Account Assignment and Posting chapter.
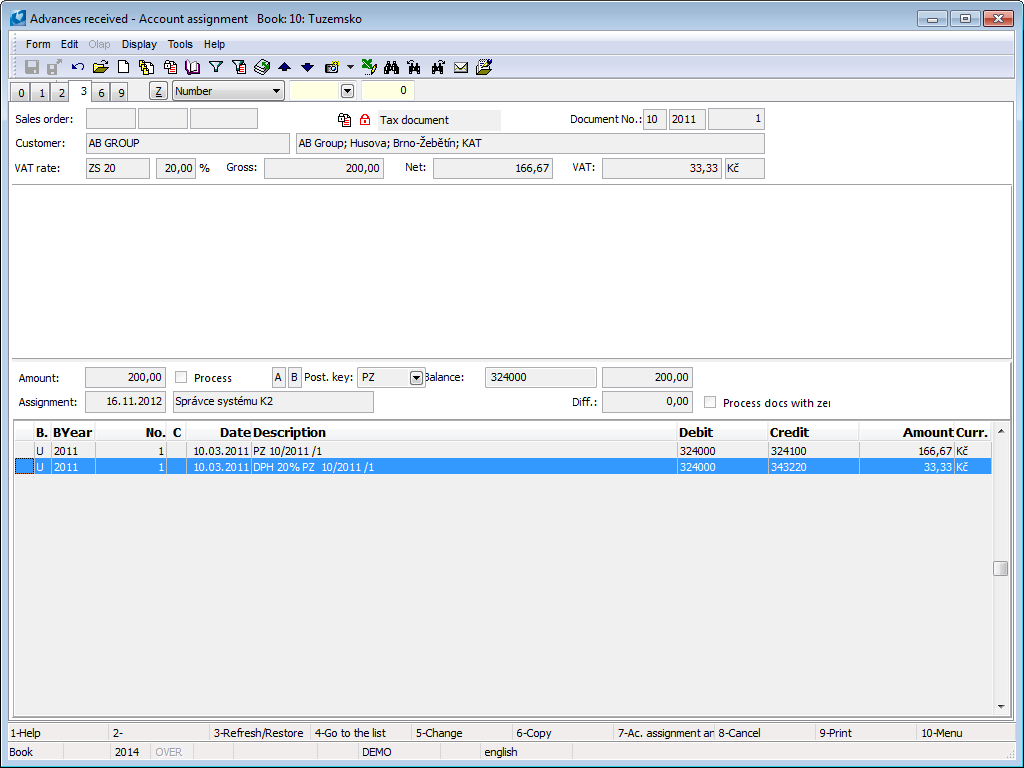
Picture: Advances Received - 3rd page
It is possible to post Advances in bulk. Create a filter of the confirmed and paid Advances Received for a business year in which you want to post the Advances (by using the 'Unposted' filter), mark the records with asterisks, and post them in bulk (the Ctrl+F7 key combination).
If the Tax Document status is changed on a posted document, the Posting and Settlement signs are always removed. It is necessary to post the document again.
Post the Advance Received in the "Tax Document" status as follows:
Net price |
Debit account from the Advance Received / Credit account from the Advance Received |
the amount of VAT |
the Debit account from the Advance Received / 343 |
No tax advance received is posted as follows:
Gross price |
Debit account from the Advance Received / Credit account from the Advance Received |
|
|
|
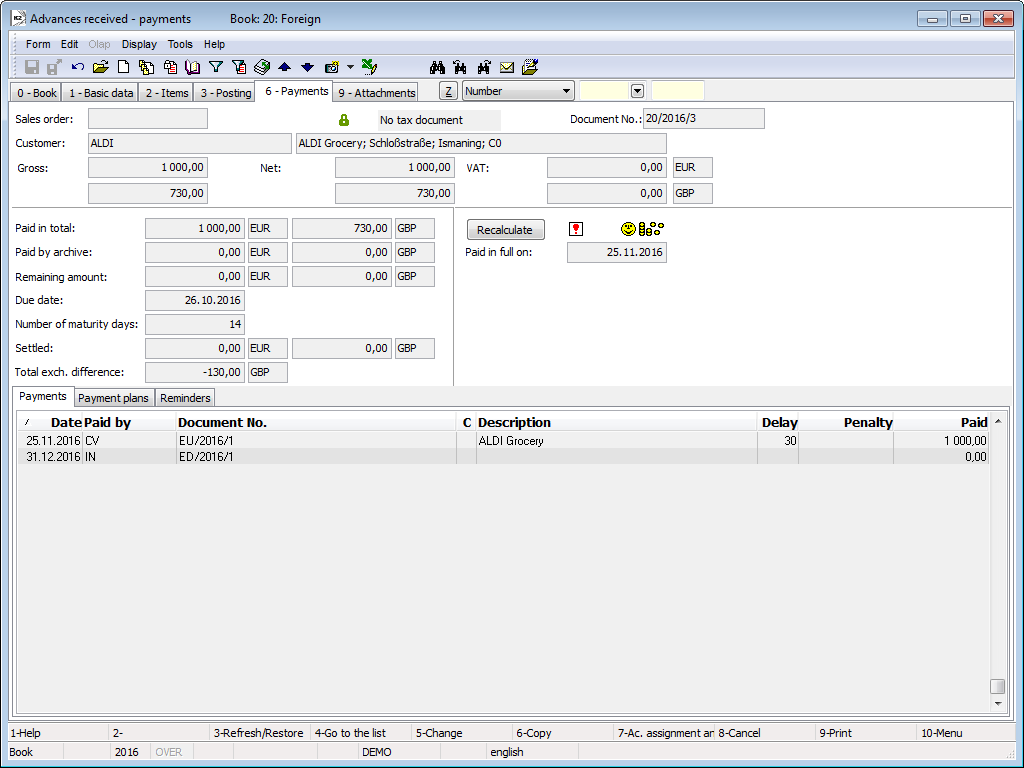
On the 6th page of the advance received, the user can monitor the facts related to the payment status of the advance - whether it is paid entirely or partially, due date, delay or information on concrete payments (in the lower part of the 6th page). This page is displayed only in the Browse mode (it is not accessible in the Change mode or in New document).
When paying an Advance received, the Acc. Trans. Date and the Invoice Date is changed according to the Date of Issue of the payment. If the Set "Tax Doc." Status on Advances When Paid In Full field is checked in the Book of Sale, the Tax Document status is automatically set when an Advance Received is paid in full.
If the Advance is in the Tax Document status, it is not possible to match next payment to the document. It is also not possible to undo the match of an already existing one.
If you insert an Advance to a Cash Voucher or a Bank Statement manually, and the Advance is in a different currency than the payment, the following message will appear: "Do you want to change exchange rate of the advance according to the document exchange rate?". After approving, the Exchange Rate on the Advance will be automatically changed according to the Exchange Rate of the Cash Voucher or the Bank Statement.
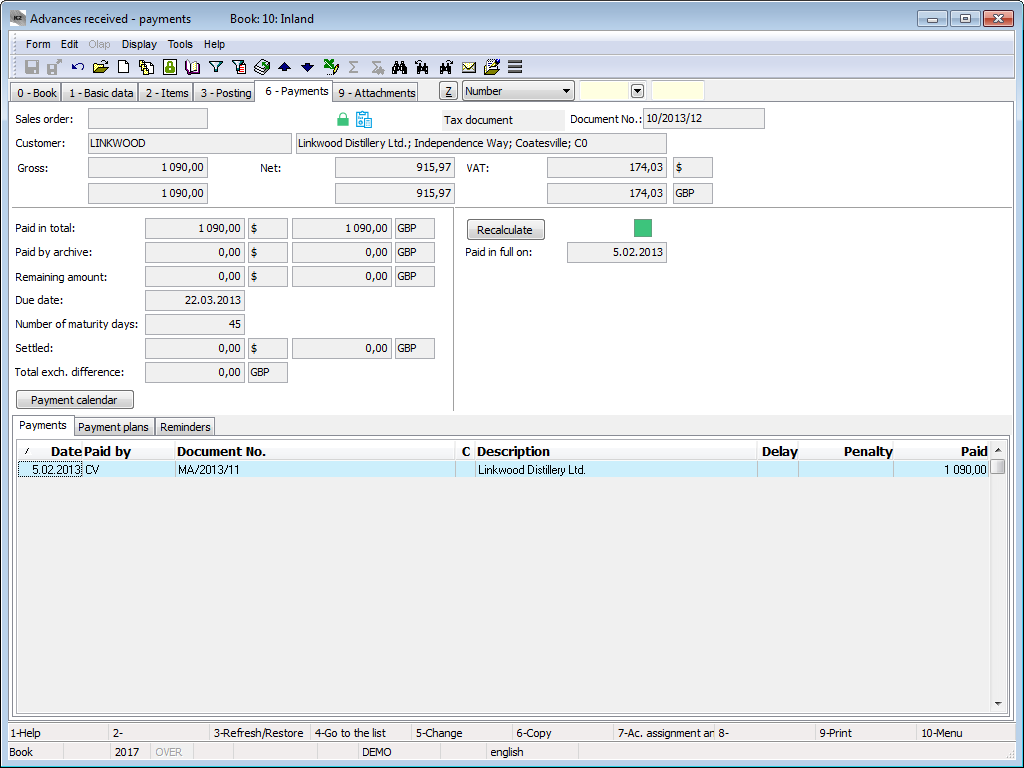
Picture: Advances Received - 6th page
Field description:
Paid In Total |
The total amount that has already been paid. |
Paid by Archive |
The amount paid by the documents, which have been already moved to an archive. |
Remaining Amount |
The amount that remains to be paid. |
Recalculation |
The Recalculate button recalculates the payments for the Invoice. It can be also run by using the Ctrl+ F3key combination on the 6th page of an Advance. If there is an exclamation mark next to the button, the payments on the 6th page are not counted correctly - it is necessary to run the payments recalculation. |
Due Date |
The due date. |
Number of Maturity Days |
Number of maturity days. |
Total Exch. Difference |
The total exchange difference. |
Paid in Full On |
The actual date of the payment of advance received. |
Planned Payment Date |
The due date reflected by the delay from the customer's card at the date of document issue is automatically filled in. It is possible to change it. |
Expected Payment Date |
Due date reflected by the current delay. It cannot be changed. |
Priority |
Used to set the priority for a payment. |
Payment Status |
A payment status that can be used to suspense a payment or completely block it. The payment status can take the values of Allowed, Suspended, or Blocked. You cannot add payments with the Suspended or Blocked payment status to a banker's order. |
Do Not Include Into Financial Management |
If this option is checked, the document does not appear in the Financial Management module. |
In addition to amounts in the Advance currency, amounts in the Client currency are also displayed on the foreign currency documents.
The bottom part of the 6th page is divided into 3 tabs:
- Payments,
- Payment Plans,
- Reminders.
In the Payments tab, the individual payments of an Advance are displayed . After pressing the Enter key in the Browse mode on the specific payment, will display 2nd page of a Bank Statement, Cash Voucher, Internal Document, and a Banker's Order, by which the payment has been executed. In the bank statement, (cash voucher, internal document or the banker's order) the light indicator is positioned on the item that corresponds to the Advance payment.
In the Reminders tab are the individual Reminders that have been issued on an Advance. With the Ctrl+Enter keys you can switch into the Book of Reminders, the light indicator will be positioned on a specific Reminder.
|
|
|
External documents can be inserted in and references can be assigned to documents on the 9th page of Advances Received within the K2 IS. K2 IS. Further work description with Documents is stated in the chapter Basic Code Lists and Supporting Modules K2 – 9th Page.)
|
|
|
|
|
|
Bulk actions can be run on the records marked with asterisks or on the records in container.
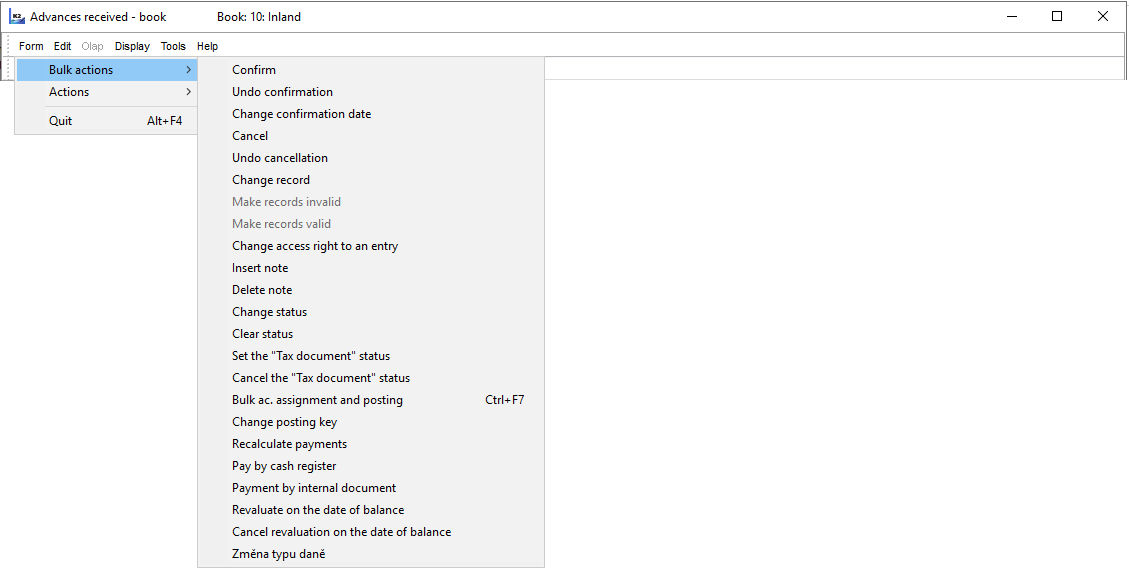
Picture: Functions of Advances received module menu
Description of actions:
Set the "Tax Document" status |
The function sets "Tax document" status on the paid advances with the checked VAT flag. |
Cancel the "Tax Document" status |
The function cancels "Tax document" status on advances that are not deducted. |
Payment Recalculations |
Function for mass recalculation of payments of advances received. |
Payment by Cash Register |
It executes automatic payment of advances by cash register. Closer description is in the chap. chap. Invoice Payment - Automatic Payment by Cash Register and Internal Document . |
Payment by Internal Document |
It executes automatic payment of advances by internal document. Closer description is in the chap. chap. Invoice Payment - Automatic Payment by Cash Register and Internal Document. |
Revaluation to the Date of Balance |
This revalues Invoices on the date of balance by an internal document. Closer description is provided in the Accounting - Revaluation to the Date of Balance. |
Cancel Revaluation to the Date of Balance |
It cancels the revaluation to the date of balance. Closer description is provided in the Accounting - Revaluation to the Date of Balance. |
Change Type of Tax |
The function for the bulk change of a tax type on unconfirmed documents. The change is reflected in the document header and in the items in which the same tax type was entered. |
|
|
|
Functions over Advances Received
Description of functions:
Alt+F3 |
This switches the Advance to the Tax Document status. Only the Advance on which the VAT field is checked, is confirmed and paid and has not been deducted on the Invoice, can be switched into this status. Invoice |
Ctrl+F3 |
It cancels the Tax Document status in the Browse mode. This status can be cancelled only if the Advance has not been deducted on the Invoice. |
Shift+F2 |
It activates the form to change invoice date (in the book and on the 1st page in Browse mode). It is executable on credit notes only. Automatic payment by Cash Register. This function can be run only in the Browse mode. 6th page of the Advance Received. |
Shift+F3 |
Automatic payment by internal document. This function can be run only in the Browse mode. 6th page of the Advance Received. |
Shift+F4 |
Bulk creating of documents - of repeated Other Receivables. |
Shift+F5 |
It opens the form for the reminder creation on page 0. |
Alt+Shift+F3 |
It activates the function (on page 0 in the Browse mode) that processes a partly paid or overpaid Advance - this means it either increases or decreases the Advance amount according to the payment, or it splits the Advance into two. For further description, see thePartly Paid/Overpaid Advance chapter. |
Ctrl+Alt+F5 |
The function enables to choose the document Status. |
|
|
|
Create Repeated Advances Received
This function is designated for automatic generation of documents by "copying" the current document, when new documents differ from the current one only in the date. It is useful e.g. for creating a prescript of regular Advances.
After activating the function (Shift+F4), the input form of the function will appear:
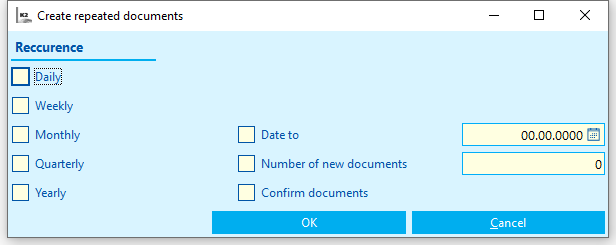
Picture: The form of the Create Advances Received function
In the initial form:
- specify the frequency of repeating - set the option Daily, Weekly, Monthly or Yearly,
- check and specify the Date To (Acc. Trans. Date to which the documents should be created) or check and specify the Number of New Documents,
- you can check Confirm Documents.
New documents, the Acc. Trans. Date of which will be set according to the selected frequency of repeating, will be created after pressing the OK button. Due Date will be set according to the number of maturity days in the default document.
|
|
|
Rounding of Advances
When creating Advances Received in the domestic currency from a Sales Order, it is possible to set the rounding of the Gross amount depending on the entered Payment Method. Rounding is set in the 'Payment Method' code list. In the Constant field, enter the value to be added or subtracted to the rounded number before rounding itself (allows rounding up or down). The value that is to be rounded can be entered into the Order field.
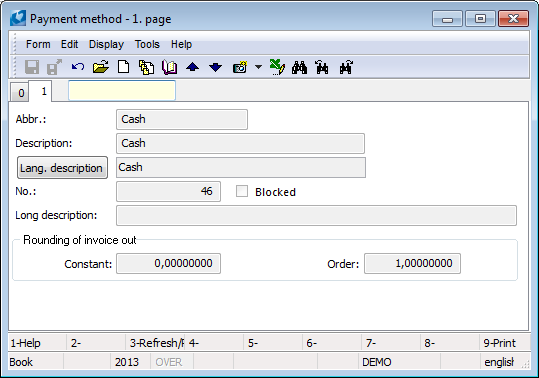
Picture: The Setting of Rounding in Payment Method form
When setting the rounding according to the picture, the Gross amount will be rounded to the integer units. The Net amount and the VAT are rounded according to the Client Parameters.
If the rounding is not defined in the Payment Method, the Gross, the Net amount, and the VAT of a domestic Advance are rounded according to the Client Parameters.
The Gross amount of an Advance in a foreign currency (the Currency option is checked) is rounded depending on the settings of rounding of the entered Currency. The Net amount and the VAT of an Advance in a foreign currency are not rounded.
Rounding is executed during the issuing of the Advance Received, or during changing the Payment Method. The rounding difference will be allocated into the first item.
|
|
|
Methodologies to Advances Received
|
|
|
Process of Receiving an Advance From a Customer
We will now introduce you to the work with Advances Received within a business transaction step by step.
|
|
|
You can issue the call for payment to the customer on basis of the contract, where you can specify the amount you require to be paid. Create theReceived advance in K2 IS.
If a Sales Order created to the contract exists, you can create an Advance Received right away to that particular Sales Order. To do this, search for the particular Sales Order, switch to the 2nd page, and press the New Advance to Sales Order. A new Advance Received with pre-set data from the Sales Order is created, and the amount of the Advance will be reduced of the already issued Advances to that particular Sales Order. The buttons on the 2nd page are accessible in either the Change or the Browse mode. A new Advance cannot be created to an already confirmed Sales Order.
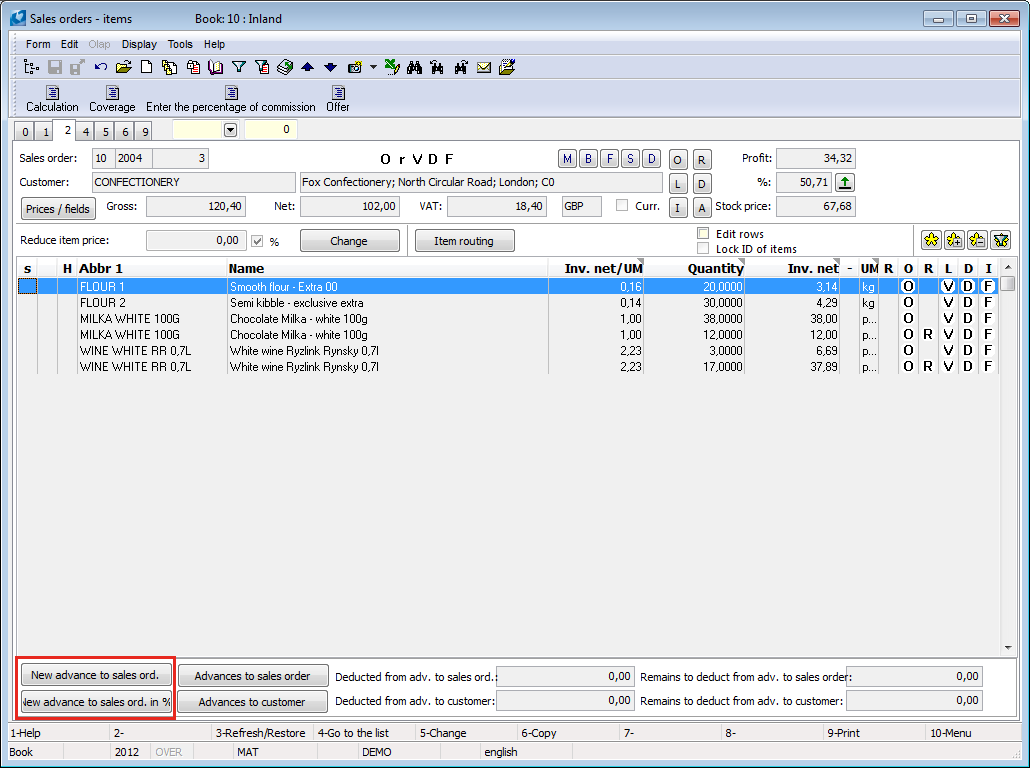
Picture: Sales Order - 2nd page
Picture: Pre-set Advance
Or use the New Advance to Sales Order %button on the 2nd page of a Sales Order, which helps you to calculate the Advance. For instance, in the contract is stated that the customer will pay 60 % of the Sales Order in advance. Create an Advance directly in the Sales Order by the New Advance to Sales Order % button and enter "60" in the displayed form. The calculated amount of the future Advance will be on the form. A new Advance Received with pre-set data from the Sales Order and with the price that equals 60% will be created by the OK button. % of the Sales Order in advance.
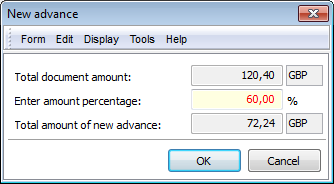
Picture: Enter the percentage of sales order amount
A new Advance Received created with the buttons mentioned above stays in the Change mode until you complete the necessary data, save it with F2, and confirm. An Advance Received created this way will be matched with that Sales Order.
If you require to pay some amount in advance but are not able to specify the Sales Order which the Advance is matched with, just create a Call for Payment in the book of Advances Received. Create a new document with the Ins key and fill in the appropriate data in the book. Then save it with the F2 key and confirm it. An Advance Received created this way is free, resp. an Advance to a customer. There is an option to match it with the particular Sales Order additionally (in the Change mode of the Advance Received, fill in the book, business year, and the number of the Sales Order). Another option is to match the free Advance with the Sales Order by the Alt+F5 key combination. This function links the subordinate doc. with the superior one and is accessible on all the pages. With the Alt+F5 keys, you can open the option table which contains the list of Sales Orders, and select the particular document with Enter.
The Advances Received report is prepared for the print of Call for Payment.

Picture: Printed Call for Payment
On the 2nd page of a Sales Order is an exclamation mark next to the amount of "Remains to Deduct From Adv. to Sales Order'" in the header. This occurs only if there is an unpaid or a partially paid Advance to the Sales Order. If there is an unpaid or a partially paid Advance to the Sales Order, the exclamation mark will be displayed next to "Remains to Deduct From Adv. to Customer".
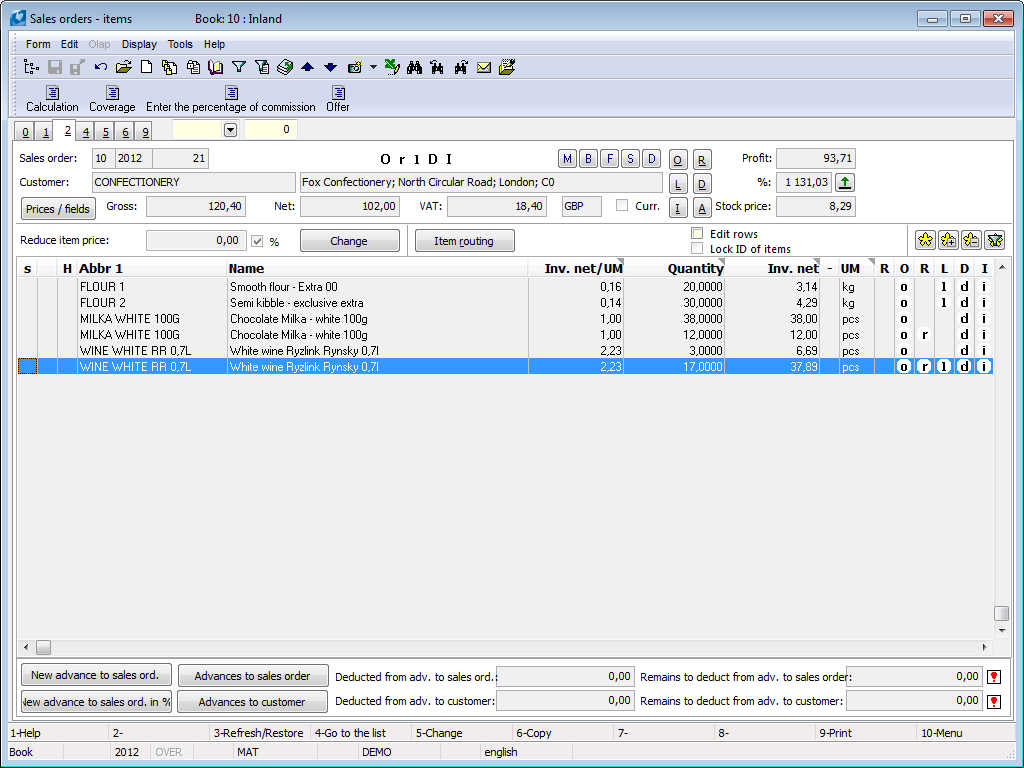
Picture: Sales Order - an unpaid Advance exists
The filters for Advance search are the Unpaid Advance - For One Customer Unpaid Advances - For All Customers.Select the range in which the Acc. Trans. Date on the documents will be taken into consideration for both filters. Moreover, you can select the books which the documents will be taken from.
|
|
|
You can enter the payment as a cash voucher in K2 IS. If you need to pay in cash right away in a Call for Payment (see the Call For Payment chapter), use the function called 'automatic payment' on the 6th page of an Advance Received. Run the function with the Shift + F2 key combination. Choose the cash register in a displayed form, set the payment date, enter the '100 %' amount and check the field Amount - remains to pay. The function creates a Cash Voucher for the amount that equals the Advance amount automatically, and that Cash Voucher will be matched with the Advance.
If the payment in cash preceded the time of the Call for Payment in the Advances Received book, you have an already existing Cash Voucher for the amount received (the Cash Voucher has to have the 'AR type - Advance Received'). Payment matching for an Advance is done by editing the particular Cash Voucher, when you enter the book, business year, and the number of a new Advance Received.
If the payment for the Advance is affected by the bank transfer, the payment by Call for Payment will be done by matching with the particular bank statement with the Advance Received. During automatic pairing (using the Ctrl + F3 keys above the bank statement in the Change), the deposit is automatically selected according to the variable symbol entered in the bank statement item, or at the same time according to the amount of Pay. If the appropriate Advance Received is found, the bank statement item changes the 'AR type - Advance Received' and the number of the AR will be added to the bank statement item. This way, the payment will be matched with the Advance Received.
You can do the matching manually, i.e. Change the type 'AR type - Advance Received' and select the particular Advance Received in the Change mode of a bank statement.
After you save the Cash Voucher or the bank statement which is matched to an Advance Received, the Advance will be fully paid and the field Set "Tax Doc." Status on Advances. When Paid In Full will become checked in the book of Sale. The function is activated after you switch the Advance Received into the Tax Document state. After you save the payment of the Advance, the Invoice date is saved according to the date of payment automatically.
Each payment of the Advance increases the amount, which is able to be deducted on Invoices (Remains to Deduct field the Advance Received).
The filters for searching Advances are Unpaid Advance - For One Customer and Unpaid Advances - For All Customers. Select the range in which the Accounting Trans. Date on the documents will be taken into consideration at both filters. Moreover, you can select the books which the documents will be taken from.
A filter called Advances Not On TD helps to find the Advances which have been fully paid, have the VAT flag checked, and that are not switched into the "tax doc.". You can select the range in the filter, from which the Accounting Trans. Date on the documents will be taken into consideration.
|
|
|
The currency of an Advance and the payment is identical
The method of Advance payment in Client's currency is the same as the one described in the Payment Received chapter.
On the Automatic Payment form is a checkbox called Set Exchange Rate of Advance Acc. To Payment. If you want to pay an Advance with an exch. rate that is different than the Set Exchange Rate of Advance Acc. To Payment checkbox:
- - if the checkbox is checked - the exch. rate will be overwritten according to the exch. rate of the payment,
- - if the checkbox is not checked - the exch. rate will not change and an exchange rate difference will be created.
When paying an Advance in a foreign currency, if the Advance exch. rate differs from the exch. rate of the Cash Voucher and the bank statement, the following situations may occur:
- If you choose an Advance on a Cash Voucher or a bank statement manually, the following message will appear: "Do you want to change exchange rate of the advance according to the document exchange rate?". If you agree, the exchange rate on the Advance will be changed automatically according to the payment exch. rate. If you choose "No", a new exch. difference will be created during the payment.
- Automatic Matching - a new checkbox "Exch. Rate of Advance Accor. to Payment Exch. Rate" is on the form "Automatic Matching" of a bank statement. If the field is checked, the exch. rate on the Advance changes according to the exch. rate on the bank statement. If the field is not checked, a new exch. rate will be created during the payment.
- Upon homebanking matching via the HB - Bank Statement script, the exch. rate will be overwritten according to the payment exch. rate.
The advance is in the Client currency and the payment is in a foreign currency
- If you change the amount or the payment exch. Rate during the manual Advance matching, the following message will appear: "Do you want to change the amount of the advance accor. to the document exchange rate?" If you agree, the Advance in the Client's currency and the Gross Advance will be counted according to the payment (i.e. the payment amount in the currency * payment exch. rate); the Net and VAT of the Advance will also be counted. If you choose "No", the payment will be matched, but the data on the Advance will not change.
- Automatic Matching - if the "Advance Exch. Rate Accord. to Exch. Rate" field is checked, the Advance stays in the basic currency and the Advance Gross will be calculated acc. to the payment amount (i.e. the payment amount in currency * payment exch. rate). The Net and VAT of the advance will be calculated as well. If the field is not checked, the payment will be matched, but the data on the Advance will not change.
The advance is in the Client currency and the payment is in a foreign currency
If you match a payment to the Advance, the data in documents will not change. In the case of automatic matching, the Set Exchange Rate of Advance Acc. to Payment flag does not work and it is necessary to correct the Advance manually (an Advance from item payment has to be undo-matched, then change the rate in the Advance and match it again). Exchange difference cannot be created upon the Advance payment.
|
|
|
You have received a specific amount as the Advance payment from a customer. Realize and invoice the Sales Order. The Result Tax Document will contain the deduction of the already paid amount.
The following situations may occur:
- the Advance Received is equal to the invoiced amount for a complete Sales Order,
- the Advance Received is higher than the invoiced amount for a complete Sales Order,
- Received Advance is lower than the Invoiced amount for a complete Sales Order.
In the K2 IS, we solve the Advance accounting with the so-called Deduction of the Advance on the Invoice. Drawing on the advance will reduce the total amount of the invoice by the amount drawn from the advance, thus adjusting the tax recapitulation and ensuring the correct values in the VAT return, provided that the tax rate and type of tax were correctly filled in the received advance.
Firstly, search for the Invoice Out. For fast orientation, use the bitmaps which inform us about the already paid, non-deducted Advances, and inform us whether there are any deductions of Advances on the 1st and 2nd page:
-
 they inform the user about the existence of a paid, non-deducted Advance to a Sales Order,
 -
 they inform the user about the existence of a paid, non-deducted Advance to a Customer.
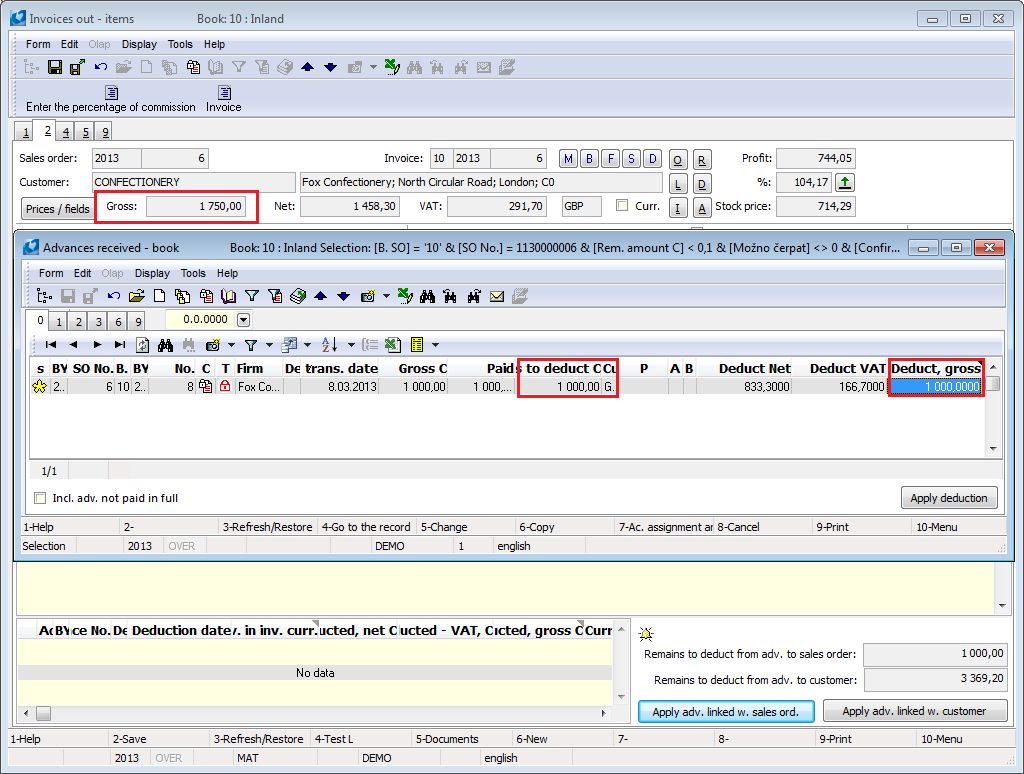
Switch the Invoice Out to the Change mode. On the 2nd page, use either the Deduct Adv. Linked w. Sales Order button or the Deduct Adv. Linked w. Customer button. The difference between the buttons is that the Deduct Advance Linked with Sales Order is used with an assigned Invoice Out (it contains a superior document - a Sales Order) and after pressing the button, the Advance will be offered to the identical Sales Order. In multi-documentation Invoices, all Advances are displayed to all Sales Orders on the Invoice. Use Deduct Adv. Linked w. Customer button with an Unassigned Invoice (it does not have a superior document - Sales Order). After pressing this button, the Advances linked with the Customer from the Invoice are offered. In both cases, you will have the options to deduct the amounts of Advances up to the maximum amount.
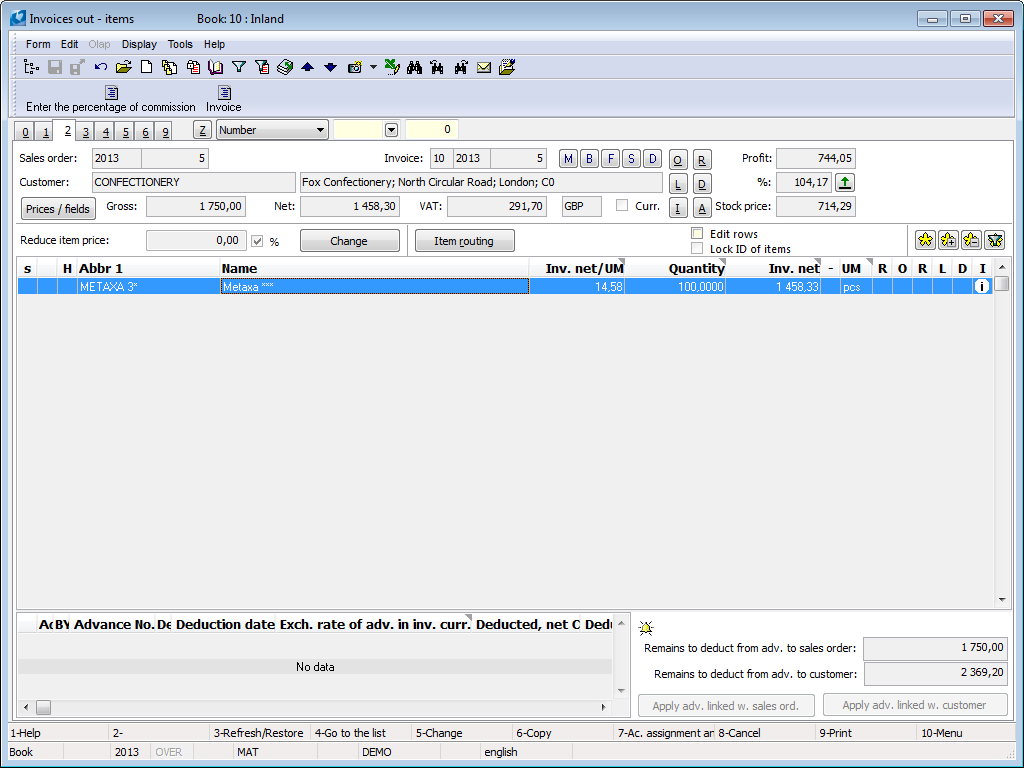
Picture: Invoice Out - 2nd page - the button for Advance deduction
In the displayed list of Advances, the Advances are indicated with a black square in the V column. The amount to be deducted is specified there (the Deduct Gross column). The user can change the deducted amounts, cancel the selection of the Advance, or select another Advance. When the selection of Advances and deducted amounts is executed, the deduction is added to the Invoice by the Apply Deduction button or by pressing the Ctrl+Enter keys.
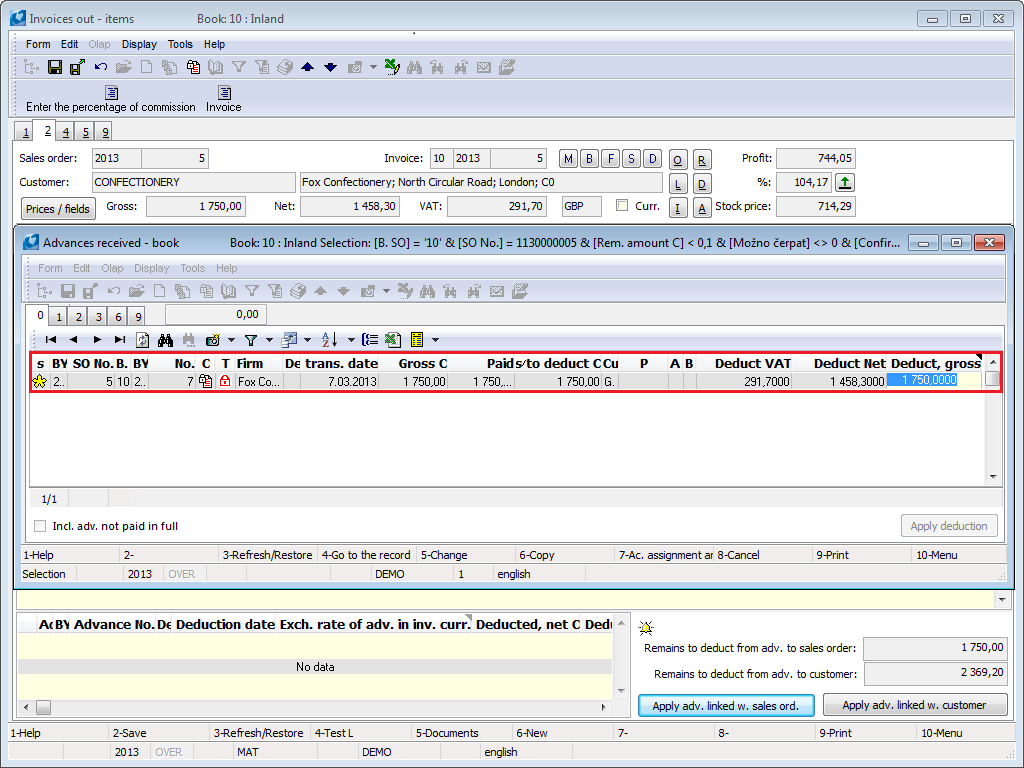
Picture: Setting of the deducted amount
If the amount of an Advance Received equals the total invoicing amount, the result amount of the Invoice after the deduction will be zero.
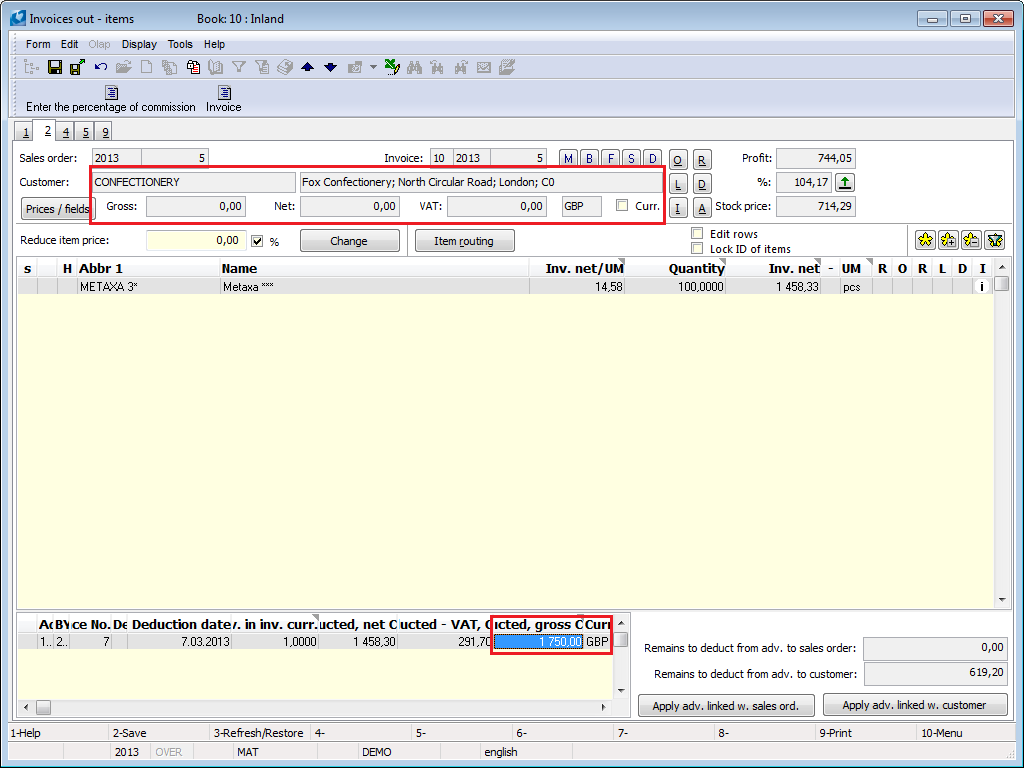
Picture: The deduction of an Advance with the amount identical to the amount of the Invoice
If the amount of the Advance Received is lower than the invoiced amount, you can deduct the whole Advance on the Invoice. When indicating such an Advance, the K2 IS will offer the whole amount of the Invoice. In that case, it depends on the specific situation whether the user will leave the deducted amount in this amount, or they will decrease it. In the case of decreasing, the whole Advance will not be deducted.
After saving the deduction, the amount will remain to be paid off on the Invoice.
Picture: Deduction of an Advance with the lower amount than the Invoice value
You can change the list of deducted Advances on an Invoice easily:
- by pressing the Ins key, you can add other Advance deductions,
- by pressing the Del key, you can delete the Advance deduction,
- or change the amount drawn directly in the column Gross deduct M. after pressing the Enter key (the changed amount is then confirmed by pressing the Enter key again).
In the list of deducted Advances, you can also simply switch to a particular Advance with the Enter key, or by "double clicking" on the left mouse button.
You can enter the deducted amount in the Deduct Net column as well. The user enters any Net amount, and the Gross amount will be calculated by the VAT coefficient (and by the VAT cross and Tax doc. marking). The VAT, which is rounded by the Client Parameters, will be calculated from the Gross amount. The calculated VAT will be added to the Net amount that is entered by the user and the sum is used as "Deduct Gross". This means that what the user has entered along with the VAT results in entering the Net amount. Net amount can be entered only if there is no "Calculation Vat from Above".
You can deduct the Advances that have been paid off in various currencies. If the currency of the Invoice is different from the currency of the deducted Advance, the amount of deduction will be recalculated according to the currency of the Invoice. The Exchange rate of deduction (i.e. the exchange rate of the Invoice) is entered from the Exchange list according to the date of the Advance. If the Exchange list is not updated regularly, and the Exchange rate of the date is not mentioned there, you can adjust the Exchange rate manually on the 2nd page in the lower part of the form in the Exch. Rate from Advance in Curr. of Inv. column.
To search for invoices on which a deposit has already been drawn, use the filters Invoices with applied advance - for one supplier (in K2 we can find it under the name Applied advances-for 1 supply) and Invoices with applied deposit - for all suppliers (in K2 we can find it under called Advances paid-for all deliveries.) . Select a range, in which the Date of Execution on the documents will be taken into consideration at both selections. Further, you can select the books from which the documents will be taken from.
|
|
|
Example: The customer pays an Advance for the article delivery of 2,000 GBP by cash. The article will be exported the following day.
Create an Advance Received of 2,000 GBP for the particular customer. Enter 'N' tax type (not entered into return) and choose the 'N' tax rate or the 'NN' (null VAT rate). Advance Received does not have the VAT field checked.
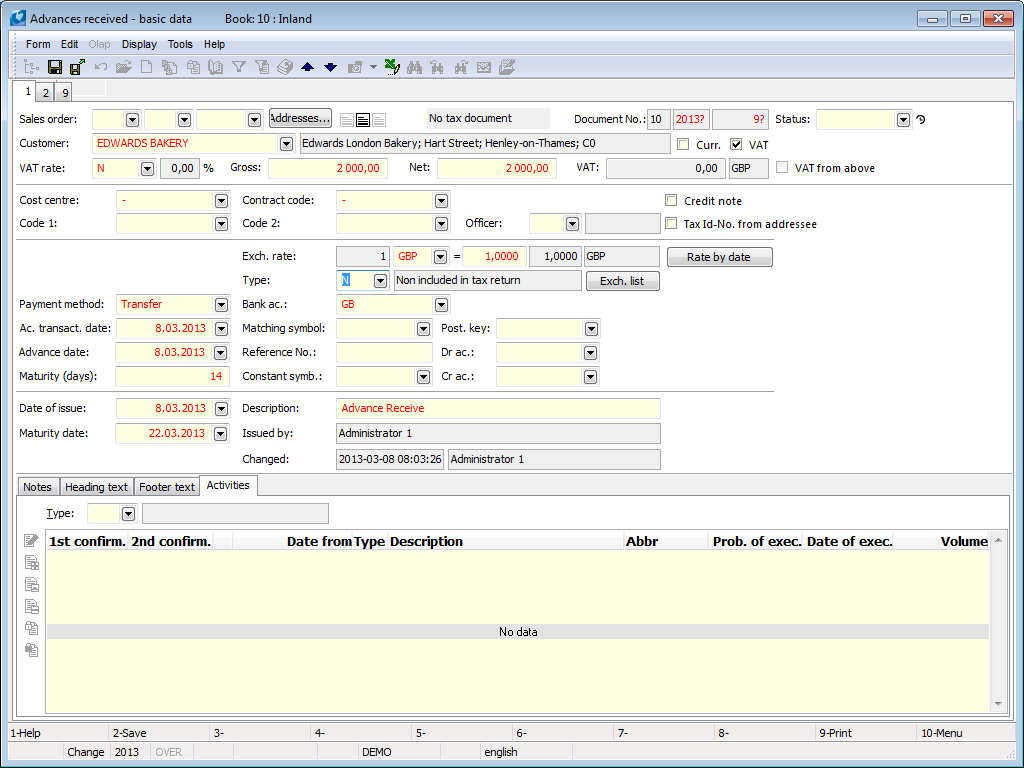
Picture: A non-tax Advance with the "N" Tax Type
Save the Advance Received, confirm it and pay by the cash register by means of the Shift+F2 keys. (After the payment, the Advance Received does not change into the tax document status, as the VAT field is not checked)
After the article expedition, you can issue an Invoice and as in the previous example, you will deduct the already paid Advance. On the 2nd page, click into the lower table and press the Insert key. A list of Advances which you can deduct on the Invoice will be displayed. You can mark the non-tax Advance of 2,000 GBP by pressing the Space bar. The remaining amount of 2,000 GBP in the column Deduct will be displayed automatically.
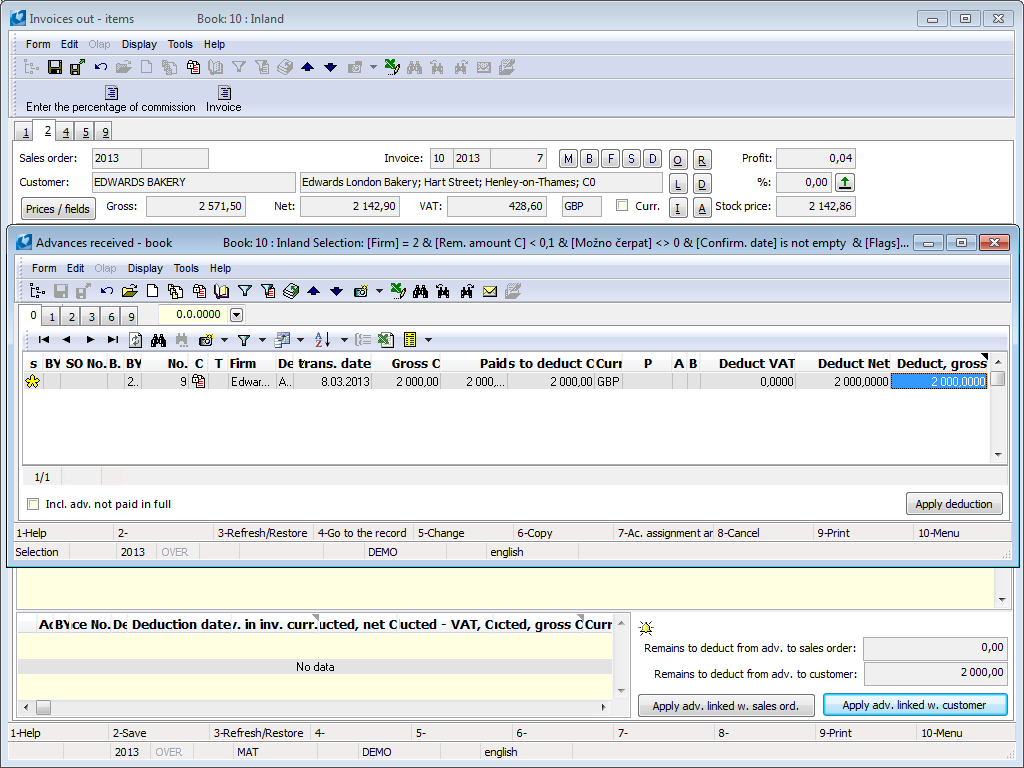
Picture: Select the remaining amount of an Advance on an Invoice
You can save the deduction of the Advance into the Invoice by pressing the Save Deduction button or with the Ctrl+Enter combination, and the Invoice stays in the Change mode. The total amount of the Invoice will be reduced of this deducted Advance.
In the tax summary, the deduction of Advance is expressed as the deduction of a non-tax advance, i.e. the VAT will be paid from the total value of the article, i.e. regardless of the amount of payment in advance, because the VAT was not paid from that amount paid in advance.
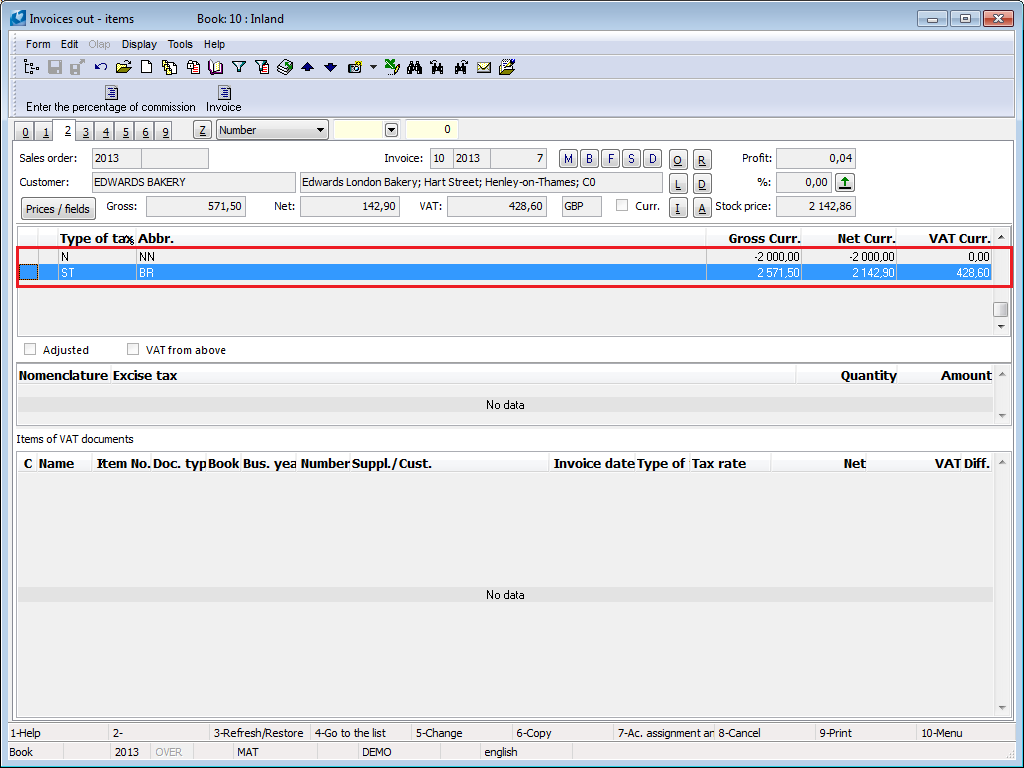
Picture: Tax summary of invoice after deduction of non-tax summary advance
Save, confirm, print, and send the Invoice to the customer.
|
|
|
A Received Advance contains the Debit account and the Credit account directly in the header of the document. Both accounts can be predefined in the Books of Sale, which means you can ensure the inserting of Debit and Credit accounts into all newly created Advances Received in the book. For the pre-definition in the Books of Sale, select the most frequently used accounts for posting of Advances Received. If you record an Advance that should be posted todifferent accounts in the book, you can change the accounts immediately when creating the Advance, eventually later via the Change Posting Key bulk action (Form / Bulk Actions / Change Posting Key).
As well as the accounts, a posting key by which the Advance will be posted is inserted into a Received Advance. The Posting key of an Advance Received may be predefined in the Books of Sale. The predefined posting key can be naturally edited similarly as described above for the Credit and Debit accounts, i.e. via the Change Posting Key function (Form / Bulk Actions / Change Posting Key).
An Advance Received which has a Credit and a Debit side account and a Posting key defined, and which is also confirmed, is ready tobe posted. Posting:
An Advance Received is always posted after it has been paid off. Create a filter of the confirmed and paid Advances per the business year in which you want to post them, and post them in bulk (the Ctrl + F7 keys over the selected Advances).
If the Tax Document status is changed on a posted document, the Posting and Settlement flags are always removed. It is necessary to post the document again.
The standard way in which you can charge a Tax Advance Received is as follows:
Net price |
Debit account from the Advance Received / Credit account from the Advance Received |
100,000 GBP |
the amount of VAT |
the Debit account from the Advance Received / 343 |
20,000 GBP |
In standard way, you can charge a Non-Tax Advance Received as follows:
Gross price |
Debit account from the Advance Received / Credit account from the Advance Received |
120,000 GBP |
In standard way, you can charge an Invoice Out with the deduction of tax Advance as follows:
the Net amount - supply |
the account from the Invoice Out / Revenue Account |
200,000 GBP |
the Net amount of the deduction of the Advance |
the Debit account from the Advance Received / the account from the Advance Received |
100,000 GBP |
the amount of VAT |
the Debit account from the Invoice Out / 343 |
20,000 GBP |
|
|
|
Partly paid/overpaid Advance
The advance that is paid either partly or over, is essentially in the error condition. Such an advance should not be invoiced because it has not been paid totally; nevertheless, money has been received / paid, so the accounting is necessary. Further, you cannot switch such an advance into the Tax Document status, and therefore it does not enter into the returns of value added tax. It shows that we must solve the wrong advance status. In the K2 IS a function is prepared for that.
The best is to check it each month before the conclusion of documents for VAT returns or before the financial statements. First, activate the filter of Advances which have been paid during the review period but that have not been fully paid. The name of the filter is Underpaid / Overpaid Advances.
Picture: List of predefined filters
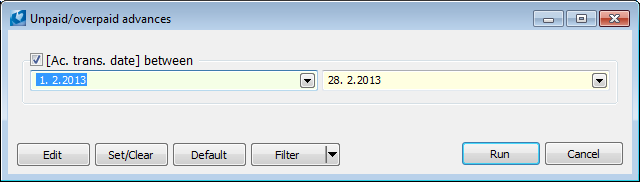
Picture: The Underpaid / Overpaid Advances filter
Run the function for each Advance from the Solving Incorrect State of the Paid Advances filter. You can run this function by pressing the Alt+Shift+F3 keys.
- Divide the Advance into Two (the field is accessible only at underpaid Advance),
- Lower the Amount According to the Payment (the field is accessible only at underpaid Advance),
- Increase the Amount According to the Payment (the field is accessible only at overpaid Advance) and
- Set as a Tax Document.
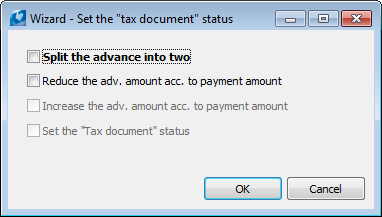
Picture: The form of the Solving Incorrect Status of Paid Advances function
In case of the underpaid Advance, just select the first or the second option. If the Advance will be paid later, just select the first option (split the Advance into two). The amount of the Advance will be decreased according to the payment and the Advance becomes fully paid. Anew Advance with the remaining amount will be created in the same book as the original one.
If you do not expect any further payment in advance, just select the second possibility and the amount will be only decreased according to the high of the payment; the Advance becomes fully paid.
If the Advance is overpaid, select the third option (increase the amount of the Advance according to the payment). It ensures the increase of the amount according to the amount of the payment and the Advance becomes fully paid.
If you also check the Set as Tax Document field at the same time, the the Advance becomes fully paid after the Advance decreasing/increasing, and the Advance will be switched into the Tax Document status.
|
|
|
Credit Notes to Advances
You can create a credit note to an Advance that has been already paid and has not been deducted. A new Advance will be created to an original Advance (a Credit Note) with the negative value of the credited amount. If the Advance has more items, it is possible to create a credit note to items which have not been deducted.
The Credit Notes ("FA_DOB.PAS") function is activated over a particular Advance. It is assorted within the offer of all standard scripts and reports under the keyword Credit Note. You can find it in a tree menu in the Finance - Function part.
Example: A new Purchase Order is created for a delivery of articles in the value of 100,000 GBP, included VAT. An Advance has been provided for this Purchase Order in the value of 30%, i.e. 30,000 GBP. As the Purchase Order has not been eventually realized, it is necessary to issue a Credit Note to the Advance.
Run the Credit Note function over the Advance for which you want to issue anew Credit Note. An initial form of the function will be displayed.
Indicate the Advance by asterisk in the initial form and move the Advance bymeans of arrows into the bottom part. The amount that remains to be deducted on the Advance will be automatically predefined. You can edit the amount.
Enter the reason of the correction into the Reason of the Correction field.
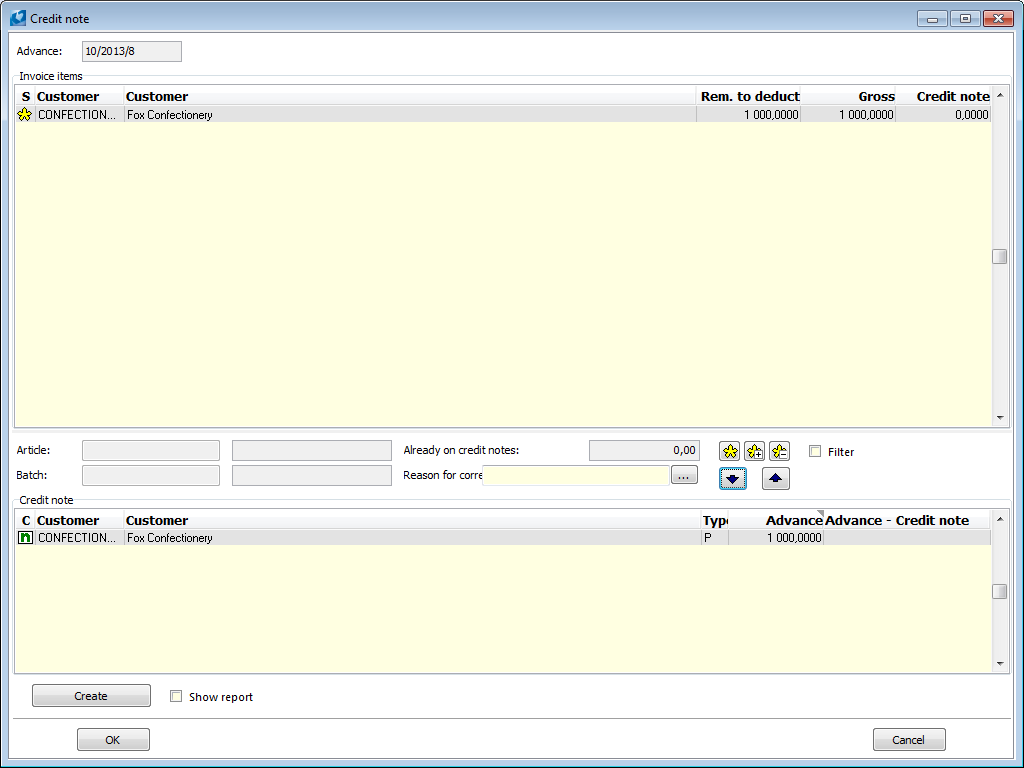
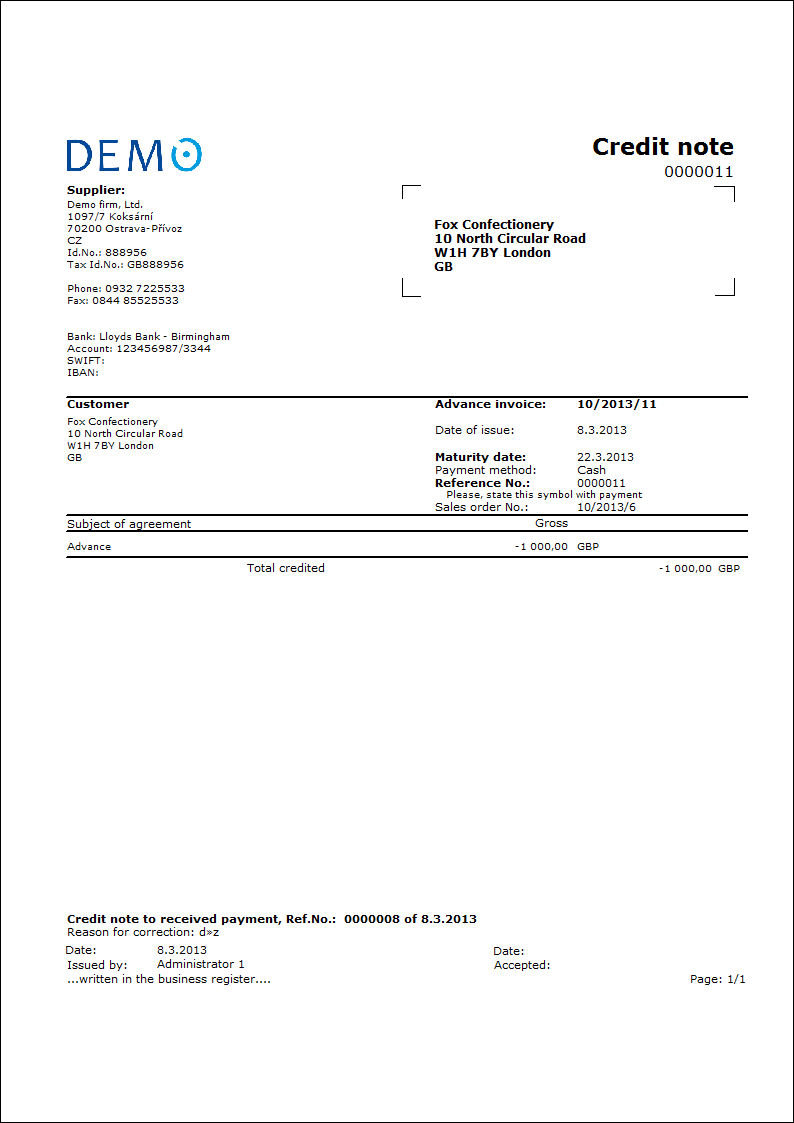
Picture: The Credit Notes form with the credited Advance
After confirming the form, a new created Advance with the Credit Note field checked is created with the amount of -30,000 GBP. On the 9thpage, there is a link to the original Advance. Also the original Advance has the link to the Credit Note onthe 9th page. Credit note,
After paying the advance, print out an Advance Received report.
After that, run the Reciprocal Deduction of the Advance and Credit Note function. Run the function on a confirmed and paid Advance - by Credit Note. The Reciprocal Deduction can be executed only if the original Advance and the Advance of the Credit Note have the following:
- identical currency,
- identical exchange rate,
- identical status (tax or non-tax)
- identical tax rate,
- the amount on the Advance - Credit Note is not higher that the amount of what remains to be deducted on the original Advance.
If all conditions for deduction are met, the Reciprocal Deduction of the Advance and Advance - Credit Note will be executed. The deducted Advance will be displayed on the 2nd page on both documents and the "Remain to Deduct" values will be recalculated. The function may be run in bulk over the Credit Note Advances marked with an asterisk, or over a container of Credit Note Advances.
After cancellation the Reciprocal deduction of Advance and Advance CTD, you can use the Cancellation the Reciprocal deduction the Advance and Corrective Tax Document function.
In case the advance - CN has not been paid and you want to cancel it, just use the script Cancel Advance - CN. The original Advance will be offered to be deducted again.
|
|
|
Credit Notes to Revalued Advances
Example: A customer from the EU paid on 30/11/2016 an Advance for the delivery of goods in the value of 1,000 EUR (exch. rate 0,73 GBP). On 31/12/2016, the Advance was revalued by exch. rate 0,86 GBP / 1 EUR. The delivery of goods has not been realized yet. On 10/1/2017, the Advance was returned to the customer in full amount, exch. rate of the payment was 0,73 GBP / 1 EUR.
There is an advance from the year 2016 in the K2 IS, which was revalued on the date 31/12/2016.
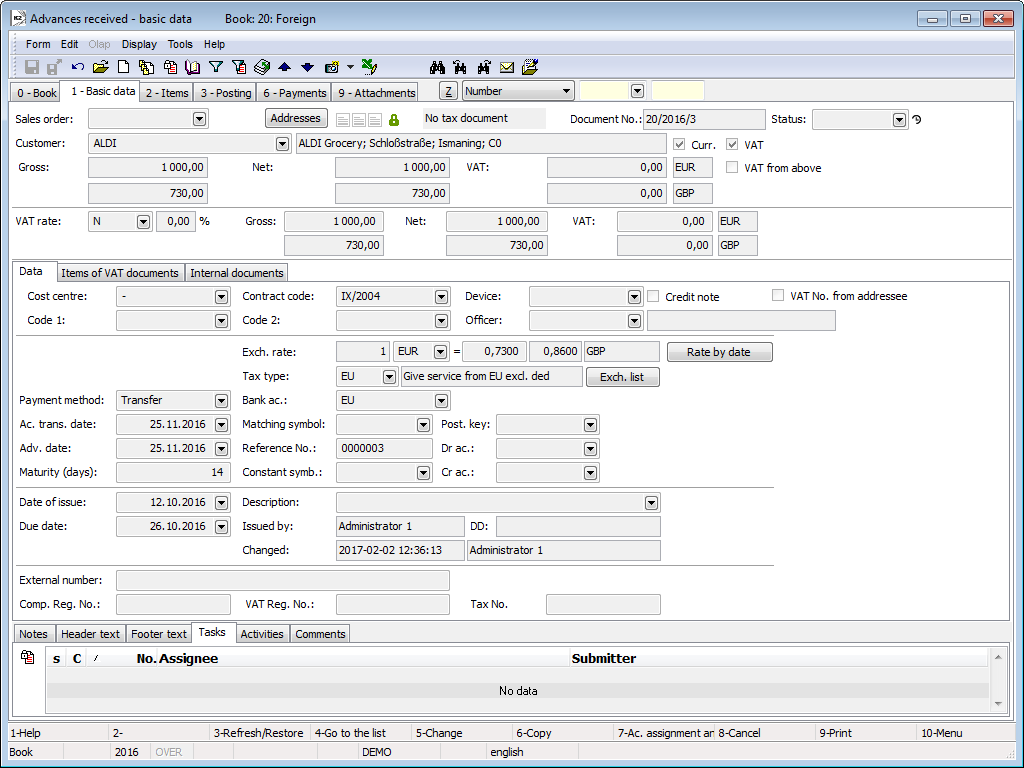
Picture: Advance Received - 1st page
Picture: Advance Received - 6th page
By using the Credit Notes script, create a new Advance for 1,000 EUR, exch. rate 0,73 GBP / 1 EUR (exch. rate is identical to the first exch. rate of the Advance for which the credit note is created). Pay the Advance, exch. rate of the payment is 0,83 GBP / 1 EUR. The exchange rate of the Advance - credit note is not changed after paying.
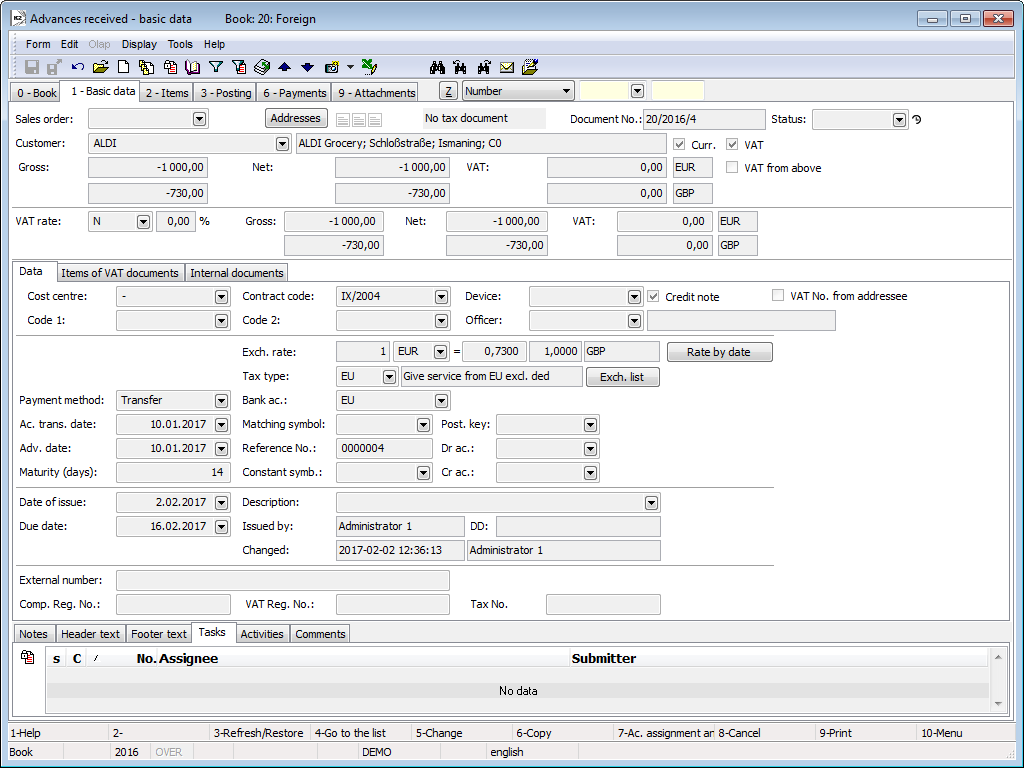
Picture: Advance Received - Credit Note 1st page
On the paid Advance - credit note, run the Mutual Deduction of Advance and Credit Note script - on both of the Advances, the amounts Remaining Amount will be set to zero.
Posting:
Advance Received
Advance Received |
324000/324100 |
25 260,- |
Payment of Advance Received |
221/324000 |
25 260,- |
Revaluation of the Advance Received on 31/12/2016 |
324100/663 |
120,- |
Advance Received - Credit Note
Advance Received - CRN |
324000/324100 |
-25 260,- |
Payment of the Advance Received - Credit Note |
221/324000 563/324000 |
-25 630,- 100 GBP |
As the exch. rate of the Advance - credit note corresponds to the first exch. rate of the Advance for which the credit note was created, 130 GBP stayd on the account 324100 (the amount of revaluation on 31/12/2016). This amount has to be posted by a general accounting document.
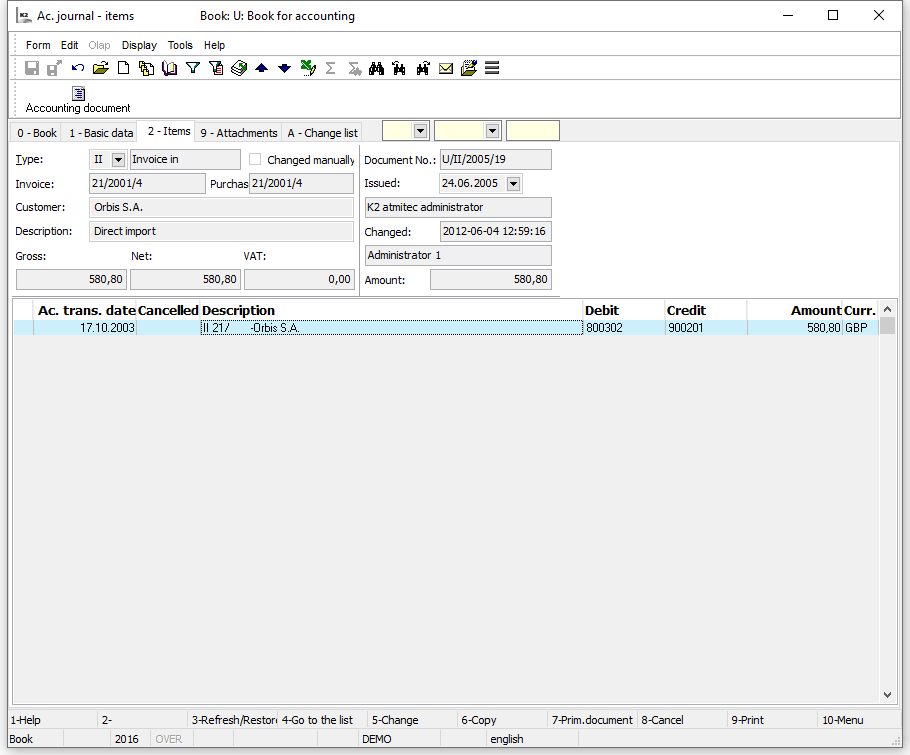
Picture: Accounting Document Item