Deployment of eshop on IIS K2
This document deals with the issue of deploying the e-shop on IIS and the installation of its components and testing.
Before the actual installation of Eshop, it is necessary to have prepared and installed:
- ISS (Internet Information Services Manager)
- Application Servers
- K2 web services server
- Installation of PHP version 5.6
Installation and setup of individual components will be described in detail in the following chapters.
|
|
|
K2 Application server
|
|
|
Description
This installation package is used to install the K2 IS version 3 application server. The application server is then used to serve web clients that connect to the application server.
|
|
|
Software requirements
The first requirement of the application server installer is that user must have the installation running with administrator privileges. Since this condition must already be met by the K2 installer itself, this ensures that this permission is also transferred to all installations running from the K2 installer. To be sure, this permission is tested by each installation, so if the permission is deficient, the installer would display a message.
The second requirement is the need to have IS K2 installed, namely the version that corresponds to the version of the application server, at least at the level of the release version, i. e. 3.135.3.
If the above conditions are met, then user can start the installation.
|
|
|
Installation
After starting the installation, the first dialogue will be displayed, informing the user that the installer for the K2 Application Server product is running, and in addition it will display the version number that will be installed, see Pict.: Start of AS installation
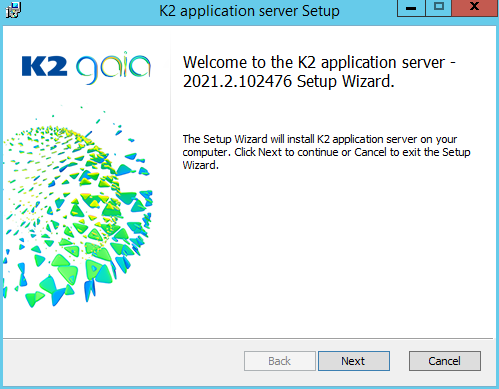
Picture: Start of AS installation
After pressing the Next button, user will proceed to the second dialogue, which contains the license agreements, which user must accept to continue. User accepts the agreement, by checking the option I agree with the terms of the license agreement, see Fig .: AS license agreement.
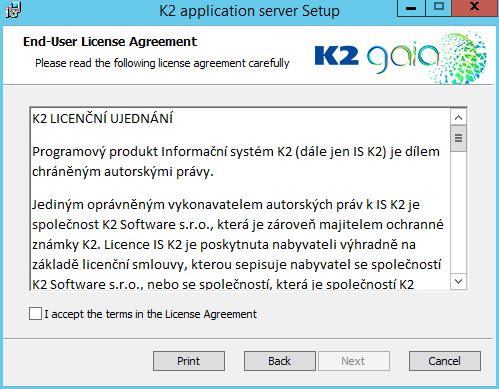
Picture: AS.png license agreement
Click Next to get to the third dialogue, where the user is prompted to enter the path to the installed K2, see Pict.: Path to IS K2. With the Change button user can browse the classic directory dialogue on physical disks or on the network.

Picture: Path to IS K2
If IS K2 is not installed in the selected directory, then a warning message is displayed when attempting to continue the installation, which will not allow the installation to continue until a valid path is selected, see Pict .: IS K2 not found
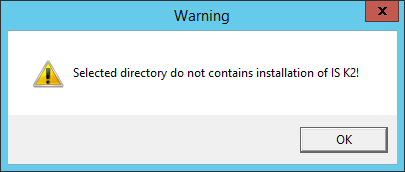
Picture: IS K2 not found
If a valid IS K2 installation is found in the directory, the installation continues to the next dialogue after pressing the Next button, which is used to select the installation path. That is, the path where the application will be installed. With the Change button user can browse the classic directory dialogue on physical disks.
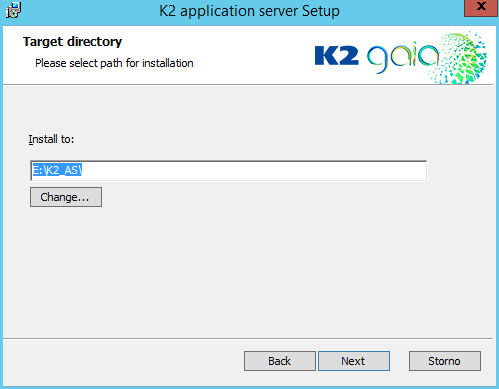
Picture: Installation directory
After selecting the installation directory and pressing the Next button, a dialogue will appear prompting the user to enter the name of the application server, including a description (designed to make it easier to identify the application server) and the client, see Pict.: Name of K2 application server. This value serves as a unique identification of a particular application server among multiple installations of those application servers. Using this identification, web clients will then connect to the correct application servers.
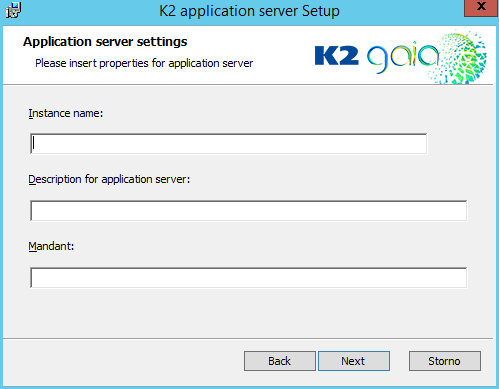
Picture: Name of K2 application server
Fill the field Installation name and Description of application server. In the Client field, enter the client for which the application server should be the default.
Picture: Installation name
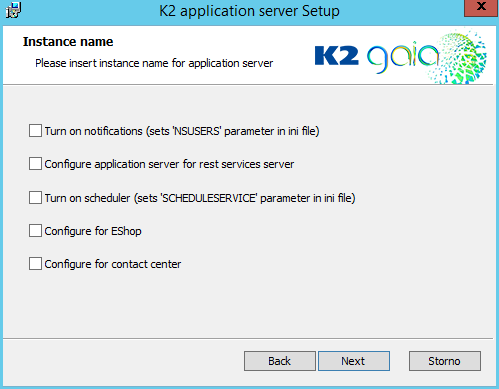
The Notifications on option enables notifications on the AS, i. e. the parameter "NSUSERS = K2" is added to the file "K2.INI". Using the Scheduler on option, the scheduler is switched on on the AS and the "SCHEDULESERVICE = 1" parameter is added to the "K2.INI" file.
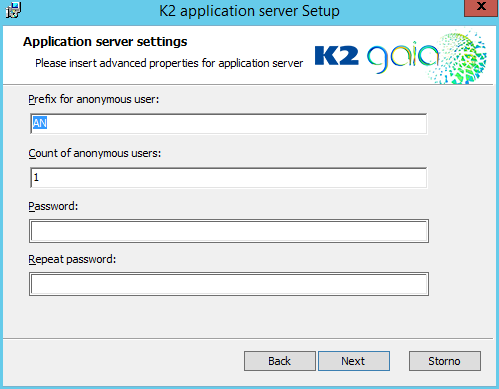
If the Configure application server also for web services server option is checked, then a dialogue follows, see Pict: Application server settings that prompts user for an anonymous user prefix, number of users, and user password. These users must be created in IS K2 before the installation of AS and should be numbered in ascending order, e.g. AN1, AN2, etc. where AN is the prefix followed by the serial number. All of these users must have same password.
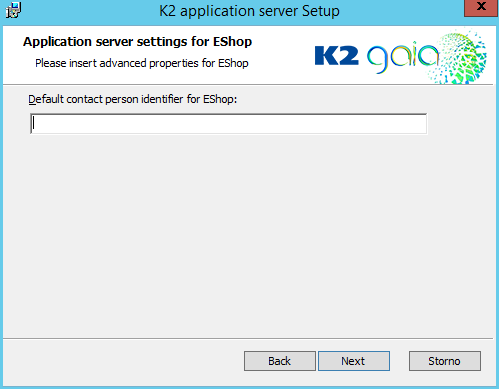
If the Configure for eshop option is checked, the dialogue for Application server for Eshop settings will be displayed as the next installation step, see Pict. Number of the default contact person for EShop. Here user enters the number of the contact person through whom the anonymous e-shop user logs in. This contact person must have a registration assigned. The "AS3ContactPerson" parameter is also included in the "K2.INI" application server.
If the Configure for contact center option is checked, a dialogue will also be displayed within the application server installation, see Pict. K2 user for the contact center. On this screen, enter the name of the user under which the contact center is running in IS K2 and also the password. The values entered here are then added to the "K2.INI" application server as the "CCUSER" and "CCPASWORD" parameters. The parameter "CONTACTCENTERSERVICE = 1" is also added to "K2.INI".
Picture: Application server settings
Picture: Number of the default contact person for EShop
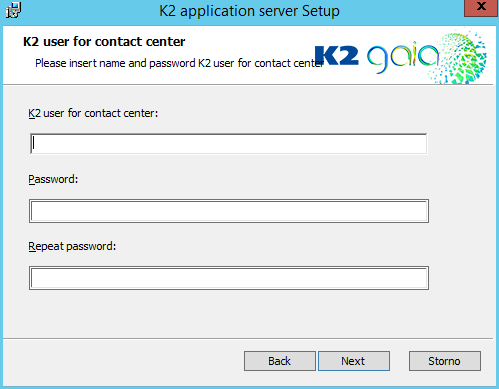
Picture: K2 user for contact centre
Next dialogue in installation is entering the name and password of the user under which the application server service will run. A local system account can be used, see Pict. Local system account - AS or a Windows account of a user who requires a password, see Pict..: Windows user 2 - AS
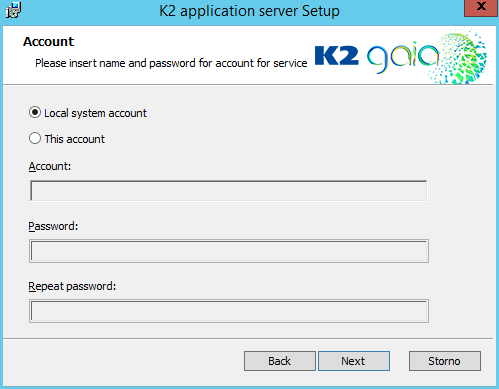
Picture: Local system account - AS
A domain user can also be used with a password, see Pict.: Windows user 2 - AS
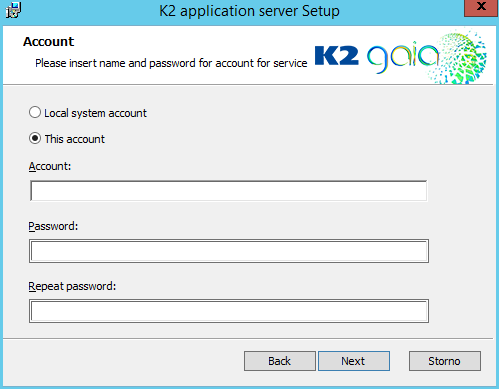
Picture: Windows user 2 - AS
After pressing the Next button, the passwords are checked for compliance. If they are not same, the user is prompted to correct them. Another dialogue in the installation is to enter the K2 user under which the application server will connect to the IS K2. It is possible to use an already created user or create a special user that will only be used to connect to the AS. It is not necessary to have a reserved license for users who will connect to the AS, see Pict.: K2 user - AS
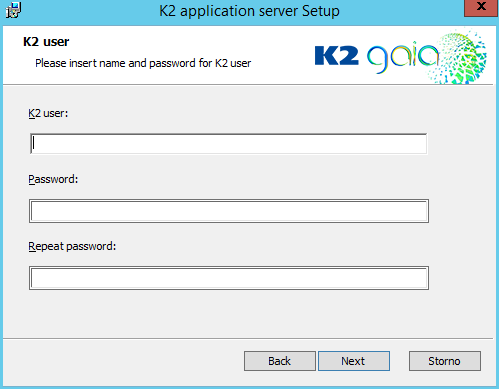
Picture: K2 user - AS
After pressing the Next button, the passwords are checked for compliance. If they are not same, the user is prompted to correct them.
If the passwords are the same, then a dialogue will be displayed informing the user that the installation is ready. Clicking the Install button will then start the installation process itself.
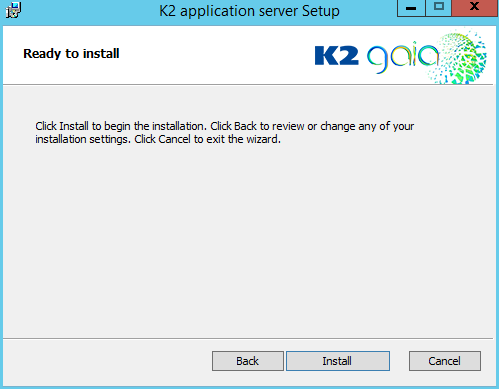
Picture: Installation confirmation
After a successful installation, the user is shown the last dialogue about a successful installation, see Pict.: End of installation

Picture: End of installation
At the end of the installation or reinstallation of the Application Server, a text file with a list of users may be displayed. The reason is the stricter security policy of IS K2 user accounts.
Individual users can be denied access from the web to IS K2 and all users have this access denied after reinstallation. In the text file, at the end of the installation, a list of all users who have a link to the contact person and are also denied access via the web is displayed. These will not be able to use some features, such as approving wkfl from email. For these users, it is necessary to set access from the web in the book Users - password settings.
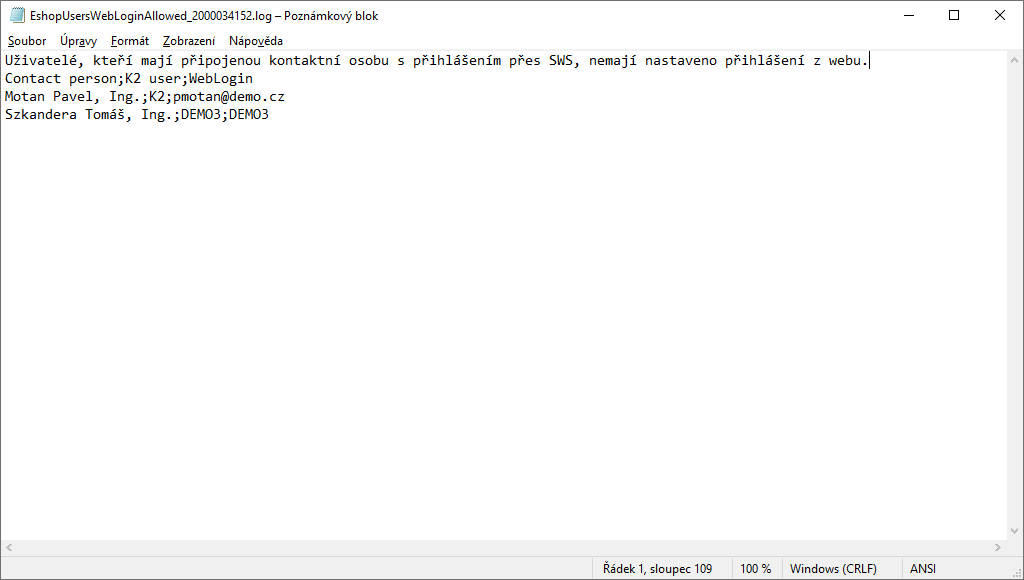
Picture: Text file with list of users
|
|
|
IIS Installation
K2 EShop must be used on a server operating system in live operation - Microsoft Windows server. Supported versions of this system are available in “System requirements” document according to K2 IS version. Installation on client operation system is possible but only for test or viewing DEMO installation. This document describes the server installation of IIS and all other system components necessary to run K2 Eshop.
Next step is IIS installation (Internet information service administrator. First is necessary to run Server administrator and then Add role and functionoption.
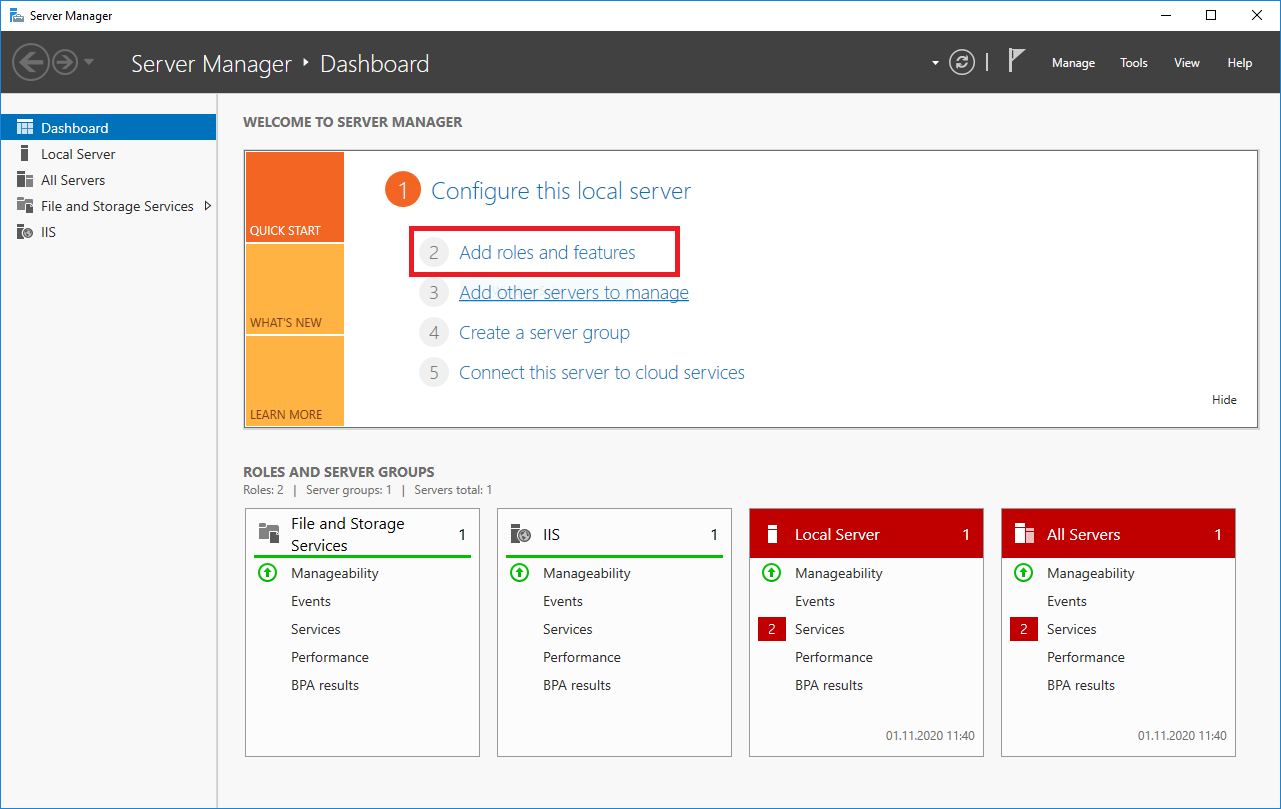
Picture: Server administrator
First step are instructions before the installation itself, after studying them, move to the next step with the Next button.
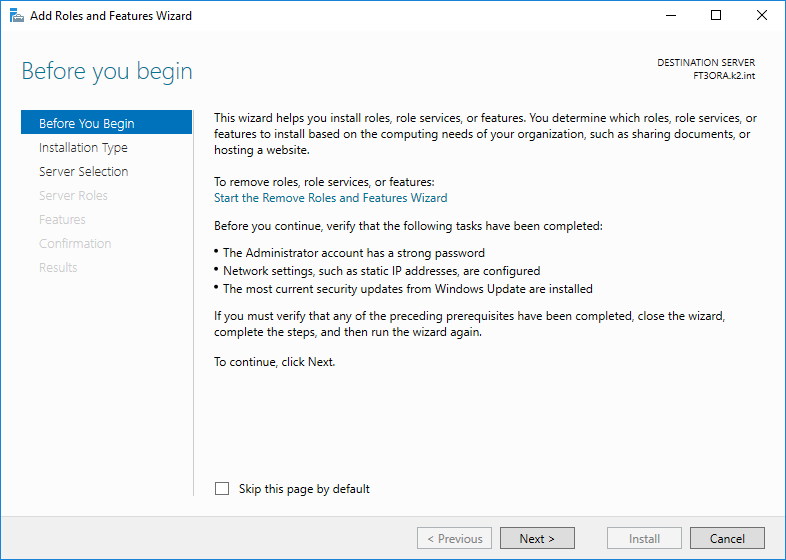
Picture: Add guide
In next step user chooses the type of installation - Installation based on role or function.
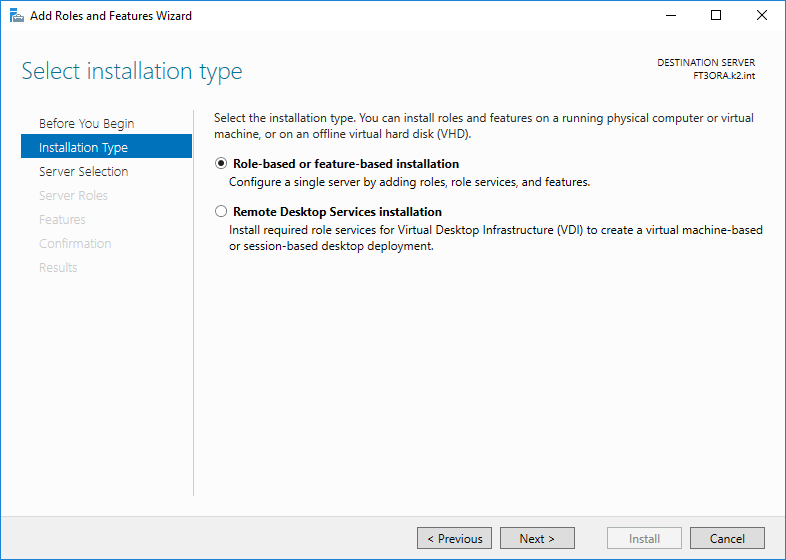
Picture: Type of installation
Selection of server, where the IIS should be installed.
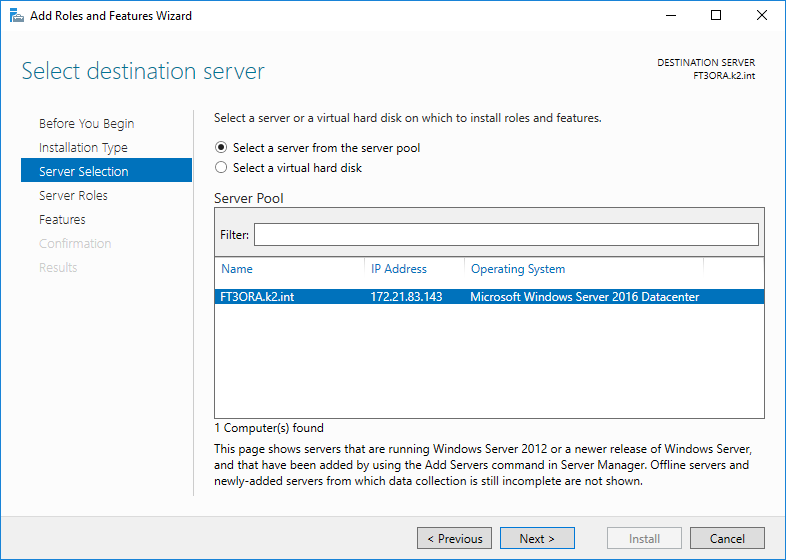
Picture: Server selection
In next step, in addition to the default checked functions, it is necessary to check the “Web server (IIS)”.

Picture: Server roles
Next step is function definition. User sets Net Framework according to installation and option. Here user needs to keep the default settings and add application development (.NET 4.5, ASP.NET 4.5), Administrative Tools (including IIS 6 compatibility) and Do not check"WebDAV publishing".
Add: ASP.NET 4.6 and under HTTP Activation (under WCF Services).
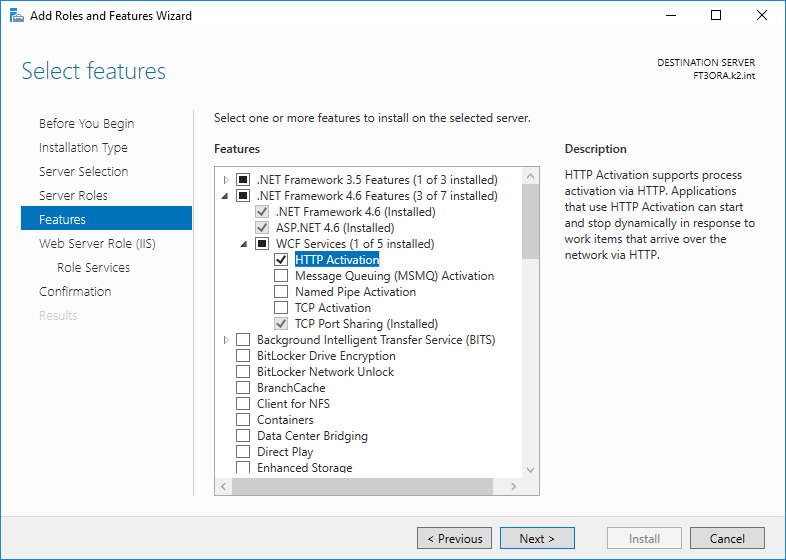
Picture: Function
In next step check CGI (under Application development) - for eshop it is necessary, for API not.

Picture: Role services
In the same step Role services IIS 6 Metabase Compatibility need to be set.
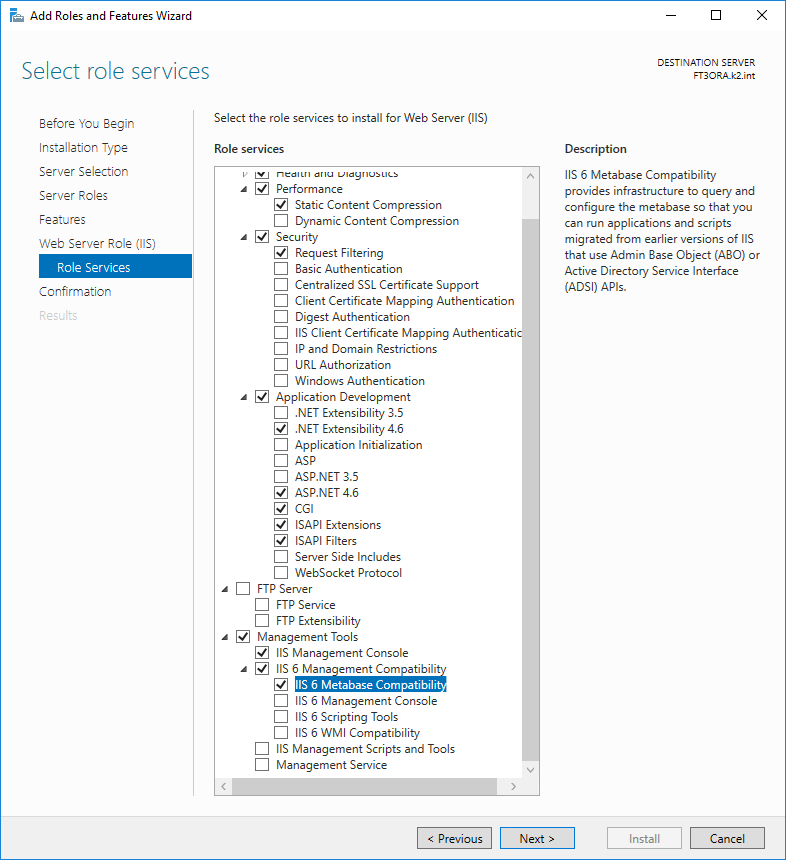
Picture: Role services
In the last step the user confirms previous setting-
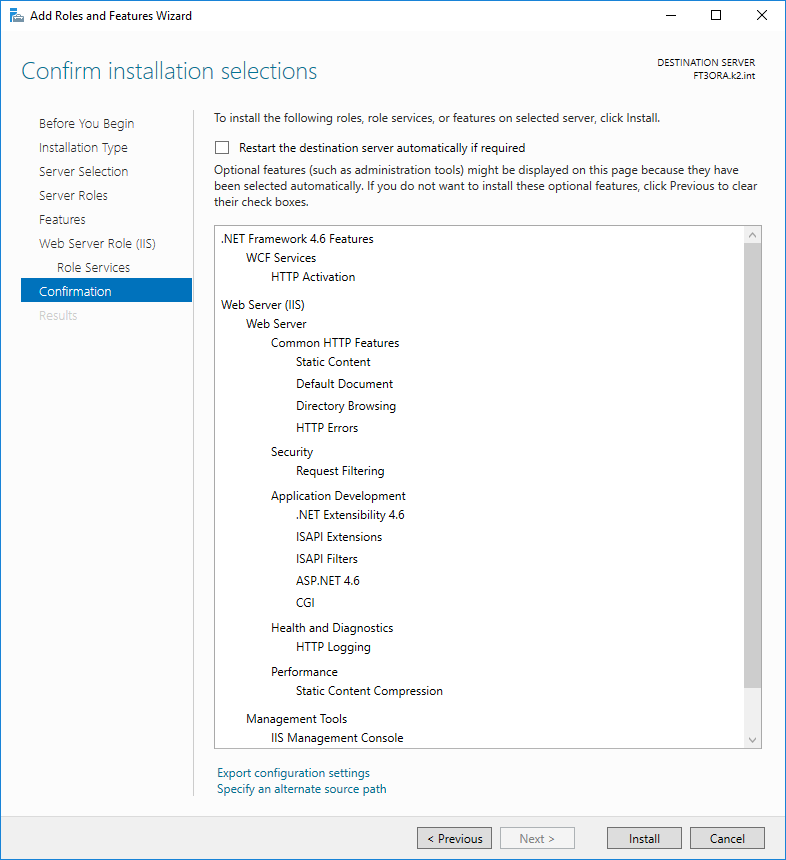
Picture: Installation confirmation
|
|
|
K2 installation
Server of web services K2 (API) is a web application which run on the web server Microsoft Internet Information Services (IIS). Through the application server K2, it makes the data of the K2 information system accessible and allows running scripts and reports. Web services are based on the REST technique, i. e. communication is running via HTTP protocol and via standard methods GET (reading data), POST (creating data), PUT (modification of existing data).
Data can be read or sent in XML or JSON format.
After entering the root URL address API into the browser can browse the basic description of the services and resources/operations using dynamic help.
Installation and basic settings
Prerequisites:
- At least one API thread (Number of Shared Users) must be available in theK2 license and the corresponding number of anonymous users with a login composed of the same prefix and a supplemented serial number at the end (e.g. "AN1" - "AN5") must be created in the K2. These users must have the same rights and the same password.
- The installed and running application server with the checked "Configure application server for web services server" and “Configure application server for Eshop during the installation. If this options were not checked during installation, it is possible to add the following parameters in theK2.INI configuration file for an existing AS installation (example for 5 threads and users named AN1 - AN5):
- AS3USER='AN'
- AS3PASSWORD='ANPassword'
- AS3USERS=5
- AS3IO=2000034152
- AS3Contactperson=65 (contact number, which serves as a anonymous users access)
- The server on which the API will be installed must have the IIS with installed support of ASP.NET and WCF. When installing IIS, the following components must be selected:
- Roles: Default + Application Development (.NET 4.5, ASP.NET 4.5), Administrative Tools (including IIS 6 compatibility); Don't check: Publishing WebDAV
- Function: Activation Service (Process Model), WCF Services (HTTP Activation), .NET 4.5, ASP.NET 4.5
- In case of HTTPS installation correctly set certificate in IIS
- In case of publication API for internet access, allowed used HTTP / HTTPS ports (80/443 by default)
Recommended deployment for accessing API from the Internet:
The K2 application server should always be installed on a server accessible only on the internal network. It is recommended to install K2 API and other web applications on a separate server that is accessible from the Internet and has limited access to the internal network allowing only communication with K2 AS.
Installation of K2 API :
This is done using the K2 Installer. The K2 API installation program checks the availability of the basic required components before starting the installation, eventually warns of missing components and the installation is stopped.
You need to enter some information during the installation:
- Target directory - any directory can be selected, it does not have to be in the IIS root directory
- IIS Server Name - enter the name that will be used to access the API server. For test installations it is also possible to enter "localhost" - under this name API will be available only on the given server.
- Web Site (IIS) - user chooses, to which Web Site he/she wants to install API. By default, only "Default Web Site" is available on IIS.
- Application name on IIS - part of the URL address to API after the server name. If the name of the server is "mujserver.cz" and user specifies "restservice" as the name of the application, then the basic URL for accessing API will be http://myserver.com/restservice
- The name or IP address of the computer where the K2 AS is running
- K2 AS instance name - specified when installing K2 AS
The most common problems with API installation and configuration
- Wrong name or IP address of the AS server or wrong name of the AS instance - check and possibly edit it manually in the K2 API configuration file - web.config file in the API installation directory. Check that nothing is blocking network communication between the SWS server and the AS server
- AS is not configured for API - add configuration, see the Prerequisites section above
- Anonymous users are missing or prohibited - see the Prerequisites section above
- There is no number of shared users in the K2 licence or this number is exceeded - update the K2 licence
- Missing IIS components - check IIS components, see the Prerequisites section above
- Missing permission for IIS process (see pict.)
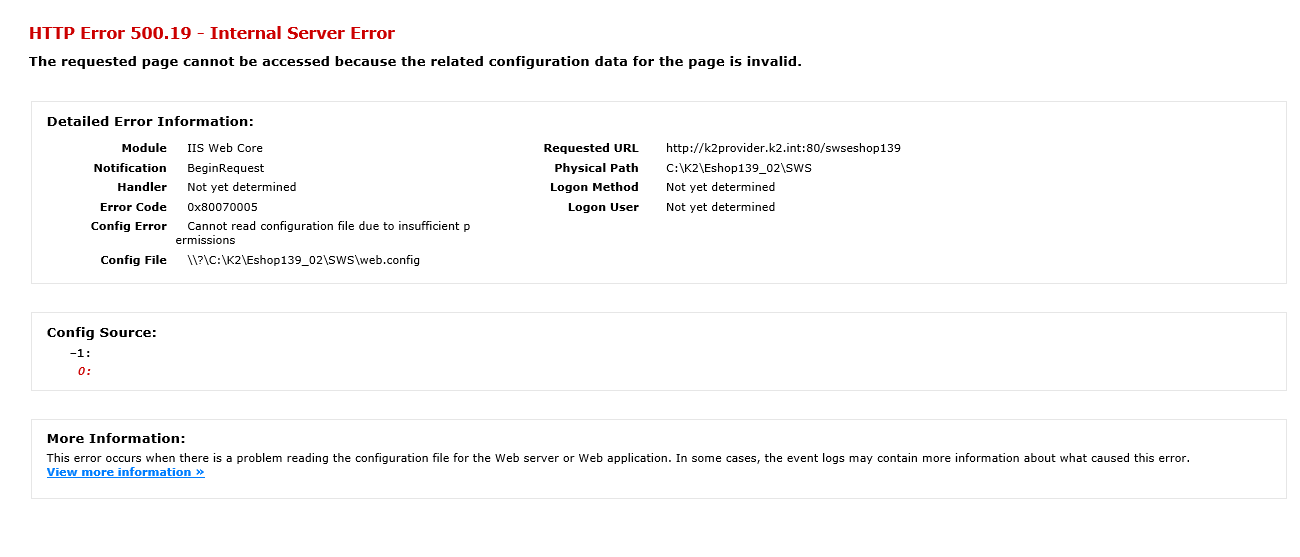
Picture: Missing permission
Permissions must be added to these users.
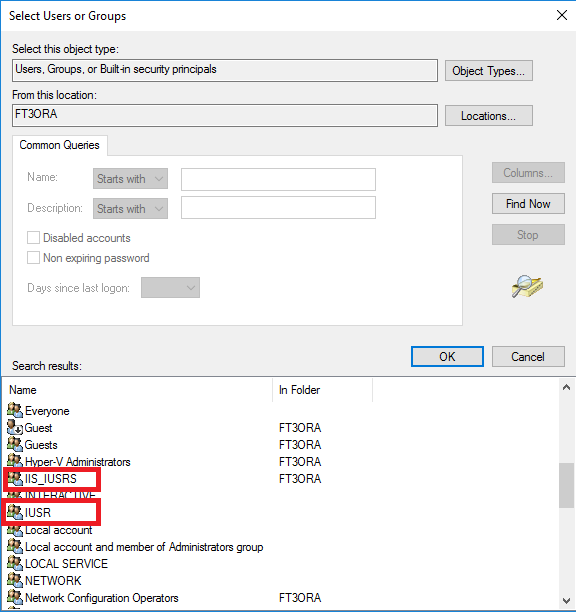
Picture: Users
In most cases logging API or AS will help. API logging is activated in theweb.config configuration file, using parameters LogPath (log file path), LogLevel (types of messages to be recorded, at least Info is recommended for debugging), LogRequests (allows user to track the processing of individual API requests even multiple requests at once).
|
|
|
PHP Installation
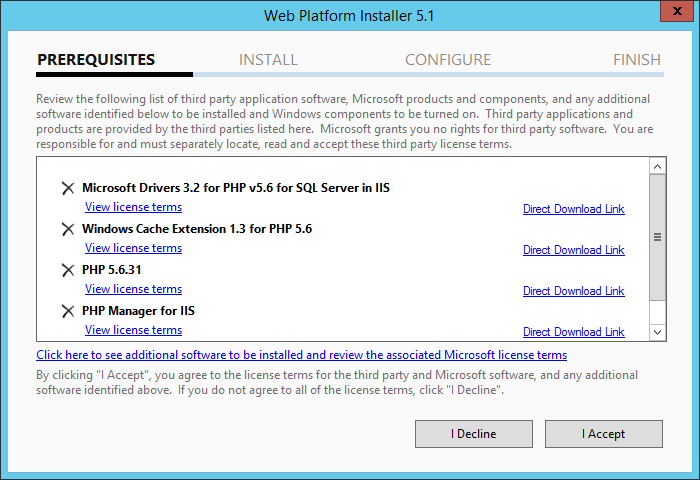
Using “WEB platform Instaler” user installs PHP. For eshop it is necessary PHP version 5.6 and higher. For some OS, may not be able to install PHP Manager. It is not a necessary supplement, but it is suitable and recommended.
If the PHP manager cannot be installed, the link below describes how to install it.
Link how to install PHP manager:
https://answers.microsoft.com/en-us/windows/forum/windows_10-other_settings/php-manager-for-iis-on-windows-10/33ef32f0-6a86-4803-abc1-6de81110f9a8?auth=1
Using Web platform instaler user finds PHP 5.6 and starts an installation
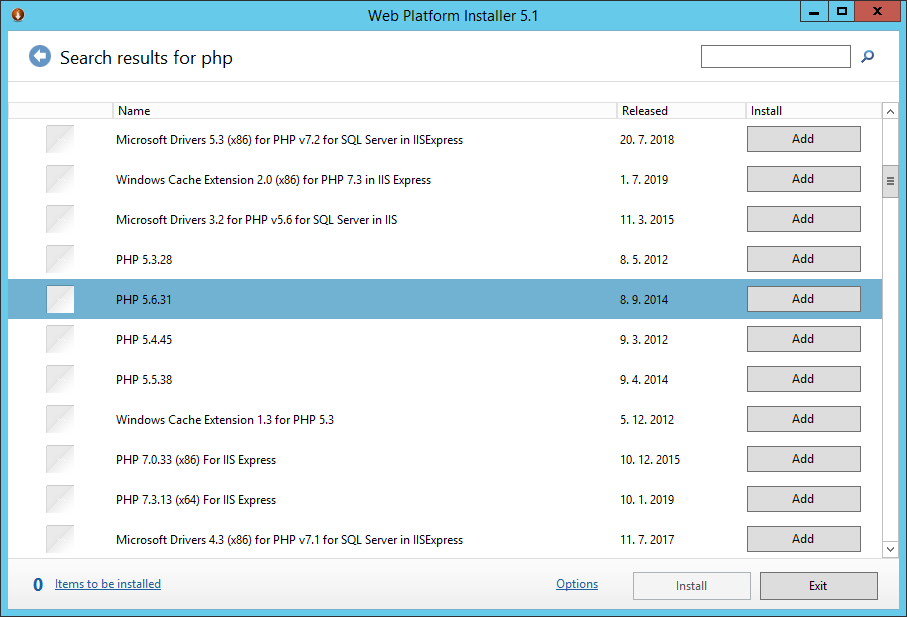
Picture: Installation of PHP version 5.6
Picture: Installation of PHP version 5.6
If PHP manager is installed, it is possible to check if the installation was successful using the Checkphpinfo function.
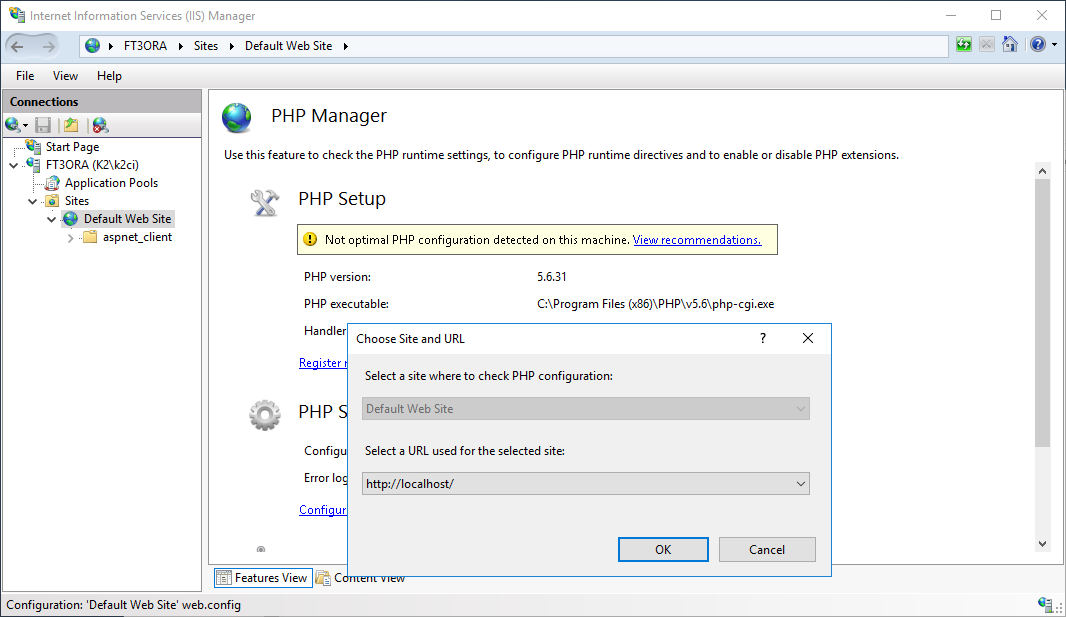
Picture: Installation verification
If the PHP is installed correctly, following page will display.
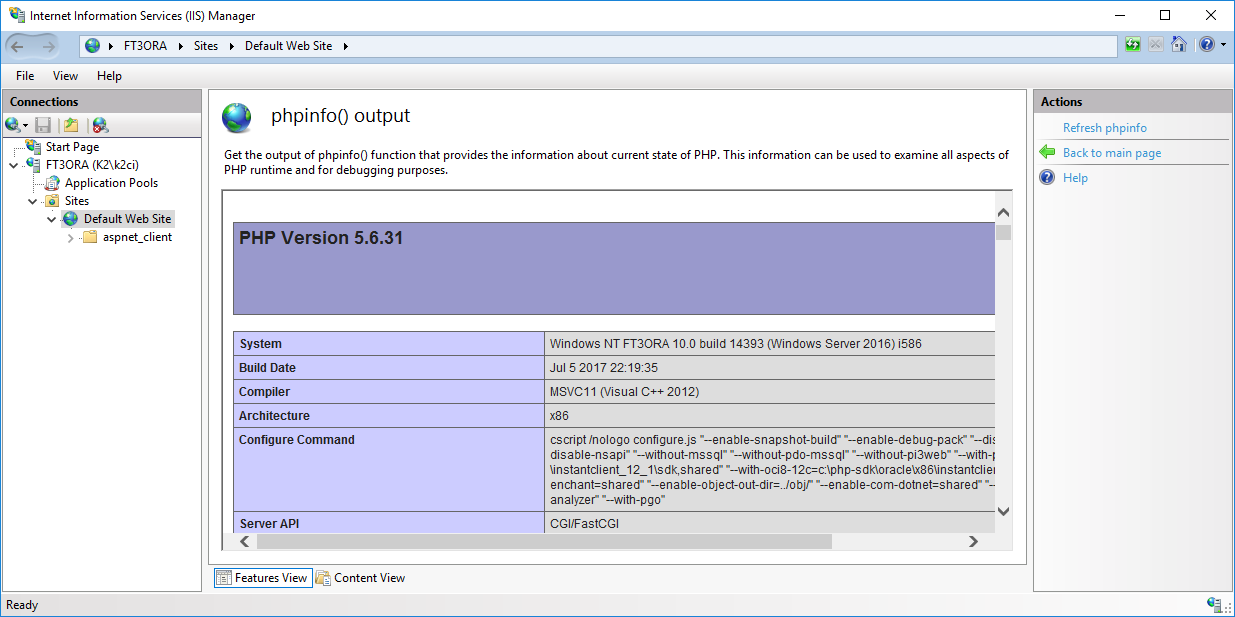
Picture: Installation verification
|
|
|
K2 E-shop
|
|
|
Description
This installation package is used to install the K2 online store. The K2 E-shop application runs within the Internet information service. The K2 E-shop uses web services to connect to the K2 IS and then the application server. The installation of the K2 E-shop therefore already assumes their existence.
|
|
|
Software requirements
The first condition for the installation of the K2 E-shop is the installation of Internet Information Services, further only IIS, version 6.0 and higher. If IIS is not installed, a warning message is displayed at the beginning of the installation. Within IIS, user must have the Common Gateway Interface (CGI) option checked in the Web Services - Application Development Function. This option is required for PHP functionality within IIS.
The second requirement for the functionality of the K2 E-shop is the extension of IIS with URL Rewrite. Installing this extension translates URL addresses into a readable form. If this extension is not installed, the installer will display a message with a download link. Rewrite URL installation is also included on the Other installations tab, from where it can be downloaded and installed.
Picture: Installer message (missing Rewrite URL)
The last requirement is to install PHP version 5.6 support on IIS. If this support is not installed, the installer informs you with the displayed message. PHP support installation is available on the Other installations tab. However, there is no installer for PHP version 5.6. It is necessary to first install version 5.3 (available in the installer on the Other installations tab), then download PHP 5.6 and upgrade to this version. The download link for PHP 5.6 is http://windows.php.net/.
Picture: Installer message (missing PHP support)
|
|
|
Installation
After starting the installation and meeting the above software requirements, the first dialogue will be displayed, informing the user that the installer for the K2 E-shop product is running, see Pict .: Start K2 installation.
Picture: Start installation K2 E-shop
After pressing the Next button, user will proceed to the second dialogue, which contains the license agreement.
The Next button takes user to the third dialogue, which is used to select the installation path for the K2 E-shop, see Pict.: Target directory. With the Change button user can browse the classic directory dialogue on physical disks or on the network. We usually install the K2 E-shop in the IIS home directory (the default IIS directory is C: \ inetpub \ wwwroot). The directory name then determines the final form of the e-shop URL, which consists of the IIS address and the directory name with the K2 E-shop product installation.
Picture: Target directory
After selecting the installation path, a dialogue follows, in which user specifies web services for the E-shop. Using these web services, the K2 E-shop connects to the K2 IS. In this dialogue, select the Protocol type (Http or Https), the IIS server name (usually the name of the computer where the web services are installed) and the IIS application name (the name of the web services for K2 E-shop). These three values create the complete URL address for connecting to the web services server.
Picture: Web services for E-shop
To display the next dialogue box, press the Next button again. Here it is then necessary to set login details for anonymous access to the eshop. These are the login details set on the contact person.
Picture: Login for an unregistered user
The last installation dialogue is E-shop settings. Here it is necessary to enter the RID of the internet shop from IS K2 in the E-shop number from K2 field for its unique identification. There is also a field for specifying the URLaddress for accessing the images.
Picture: E-shop settings
After filling in all the data, user continues with the Next button. A dialogue will appear informing the user that the installation is ready. Then use the Install button to start the actual installation of the product.
Picture: Installation ready K2 E-shop
After successful installation, the last dialogue with the result information will be displayed.
Picture: Completing the installation
|
|
|
Pictures for Eshop
Pictures are an inseparably part of an online store. The folder from which the online store will load images must be created in the same place as the IO itself. In this folder it is necessary to set in the "Directory browsing" section to Allow its browsing.
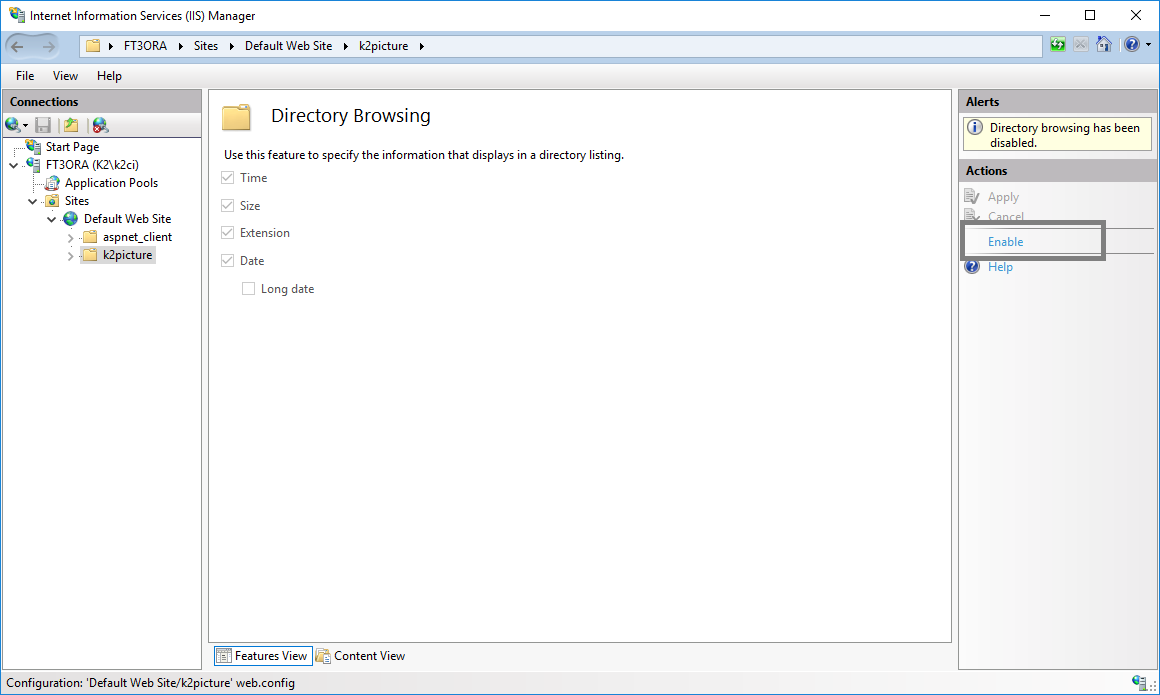
Picture: Settings of browsing the picture folder for Eshop