|
|
|
9th page - Links and References
On 9th page you can attach the external documents and records from the others K2 modules to the records. In the Attached processes part, there the workflow processes, which are related to the record, are displayed.
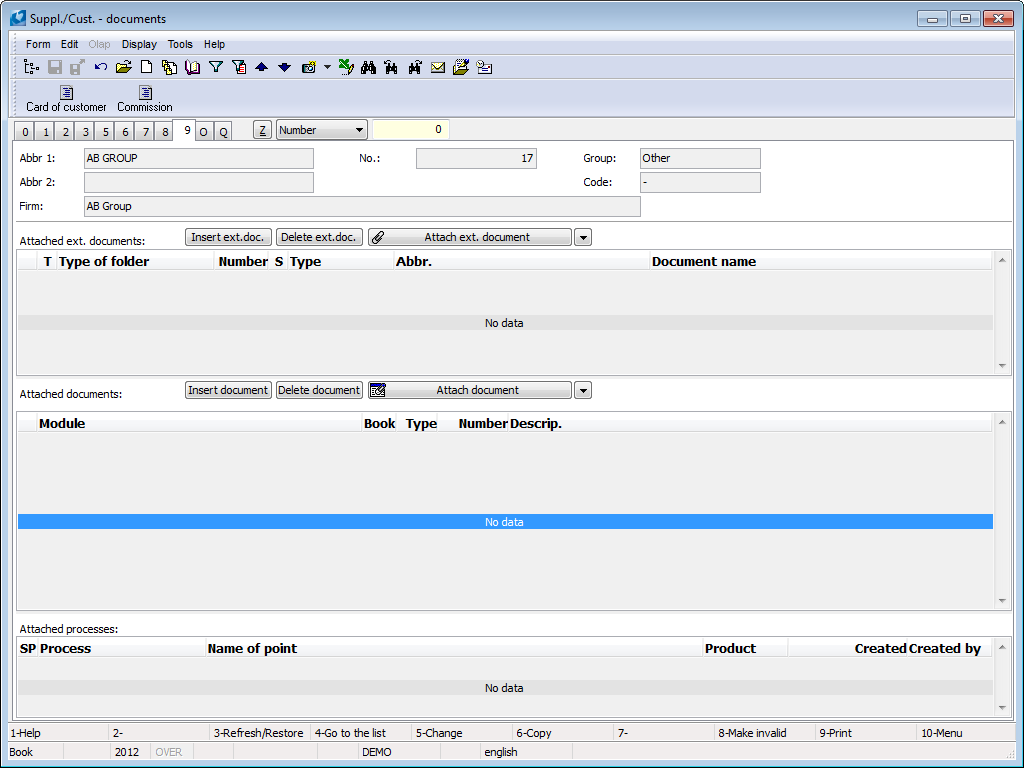
Picture: Suppl./Cust. - 9th Page
On 9th page you can select documents for attachment with the type of link by using Attach document button. After first pressing of this button, menu with types of documents links will be opened. After a selection, the type is remembered and when next pressing of this button, the book with a selected document type will be directly opened. For the selection of a relation type of a document you can use an arrow that is placed next to this button.
You can display the code list of the relations types of documents in the Client parameters - 4th page - the button Linkage types. For every linkage type you can choose a list of documents which are allowed for this link - the Doc. types to linkage types button.
The code list contains these linkage types:
- Tax invoice,
- Actual invoice to tax invoice,
- Original invoice to corrective tax document,
- Original invoice to discount,
- General,
- Corrective tax document,
- Discount.
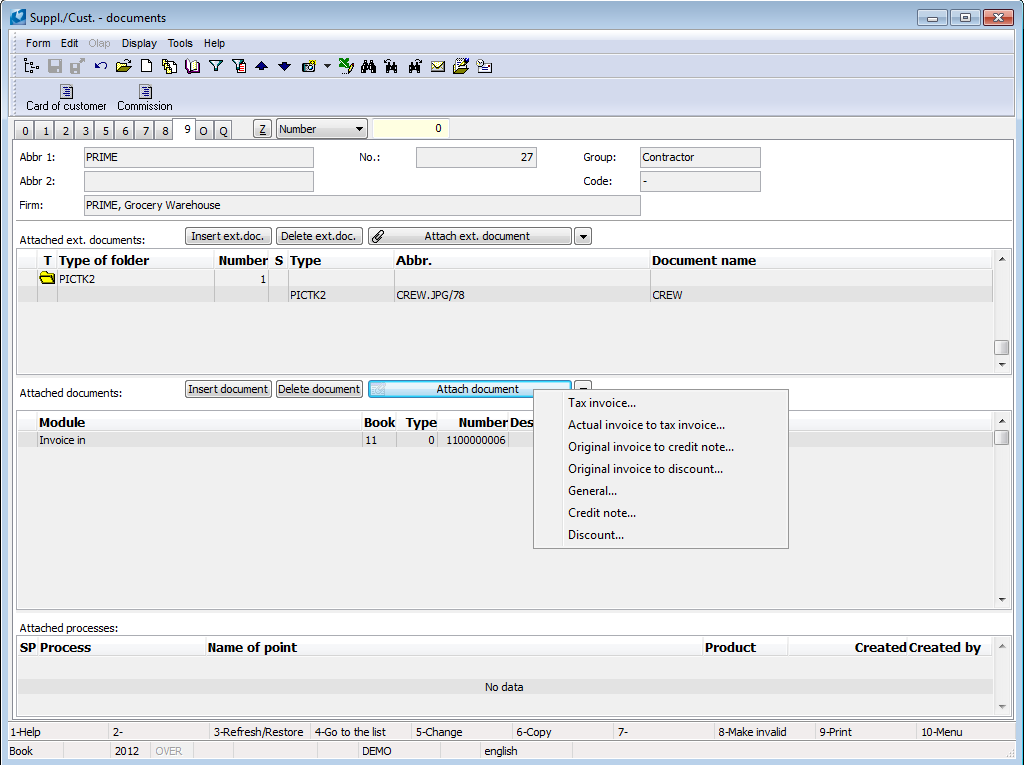
Picture: Opened menu of doc. types
There is the button Attach ext. document, that contains a list of doc. types, on the 9th page of document. You can insert more document together. According to the inserting document, either a type is automatically selected, or the menu with selection of types is displayed. Using of the button is analogous as at the button Attach document.
The code list contains these types of documents:
- ALL: Apply original,
- DS_DOC: DEMO/DSDOC, Unique transfer,
- OFI: Demo/Demands, Unique copy,
- OFO: DEMO/Offers, Unique copy,
- PICTK2: DEMO/Pictures, Apply original,
- PONP: Apply original.
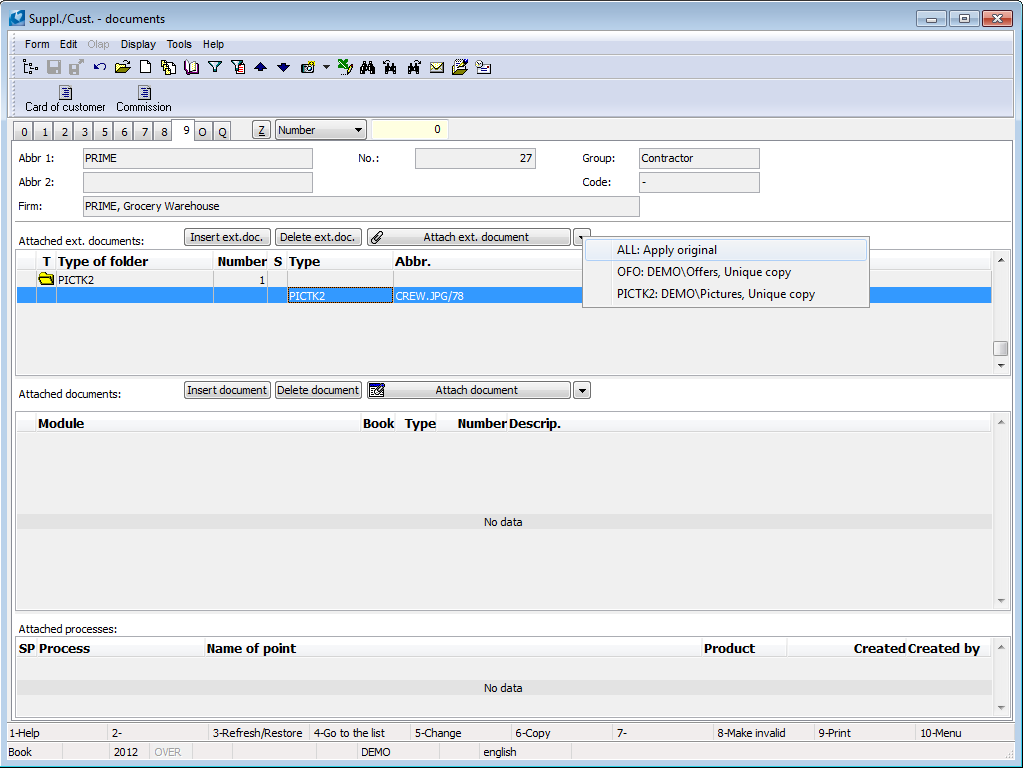
Picture: Opened menu of doc. types
Note: When there is a small monitor resolution, the Attached documents grid can be overlaid. Adjust grids on page 9 function serves to adjust grids to the screen. Function is available from the module menu Form/Actions/Advances/Adjust grids on page 9.
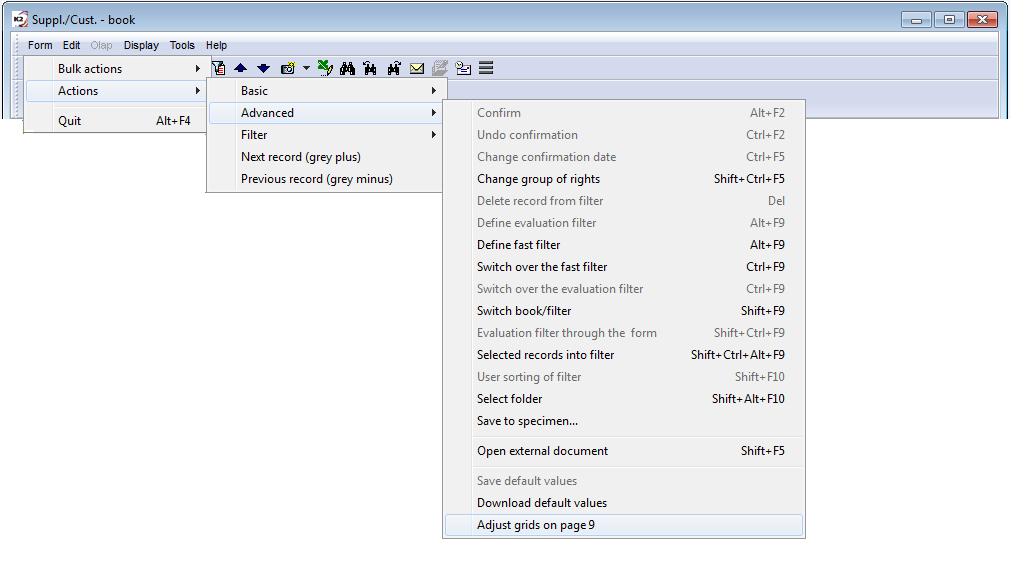
Picture: Actions - Adjust grids on page 9
|
|
|
External documents
To particular documents or cards you can assign external documents in K2 IS. The external document is a file created by one of the Windows applications and saved in a concrete Windows folder. External documents assigned by this way you can view or edit. For editing it is used either associated application by Windows system or application set in external documents parameters. It deals e. g. on contract saved in a format of text file, photographs, charts, graphic tables, drawings, etc. Proper external documents are saved in disk directories. In K2 IS only references on these external documents that are saved in a special database are stated.
|
|
|
Insert and delete external documents from documents
External documents you can attach, change and detach by this way:
- In a Change mode (only in cards of unconfirmed documents) and in a New mode it is possible to attach external documents to document by Ins key or by pressing the button Insert ext. doc. You can detach external document by Del key.
- In a Browse mode you can work with external documents in confirmed documents as well by pressing the buttons Insert ext. doc. and Delete ext. doc.
By pressing Enter key in the External documents book you can open their form.
Picture: Ext. documents book
|
|
|
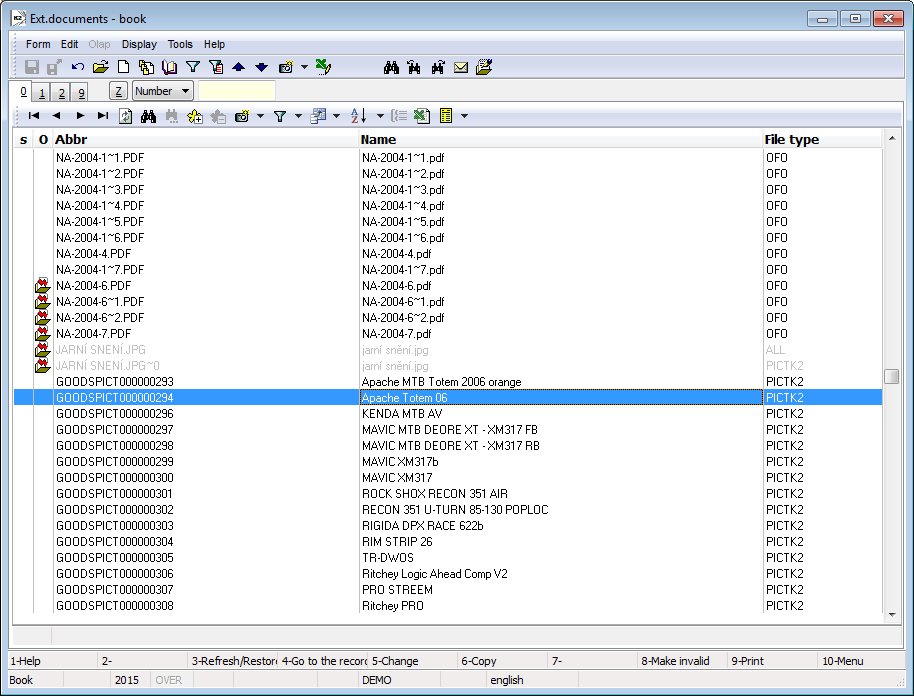
There are basic data, items of a history of a work with a document and attached notes on the 1st page of an External documents card.
Picture: Ext. documents - 1st page
Fields Description:
Abbreviation |
Abbreviation of an external document is obligatory. Two external documents can not have the same abbreviation. It serves as an identifying code of external documents according to that you can find the external documents. |
No. |
External document number. |
MTB |
By checking this field you can open external documents from parallel database (if it exists). Note: When the field is checked, the Ext. document file field is changed to the Ext. document key field. |
Ext. document type |
It characterizes document type and configuration of an appropriate file type in K2 too (the way of copying from an original folder, an associated application, parameters etc.). Ext. document types are described below. |
Name |
You can fill in this item by an arbitrary name or it will be automatically preset by a name of an attached file after pressing the Select button. In this case a name will be written without suffix. |
Ext. document file |
Name of an ext. document file including path, whence a document of IS K2 will be opened. You can enter a file only in a new record. If you select a file by a dialog window, a non-existent file can be entered. If you use the Select button, this field will be filled automatically according to the settings in Ext. document type. |
Original file |
It contains a file name and a complete path, where the file was found before an inclusion the document into database. You can enter a file only in a new record. If you use the Select button, this field will be filled automatically according to the settings in Ext. document type. |
Validity from |
On an ext. document, which you are inserting, you can write a validity of this ext. document from the certain date. |
Validity to |
Possibility to write a validity to of the date of an ext. document, which you are inserting. |
Assigned for |
Selection of a company, to which the ext. document relates. It is selected from the Own companies form (a list of companies defined for a current client). You can find the description of own companies in the Administration of own companies chapter. |
Ext. document history |
Every action, which is executed with an ext. document by a user by using K2, is recorded into the history items (inclusion of ext. document, removal, opening, opening failure, assignment to document, change header etc.). Time of an action, who and which action performed and in what document are recorded here. The items of history are not accessible in Change mode. |
Doc. inserted by, Doc. changed by, File changed on, Changed by |
These fields are filled in automatically. |
The Select button is accessible with inserting a new ext. document. A selection dialog of the files, which is defined in the Input folder field in the Ext. document types book, is opened by pressing this button. When you save a new ext. document, the appropriate actions according to a document type (copying, movement, creating new file name, ...) will be performed and the File and Original file fields won't be accessible.
|
|
|
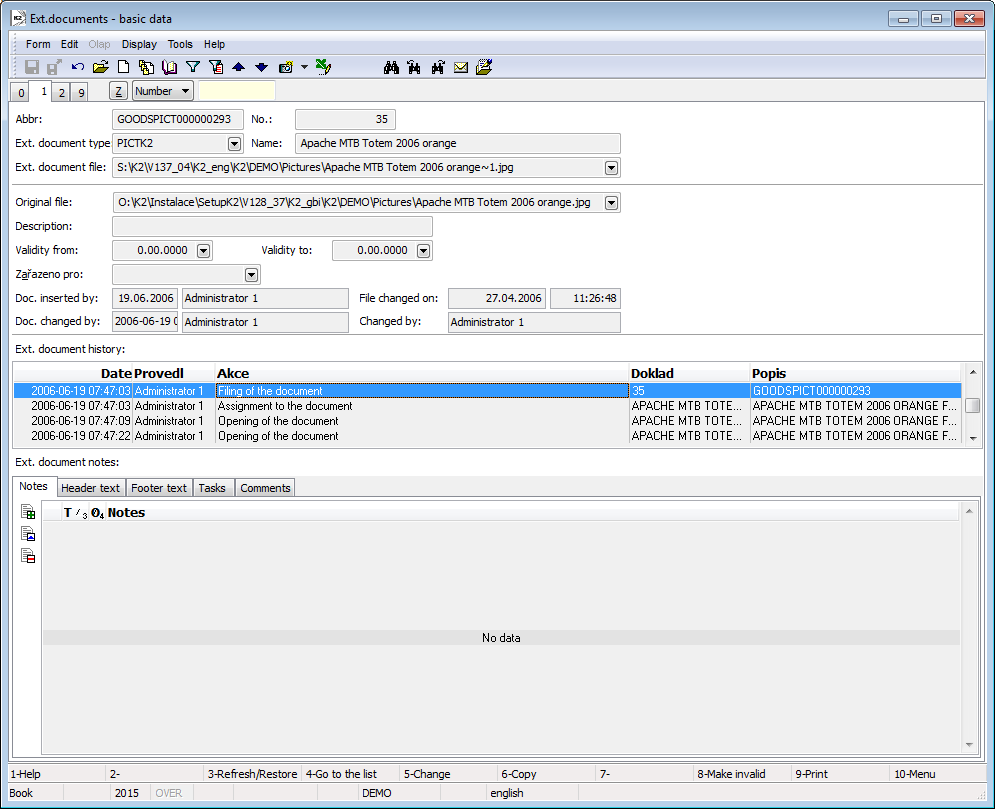
On the 2nd page of the Ext. Documents card the list of the records is given. To these records the document is assigned.
Picture: External documents - 2nd page
|
|
|
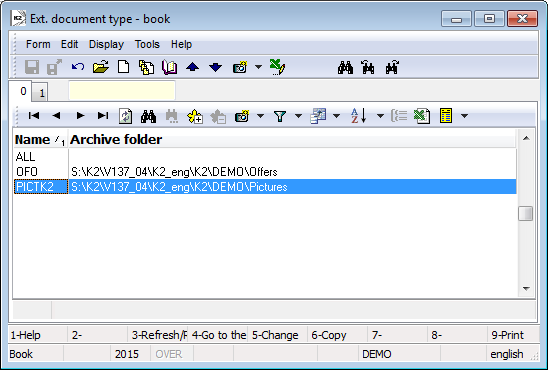
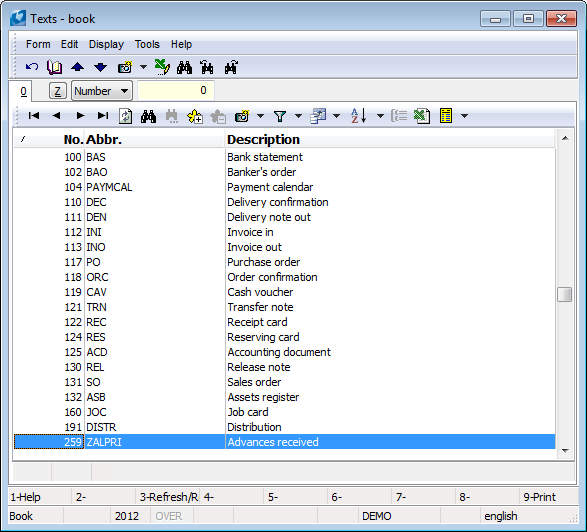
External document types
External document types used in K2 IS:
- OFO- serves to creating offers in the Marketing module,
- OFI - serves to creating offers in the Marketing module,
- PCITK2 - serves to pictures inserting.
Picture: Ext. document type book
|
|
|
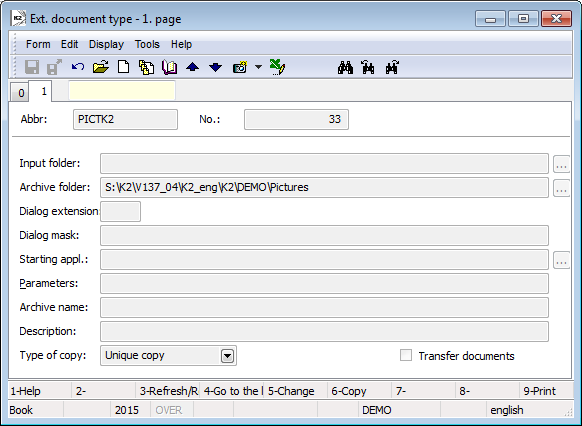
Picture: Ext. document type - 1st page
Fields Description:
Abbr |
An abbreviation of an external document type. |
||
No. |
A number of an external document type. |
||
Input folder |
Presetting a folder (directory) where a selection dialog of the files will be opened after pressing the button in an edit field or after pressing the button Selection on the 1st page of external documents. If this item is not entered, it will be done according to the last used folder (directory) after pressing the Selection button. |
||
Archive folder |
The folder (directory) where the file will be copied or moved so that they become part of the K2 arrangement files. The filling this field is obligatory. |
||
Dialog extension |
The default suffix (extension) file dialog. |
||
Dialog mask |
The file type in a standard selecting dialog of files in Windows (after pressing the Selection button on the 1st page of an external document form). Individual sequences of characters in the text in the order of [name],[extension],[name],[extension], ... must be separated by a "vertical line". E.g. Text: Text files|*.txt|Word|*.doc|All files|*.* This example of a text fills the table by 3 types of files: by text files (files with the "txt" extension), by MS Word texts (files with the "doc" extension) and by all files. If you want to have stated more file types in one line of a standard file selection dialog, you separate them with '#'. E.g. Text: Text files |*.txt|Documents|*.doc#*.rtf |
||
|
This example of a text fill the table with text files (files with "txt" extension) and external documents (files with „doc“ and „rtf“ extension) as well. If you select the external documents in a selection, the files with „doc“ and „rtf“ extension will display in a table immediately. |
||
Starting appl. |
You fill this field if you want to open an external document any other than the associated application. The name of a Windows starting file which requires running the application is filled (including a path). |
||
Parameters |
Parameters are filled in that case that the field Starting appl. is filled. Here are entered sequences of characters of parameters specified after the file name of a starting application. Parameter '%S' will be supplied after the file name of an external document including path during runtime. |
||
Archive name |
If you need to replace an original file name by concrete name, this field will not be filled. |
||
Type of copy |
In a selection you can choose what will be done with an original file during assorting an external document and how the file will get a part of K2 IS: |
||
|
Apply original |
File won't be copied or moved and only a link of original location will be written to the database. |
|
|
Overwrite by the copy |
The file will be copied to the Archive folder. If in the Archive folder will be the filed with the same name, it will be overwrite by a new file. |
|
|
Overwrite by transfer |
The file will be moved to the Archive folder. If in the Archive folder will be the filed with the same name, it will be overwrite by a new file. |
|
|
Unique transfer (default) |
The file will be copied to the Archive folder. If in the Archive folder will be the file with the same name, a new name with different number in last characters of a name will be created. |
|
|
Unique copy |
The file will be moved to the Archive folder. If in the Archive folder will be the file with the same name, a new name with different number in last characters of a name will be created. |
|
Transfer documents |
If this field is not checked, the external document does not enter into transfer. |
||
|
|
|
Open and close external documents
The function for opening and closing an external document you can start by following ways:
- By pressing the right mouse button in a bar and selection of the offered options Open external document and Close external document.
- By pressing Shift+F5 key - this key work for opening and for closing external document as well (only in a Browse mode).
- By Module menu Form - Actions - Advanced - Open external document/Close external document.
- By pressing Enter key.
It is possible to open and close external documents:
- on 9th page of documents or cards forms,
- of the table External documents or of individual pages of external document form.
In the both cases you set the light indicator on a selected external document and run the function open (close). The difference in the procedure of open (close) will be captured in the items of external documents history in the Document column. Whereas in the first case there it can be stated e. g. Invoice out (there will be stated a book and a period) or Suppl./Cust., in the next case it will be External documents.
Open
|
After pressing this button an external document will be opened by appropriate application. After open K2 IS registers the external document as opened. |
Close
|
Closing external documents is done in 2 steps:
Note: This icon is not in a standard setting user panel, you can select it however. |
Note: If you have opened one of the documents, you couldn't insert a new document to the table and you couldn't execute changes to the existing documents. As well another document can be opened after that a previous document was closed.
Note: On the 1st page of documents forms or cards you can insert note with type Document by a standard way. Administration of these documents isn't further supported.
Icons for display state of document:
![]() Icon of Opened document
Icon of Opened document
![]() Icon of Non-existent document - this icon informs about that appropriate file is disturbed or doesn't exist
Icon of Non-existent document - this icon informs about that appropriate file is disturbed or doesn't exist
Listed icons are displayed in these places:
- on 9th page of documents or cards forms,
- of the table External documents or of individual pages of external document form.
|
|
|
Documents
Documents created in K2 IS are inserted on the 9th page by using Insert document button or in Change mode and in New record by Ins key. Choose the document type from the displayed menu.
Picture: The Document types code list
By confirming a selection, one opens a list of documents and by Enter key, you insert a link to a required document. You can also insert the documents in bulk. Mark the documents, which you want to insert, and confirm the selection by Enter key. You can save it by standard way by using F2 key.
You can remove the inserted record by the Delete document button (or by the Del key).

Picture: The Suppl./Cust. card - 9th page
|
|
|
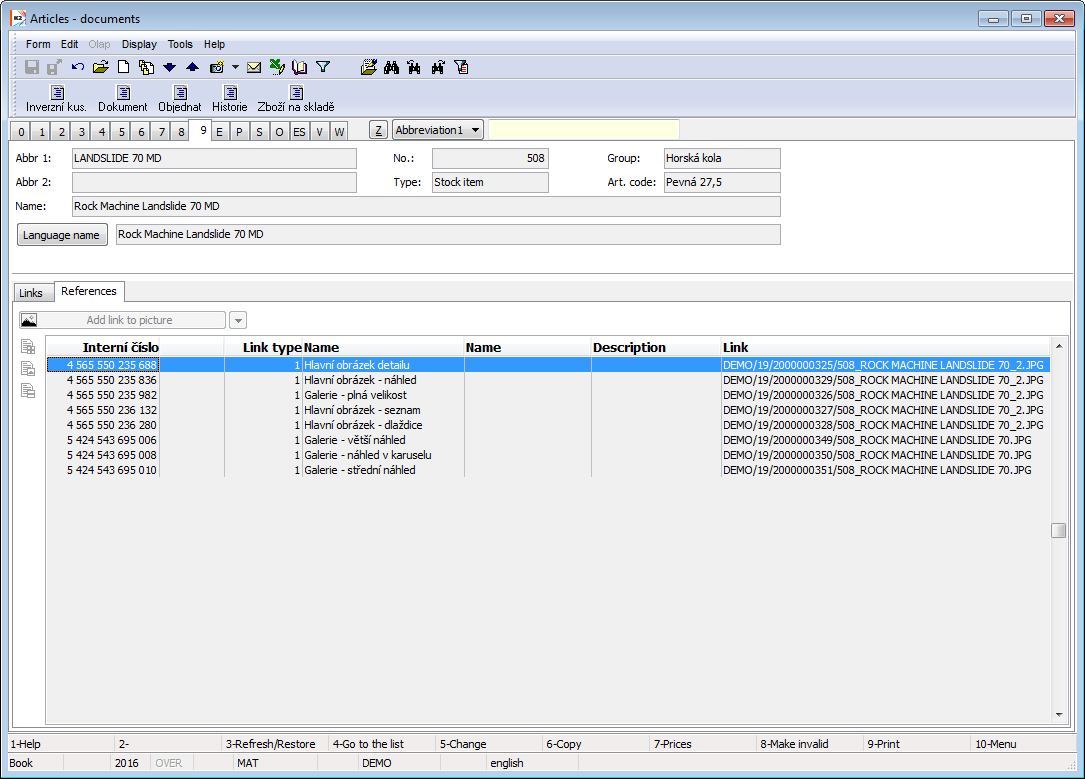
References
In some modules, it is possible to switch over References tab on the 9th page. It is used now in especially in the web shop to attach pictures and other related files, that should be displayed in web shop.
Picture: References tab on the 9th page
In references we work with Categories and Types of links.
Overview and settings of Types of links
Type |
Files extensions |
Document |
doc, docx, odt, fodt, rtf, txt, xls, xlsx, ods, fods, csv, sylk, xml, pdf |
Picture |
jpg, jpeg, png, bpm, gif |
Link |
http:, https:, ftp:, sftp: |
Other |
|
Video |
mov, avi, mp4, mpg, mpe, mpeg |
Overview of categories and their default combinations with Types of links
Type |
Category - Abbreviation |
Application for i-shop |
Document |
Documents |
It is displayed on Media tab in Documents section |
Picture |
Main picture of the detail* |
For article detail, banners |
Picture |
Main picture - tile* |
For displaying in a tile list of articles |
Picture |
Main picture - view* |
For bascet, history, icons of categories |
Picture |
Main picture - list* |
For displaying in a line list of articles |
Picture |
Gallery - view in scroll bar |
For a view in scroll bar of a displayed gallery |
Picture |
Gallery - full size |
Full size of a picture from gallery |
Picture |
Gallery - medium-size view |
For overview of pictures in the gallery |
Picture |
Gallery - larger-size view |
It is not used at this moment. |
Link |
Youtube |
It is displayed on Media tab in Videos and Documents sections |
Other |
Other |
It is not used for i-shop. |
Video |
Videos |
It is displayed on Media tab in Videos section |
* There can be only one picture of this category for the purposes of i-shop on the Articles card or on the other records; It graphically represents the given record. |
||
New particular reference can be inserted by the buttons, which are displayed under tab label, by dragging the file to the table or by using Ins key. Then you can set or edit Name and Description of a reference.
Adding new reference by using the button
The button with an arrow enables to insert new reference from default combinations of references types and category (see above). The large button displays the last used combination. By its pressing, right this combination is selected. Dialog box for the file selection is displayed. According to a type of a link, a filter, that corresponds to the endings of the files of a given type, will be displayed. You can switch the filter off, when you choose All files (*.*) next to the field for a file name. Then you can choose file of random type. By using the Open button, the selected file will be copied on the place, which is set by the Configuration of saving of picture references function, and new record with this reference will be created in the table.
Adding new reference by file dragging
If you "drag" the file, which is displayed in a folder, into a reference table in the Change mode, an offer of categories according to predefined types will be displayed (e.g. "Document: Documents" will be displayed by dragging .pdf file). By clicking on the required option, a new Reference to the selected file will be created. Also in this case, the resource file will be copied onto the place, which is set by the Configuration of saving of picture references function, and a reference is heading here then.
Inserting new reference by Ins key
This way is not recommended, because the resource file is not copied - a reference will be created to the path specified by us.
If you press Ins key in Change mode, the form for adding new link is displayed. By entering the Type of references, a selection of Categories will be reduced (K2 does not allows us enter other Type of references, than it is set in Category). Then insert the file path.
Note: Standard ishop or other K2 functionality usually work with pre-defined combinations. If you create different combination, resp. if you break set combination, it is necessary to verify, whether it is displayed by required way in the i-shop.
"Bulk" adding pictures by using Add picture for articles script
If you want to create series of pictures for publication in web shop, the easiest way is to use Eshop - Add pictures for article script (Eshop_AddPicture.PAS), use of which is described in detail in catalogue of scripts.
|
|
|
Configuration of storing picture references
FTPUpload Root:
tag FTPUpload:
File System Root: Path (inside of the K2 root directory/complete path), where the files are saved (especially pictures). This path will be taken into account when recording pictures by using Eshop - Add picture for articles script or when adding references on 9th page by dragging or by the button.
File System Copy tag: it "activates" the above-mentioned path - files will be copied here.
FTP Settings: FTP access data. These are necessary for
Use SSLTLS tag:
Data Protection tag: