|
|
|
Invoices in
The book serves for the invoices in registration. The invoices serve as the tax documents in the accounting. At the same time the evaluating the articles purchase and of the withdrawals from the suppliers are executed from the invoices that is always according to the Invoice date.
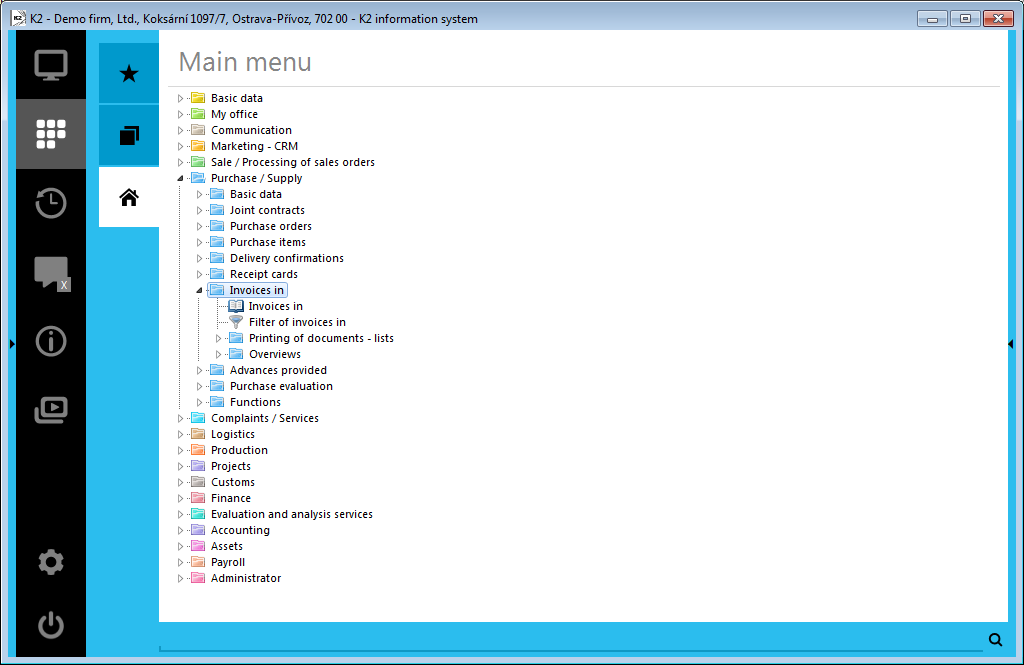
Picture: Open Menu of Purchase/Supply module - Invoices In
|
|
|
Book Invoices In
Functions and bulk processing over the Invoices in book are similar as for the invoices out.
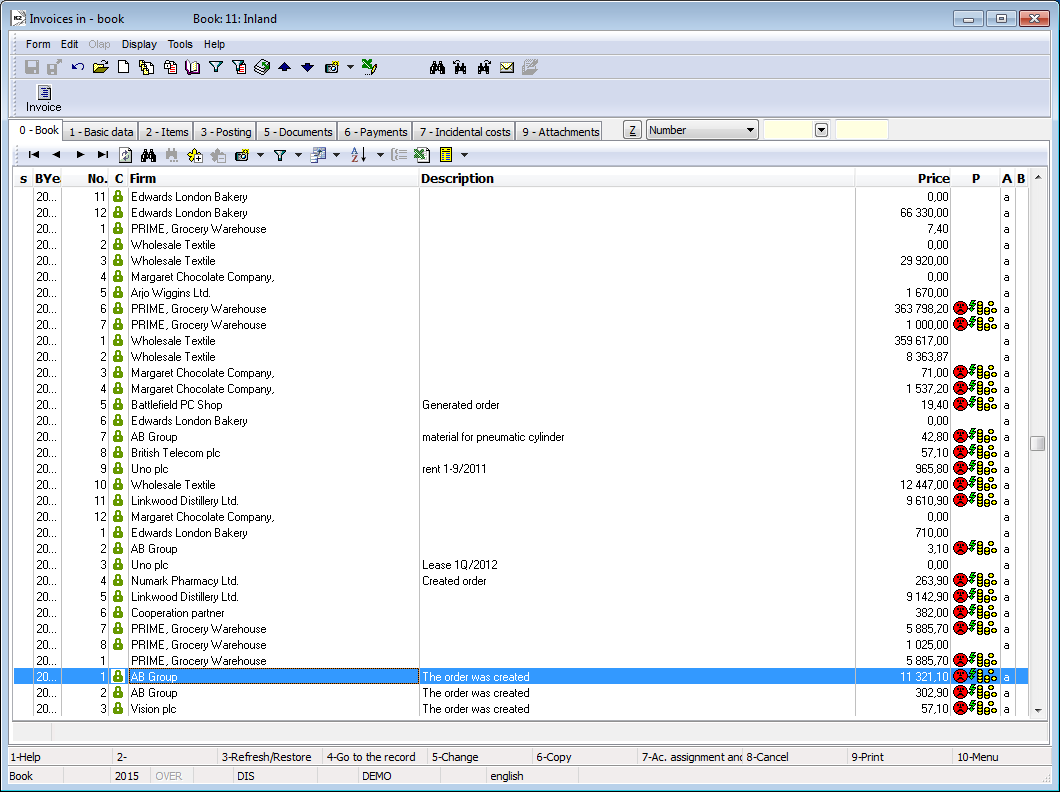
Picture: The Invoices In book
|
|
|
Account Number
Account number is an obligatory item of the invoices in. If the default bank account is entered for the given supplier/customer, then these data are automatically copied from a bank account when creating a new invoice: Account number, IBAN, name of a bank and bank code.
In the Account No. field, there it is possible to activate the Bank accounts book, where all bank accounts of the supplier are stated. You can insert a new Bank account by using Ins key or change the existing one by using F5 key.
If you check the Bank account for invoices in is not required checkbox on the 3rd page of Client parameters, then the bank account will not be required when saving invoice. You can use this field e.g. if you pay the invoices cash and you do not want to fill a bank account on the 1st page of invoice in.
|
|
|
Basic data (1st page)
The basic data, that relate to the whole document, are stated on 1st page of the Invoices in form. Just like in invoices out, the first three rows create a document header, that is separated of the others by the horizontal line. The heading of the documents is repeated on all the document pages.
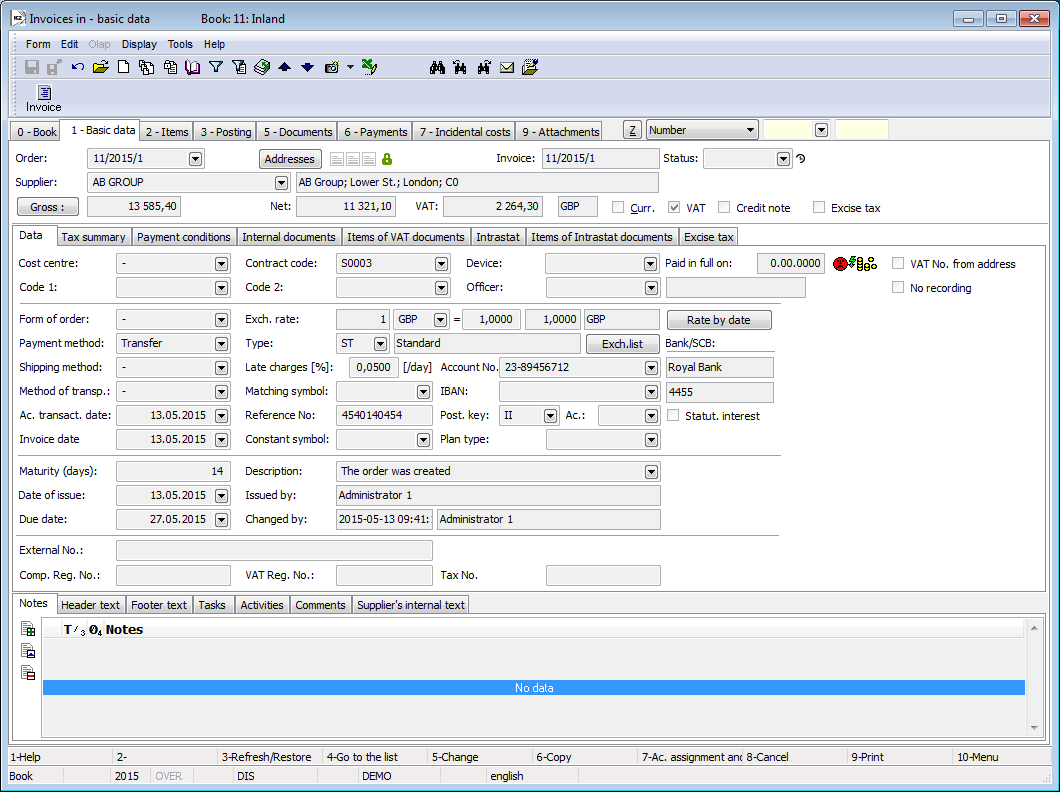
Picture: Invoice In - 1st page
Fields Description:
Order |
The field serves for giving the number of a purchase order, which an invoice is linked with. If the invoice is issued as a free document, this field will stay empty. Note: Before you create an Invoice, define by means of the wizard, whether the document will be linked or free. It is not possible to change the Sales Order in Change mode yet. |
Addresses |
The button to display an addressee or a superior firm. For further information see the Addressee chapter. |
Invoice |
The book, Business Year and Invoice number. |
Status |
Field for selection from a code list. This field enables to filter document according to the status that has been selected by the user. |
Supplier |
A business partner name that you insert by selection from the Suppl./Cust. book. In the case of a new partner, it is possible to insert the next card of aSupplier/Customer into this book by pressing Ins key for inserting a new record (eventually by F6 key - insertion according to the indicated specimen). You can also edit a card (by pressing F5 key) or only browse a card (by pressing F4 key). |
Gross |
Button for change of the gross price. It serves to edit the value in order to the value corresponds to the value on an Invoice In (the Invoice creator may use, e.g. a different rounding). It is used in Change mode. Note: It must be the last step before the confirmation. When you switch into the change mode and save again, the value will be recalculated on the sum of Net + VAT. |
Prices |
The amount on that the Invoice is issued. The gross price, the net price and also the amount of VAT are stated in that line. |
Currency |
The flag indicates that the Invoice is issued in a foreign currency. |
VAT documents |
If this field is checked, it is a common Invoice, at which the value added tax is paid. |
Credit note |
If the field is checked, it is a credit note. |
In the Invoice In document, the icon  indicates:
- reliability of VAT payer,
- verified accounts for a bank connection.
It is possible to assign random types and kinds of the notes to the invoices, eventually you can use the Header text or the Footer text. Closer description of work with the notes is stated in the Basic Code Lists and Supporting Modules K2 – Notes chapter. The Supplier`s internal text tab serves to display the internal text of a supplier. The Tasks and Activities tabs are also available. The work with tabs is described in the Tasks - document's tab and Activities - document's tab chapters.
Payment conditions may be displayed on the Payment conditions tab.
Basic data of a header of invoices in are divided into several tabs, their functionality is same as the functionality of invoices out.
|
|
|
Import of invoices from ISDOC format
Process No.: ZAS023 |
Script Id: FZAS024 |
File: FAP_ImportXML.pas |
Description: Import of invoices from "*.ISDOC" format. |
||
Address in the tree: |
||
Script parameters:
Report Id - 0 Identifier of an inserted report (number of a report inserted in F9). You can display data before a file import by using this report. |
AdvanceArticle - 0 Article number for a deduction of advances. |
LocalReverseChargeTypeOfTax - 0 Internal number of a tax type for reverse charge system. |
Book Book for import. |
NonTaxedType - NN Abbreviation for the Not in declaration of taxes type of taxes. |
PaymentsByCreditCard Parameter for determination of the payment method - Payment by credit card (separated by semicolon). |
PaymentsByCheck Parameter for determination of the payment method - Payment by check (separated by semicolon). |
PaymentsInCash Parameter for determination of the payment method in cash (separated by semicolon). |
TransferToAccount Parameter for determination of the payment method by banking transfer (separated by semicolon). |
AccountBetweenPartners Parameter for determination of the payment method - Account between partners (separated by semicolon). |
ShowOnlyConfictedItems - NO Yes - it displays only error items when matching. |
SupplierId A supplier. |
SupplementDocType - ALL Documents type for import of attachments. |
AllowSkipInvoice - No Yes - it allows to skip the unmarked invoices. No - all invoices has to be marked. |
EnableSettingsPage - No Yes - it enables to edit a page with import setting. |
SettingsFileName - ImportISDOC_Setting.xml Parameter determines, where the file with the default settings is situated. |
MethodOfSampling Shipping method. |
The user should set some parameters for its correct functionality, before starting the script. They are:
- AdvanceArticle - the user has to set an article number, which is used for a deduction of advances,
- ReportID - user sets up a number of report inserted in F9,
- if he imports the invoices, where the Reverse charge system is, he sets LocalReverseChargeTypeOfTax - a number of type of tax for Reverse charge system.
ISDOC - the fixed structure of XML file, which serves for a transfer (Export/Import) of invoices between systems.
ISDOCX - archive file, which includes 1 file in ISDOC format and further it can include the other appendices of different types and sizes.
After activating the script, the user has to execute 3 basic steps:
- selection of a book, into which a document should be imported, in the Book for import field,
- selection of a supplier, who the invoice came from, in the Supplier field,
- selection of a path to the file, which should be imported in the Input file field.
Picture: Data import form
After selection of the imported file, a document incl. all attachments, which are attached to it, is loaded into a form. An invoice is displayed in the upper part of the script form, attachments are displayed in the lower part. If the imported invoice has a flag of a sheet, it means, that this invoice has been already imported in the past and in this case it is a correction of a document. The user can display the earlier imported invoice by using the Document button. Only documents, which are indicated by asterisks, will always be imported.
The Display button, when the HTML option is activated, enables to display the file before its import in HTML format, where the basic checks will be executed and the document preview in simplified form will be displayed. These checks are related to failures, without which it will not be possible to continue and which have to be removed, e.g. checkings of existence of an article, alternate units, linking of the advances invoices etc.
Picture: Display the HTML template
If some of the rows in the displayed HTML template is indicated by red colour, it is necessary to correct the status by links in the right part. Link informs us, what is necessary to do.
Article identification - it is necessary to add or create a new article card in the K2 including alternative units to the imported item of an invoice by using this link.
Unit identification - a card of the imported article has been found in the K2, but Unit of measure has not been found. The user will get to the article card by using the link and will add a required unit to this article card by changing the record.
Document identification - if the user wants to import an invoice, to which a credit note has been already created or the advanced invoices has been issued (tax or non-tax), it is necessary to attach these documents to the imported invoice.
When there are no errors in HTML template and there are no red rows in it, then it is possible to do the next step.
By using Next button, the user skips to 2nd page of the form - Import. If everything is all right, the user can continue with import. If something is not all right, the error message will be displayed after pressing the Next button. In this event, the user has to add the required information on the 1st page of a form - Matching of the fields. This 1st page serves for correction of the field matching and for adding the default values.
It is possible to set the matching of the fields either as the default for the current imported document or it is possible to save this specific default setting directly for the supplier. This can be executed by using the options in the user bar under the Setting button. The default setting of the fields is saved in the firm directory. Setting for the particular supplier is saved in XML file and it is attached on the 9th page of the supplier card under the IMPSETT (XML) type of a document.
By linking (matching) of the fields we mean the linking of the K2 field with one of the element of ISDOC file, from which the values are loaded when document importing.
The obligatory fields are indicated by a red exclamation mark on the 1st page of a form. It is necessary to set the minimum default value for these fields or these fields have to be matched.
Matching of the fields:
The user selects a Target module (a header of an invoice or item), further in the left part of a form, the user selects the K2 field, which he wants to match and marks it by a light indicator. In the right part of a form, the user selects the appropriate element, from which he will want to match one of the values, from the Select element menu. A list of all available elements is accessible below this menu. The user marks an element, which should be linked, by a light indicator and executes the linking by using the Link button. True matching can be identify so that information about element name and path are filled in in the Name and Path columns.
Cancel the matching can be executed by using the Detach button. K2 field with the selected element will be detached and there will not be any information and values in the Name and Path columns.
The user may enter a default value for the individual fields. This one will be imported directly from the code list in the K2 without the necessity of a matching with ISDOC file. The user can allow the update for the fields, values of which are added in K2 from the code lists. The appropriate code list is updated by a value from the ISDOC file when importing.
For the matching of items, it is recommended to create a special article card with the name Error or Error article. We recommend to use this article for the default value of the invoice items.
If all obligatory fields are matched and their default values are added, the user will get to the last step by using the Next button.
The user skips to 2nd tab - Import. This page is divided into two parts. The whole left page is related to an imported invoice. There is a header of a document in the upper part and there are all items of this document in the lower part.
If there is a default article (Error or Error article) defined by the user in the K2 abbreviation column, then it means, that the identification of an article card was not successful or the name was not correctly written etc. This inconsistency can be eliminated by using the Identify articles or Enter a name function.
By using Identify articles button, the user will get to the Articles book, where he can choose the article card, which appertains to the invoice item. If the user press the Enter key, an article name from the invoice and a supplier name will be entered on the 4th page of Article card.
Invoice, which is imported for the first time, does not have entered any flag in the left part of the header. When the invoice has been already imported, it is a correction, the invoice is indicated by a flag ![]() . In this case, it is not necessary to choice the other type of document.
. In this case, it is not necessary to choice the other type of document.
It is necessary to assign a type of document to a newly imported document (by using the buttons in the middle of a form):
- Free document - an invoice will be imported as a free document.
- Generate an order - it will generate a superior document to the imported document.
- Match - it will assign a document to the already existing superior document.
Matching of an invoice with the superior document (an option Match).
The whole right part of the 2nd page of the Data import form is related to the unconfirmed orders of the selected supplier and the selected book on the page 0. There is always a heading of a document in the upper part and there are always items in the lower part. Items of the document, on which the light indicator is set in the upper part of a form, are always displayed here. By using the Enter key on the header of an order the user gets into the system on the current superior document and can execute all actions in it like in the book.
Before the proper matching it is necessary to check, whether the invoice items and their quantity correspond to status of the items of the superior document. If not, it will not be possible to match the documents.
Example: Unexecuted matching - missing items of a purchase order
In this case the matching of an invoice with a purchase order was not successful, because the invoice items were not found on an order (items in the Order column do not have stated the number of an order). In this case and if the user really wants to match this invoice with an order, we recommend to use the Add on an order function.
Example: Correct matching
In this case, the matching of all invoice items (except the advance) with an order was successful. Only items of an order, which were not on an invoice, remained unmatched.
If the article card number for advances is stated in the AdvanceArticle script parameter, and this number is also inserted in an invoice, then it is not necessary to add this item on the superior document.
The Enter name button serves for entering an article name and a supplier on the 4th page of an article card. The user has to choose an invoice item and an order item by using a light indicator before pressing the button.
If some of the invoice items are missing on the superior document, it is possible to set right this state by using the Add on order function.
If everything is correctly matched, the flag for the matched invoices will be displayed next to the invoice (in the left upper table on the 2nd page of the Data import form).
|
|
|
Credit notes - PURCHASE
Description of the Credit notes function over invoices in is similar as in the Credit notes at invoices out.
|
|
|
Instalments invoices
Principle of an instalment buying and suspensions is similar as Instalment selling, suspensions.
|
|
|
Functions over Invoices In
The functions over the Invoices In are similar to the Functions over Invoices Out chapter.
|
|
|
Invoices In reports
|
|
|
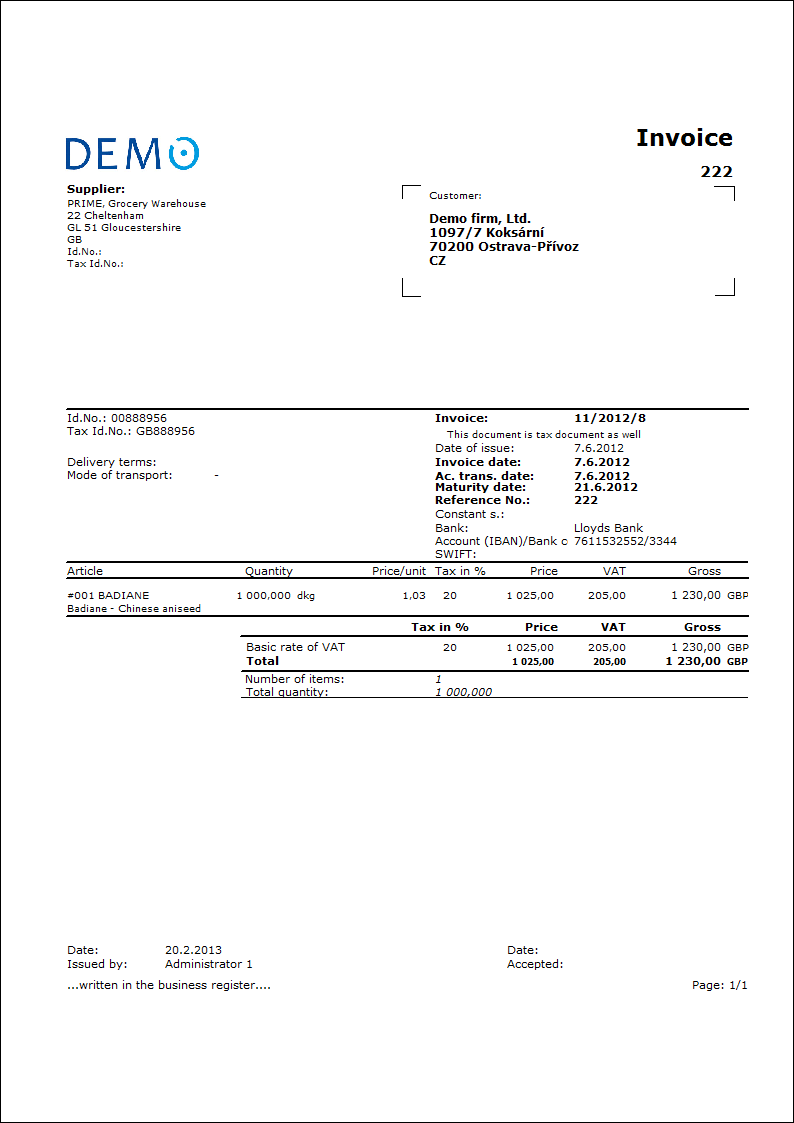
Invoice In
Process No.: ZAS012 |
Report ID: SZAS014 |
File: PF_DOK01.AM |
Report description: Invoice In. The report enables to save parameters into the „*.xml“ file. It is possible to export into the „*.pdf" file in bulk and send by e-mail. |
||
Address in the tree: [Purchase / Supply] [Invoices In] [Print reports - Lists] |
||
Report parameters:
Assignement - No Yes - it displays a documents posting (data from the 3rd page of the document). |
BarCode - Yes Yes - a bar code is displayed. |
Batch - No Yes - It displays the batches for an item. |
BatchAttr - 0 0 - Nothing is displayed; 1 - batch parameters are displayed; 2 - required batch parameters are displayed. |
BusinessRegister - Yes Information about the Business register from the Setting of own companies are displayed. No - it is not displayed. |
CodeOfCurrency - No Yes - It displays a code of currency (e.g. USD). No - It displays a sign of currency (e.g. $). |
CombineOrigItem - Yes Yes - it merges the items with the same "OrigItemF" (if it is not different in a price and the other attributes). |
ContactsFrom - 1 1- It displays contacts of the user, who issued the document, 2 - it displays contacts of the user, who prints the document. |
DefaultExport - No It is described together with the other export parameters in the Report parameters for a bulk sending by email chapter. |
Description - No Yes - it displays information from the Description field from the 1st page of the document. |
DescriptionFromItem - No Yes - it displays a supplement that is entered into the Description field on an item of a document. |
Discount - Yes Yes - it displays a discount entered in an item. |
DraftLabel - Yes Yes - a "DRAFT" text is displayed at the background of the report, if a document is not confirmed. No - a "DRAFT" is not displayed. |
Export_... - different parameters Export parameters, that are summary described for all documents in the Report parameters for a bulk sending by email chapter, are a part of a report. |
FormerInvoice - 1 It displays reference to an original invoice in a form: 0 - Reference number, 1 - number, 2 - number and reference number when printing an invoice as a Credit note. |
Interactive - No No - an input form to enter values of the parameters is displayed. |
KeepEnvelopeFormat - No Yes - the empty place under a place for window of an envelope is hidden. The effect of a saved space is multiplied if the parameter "BarCode" is set on "No". It has meaning, if the user does not use the window envelopes, he does not want to fold the printed document to an envelope according to the cam line guide of a document. Yes - a place is not hidden - the line between items and the address part will always be in one third of a page. |
LangAccordToParams - No If the report is printed in a language that is set in the "Field language" and "Report language" parameters, then you have to set a value of the parameter on "Yes". |
LeftEnvelopeWindow - No Yes - address of a customer is printed in the right side (determined for sending documents by mail in abroad where a window for a wrapper is in the left side); No - address of a customer is on the left side. |
LeftShift - 5 By how many mm the edge of the report is moved to the left (it serves for setting a print on a printer). |
LogoPictureFooter - 0 Parameter adjusts the footer logo display. If the parameter is empty, a logo according to the setting of theFooter picture parameter in the Administration - setting of own companies function will be displayed. 0 - nothing is displayed, but a place keeps free (for a headed paper), 1 - no picture or free space. Name of a file with png suffix - specific picture in the Pictures directory of the given firm. |
LogoPictureHeader - Parameter adjusts the header logo display. If the parameter is empty, a logo according to the setting of theHeader picture parameter in the Administration - setting of own companies function will be displayed. 0 - nothing is displayed, but a place keeps free (for a headed paper), 1 - no picture or free space. Name of a file with png suffix - specific picture in the Pictures directory of the given firm. |
NumberOfItem - 1 0 - it displays no number, 1 - it displays a number of a sales order item; 2 - it displays a purchase order number. Always in "#001" format. |
OneLineItem - No Yes - it always displays a document item on 1 line. |
SerialNumber - No Yes - it displays the serial numbers for the items. |
Sign - @Vyst;;; Parameter has got 5 positions: 1. position determines a person, whose signature should be displayed. It may be a picture called according to Logname of a user, who has issued the document (@Vyst) or who prints the document - so according to the current login (@akt), or the specific Logname. Picture has to always be in format Logname.png and it has to be located in Pictures directory. 2. position: picture height. 3. position: distance from the left edge. 4. position: distance of a picture from the upper edge of the given section. 5. position: picture width. Example: (Sign - @vyst;27;47;0;83) It prints a signature of a user, who has issued the document, 27 points high, 47 points indented from the left margin, by the upper margin. A picture is 83 points wide. |
SortBy - Field is filled with a field value from the sales items (e.g. Art_No;Abbr. or CF_CeJePlM). Items on a document will be sorted according to the parameter value. Parameter is empty by default. If a value of this parameter is filled in, then items will not be combined, even if the CombineOrigItem parameter is set on Yes. |
StateOfOrigin - No Yes - it displays a code of tariff and a country of origin at the items. If it is filled on a batch, it displays information from a batch; else it displays data from the Article card. |
SupplFromArticles - 0 0 - Nothing is displayed, Empty value - Business text from the Article card is displayed, otherwise the entered supplement from the Articles card (e.g. supplement of the DB type) is displayed. |
SupplFromCustomer - DZ 0 - Nothing is displayed, Empty value - Business text from the Customer card is displayed, otherwise the entered supplement from the Customer card (e.g. supplement of the DZ type) is displayed. |
SupplFromItem - TX 0 - Nothing is displayed, empty value - text from the Text tab in a document item is displayed, otherwise the entered type of supplement from an item is displayed. |
SupplFromClient - TEXT TEXT value displays information from the field General information from the own company. Otherwise it displays the entered type of supplement from the Client parameters. |
TaxRecapitulation - Yes Yes - it displays the tax recapitulation. |
Title - The entered value of the parameter is displayed as a title of the report. If the parameter is empty, an original name of the document is displayed (e.g. Invoice). |
|
|
|
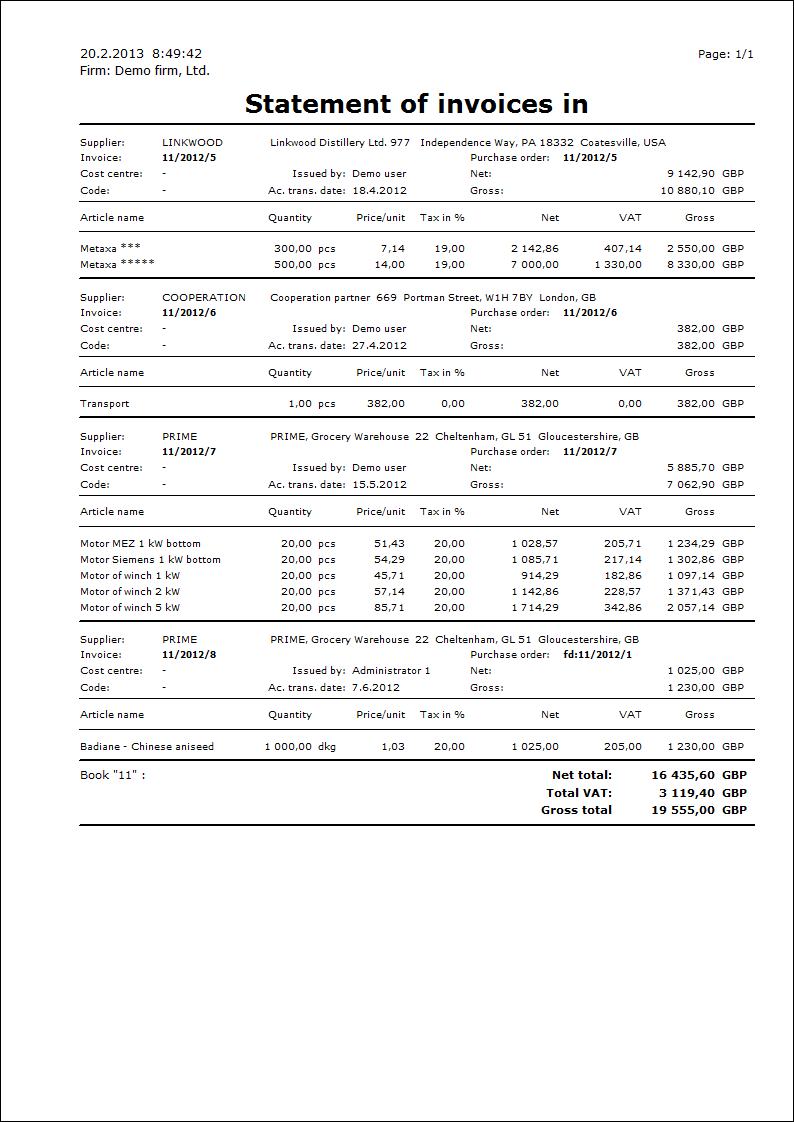
Statement of invoices
Process No.: ZAS012 |
Report ID: SZAS034 |
File: PF_VYP01.AM |
Report description: Statement of invoices in, incl. total per individual books. |
||
Address in the tree: [Purchase / Supply] [Invoices In] [Printing of documents - lists] |
||
Report parameters:
SupressSum - No Yes - it supresses sums for the individual documents. |
ShowNominalValue - No It displays a nominal value of invoices (without a deduction of advances). |