|
|
|
Reinstallation of K2 ori
|
|
|
Introduction
You will get acquainted with the graphical form of individual steps of reinstallation in the form of a diagram.
|
|
|
Dictionary of terms
Reinstall Manager is a feature of K2 that helps with the reinstallation of K2.
Licence administration is a feature of K2 that is used in this document to remotely log off users from K2.
SQL Server Management Studio (SSMS) is a Microsoft® product that is used to manage MS SQL servers and databases.
Oracle SQL Developer is an Oracle Corporation® product that is used to manage Oracle servers and databases.
Reinstallation of build type - small is the type of reinstallation, when only the last number of the version, the so-called build, is changed. This type should only solve bug fixes and add minor improvements. This reinstallation should not endanger the existing functionality. No identifiers that are used in scripts are removed unless they are evaluated as incorrect. As an example, we will give the omission of canceling the identifier when upgrading to a higher release or generation version. Then the use may result in unwanted behavior or an algorithm error.
Reinstallation of the release type - medium is a type of reinstallation when the middle number of the version, the so-called release, is changed. New functionalities can be added to individual releases. The same rules apply as in the previous - "small" reinstallation, with the difference that it is advisable to perform a test reinstallation before the reinstallation itself and then test the key functions of K2.
Reinstallation of Generation version type - large is the type of reinstallation when the first number of the version is changed. This is a fundamental change, when completely new functionalities are added to K2 or the existing ones are fundamentally redesigned or canceled. This type always requires reinstallation in a test environment, as situations can occur especially during conversions that cannot be reliably treated in laboratory conditions during development. The reinstallation of the production K2 is thus performed first in the test environment, when the test folder is taken over, and after testing and debugging of all conversions and functionalities, the reinstallation is then performed on the production K2.
The application server (AS) is a non-visual superstructure of K2, which performs automatic tasks, scheduled tasks, communicates with other K2 products, e.g. web services server (SWS), serves web client, etc.
Taking over an existing installation is a state where the folder with the K2 is used for a new installation. This situation should not normally occur because the Windows installation mechanism retains all the msi files, from which it performed the installation, in the system folders and information in the registry until the program is uninstalled. So it follows from the logic of the matter that by constant taking over one K2, the registry will be weeded and the space on the system disk will be reduced by the size of the msi file with each reinstallation. Another consequence is that there are multiple records of installation in the records of the K2 installer, even if there is only one K2. The maximum number of records for K2 instances is 100, and no more instances can be added any more.
When to use takeover?
- When you create a test environment and copy the complete production K2 to the new folder.
- When the installation is performed from a different computer than before. However, be careful because installing from multiple computers in a network environment can cause file inconsistencies.
- When the removing the original K2 during reinstallation was failed.
- If an error occurs during the reinstallation in the installation phase and the installation terminates unexpectedly.
|
|
|
Create a test environment for reinstallation
There are several ways to create a test environment so that a reinstallation can be performed in a folder. The minimum condition for a folder to be considered K2 is the presence of the k2.ini and sysk2.ini files, and the data in them refers to an existing server and database. However, an optimally prepared test environment is performed by creating a copy of sharp databases on database servers, it can be within one SQL server or the data can be transferred to another one, by copying the folder of the sharp K2 to a new folder and by overwriting the link to the database, or the server, in the k2.ini. The copy created in this way is identical to the sharp K2 and thus all possible problems can be solved before reinstalling the sharp K2. Adjustments in the data, which must be done during the test reinstallation, so that, e.g.. conversions take place without errors, can be done, and it is also recommended, in parallel to the test, and in operation.
When creating a test K2, it is a good idea to consider whether you need to transfer all databases or schemas. For test reinstallation, it is advisable to use only databases of sharp clients. There is no need to make copies of DEMO, INIT or test clients. E.g. the sharp K2 contains the following clients: DEMO (demonstration database supplied by K2), INIT (demonstration database supplied by K2), COMPANY (production database), COMPANY2 (production database of another company or branch), COMPANY2_TEST (test database created by a copy of COMPANY2). In this case, only COMPANY and COMPANY2 clients are used for testing purposes. Other databases are not needed. However, if only some databases are copied, you must modify the COMPANY table in the configuration database. This can be done either by directly editing the tables using SQL queries, or by editing the table with a tool such as SSMS, or in database administration in the K2. It is important that the company table only contains records that match the databases used in the test.
|
|
|
Reinstallation procedure
|
|
|
Scheme
scheme is designed so that it can be applied to any situation where it is necessary to reinstall K2.
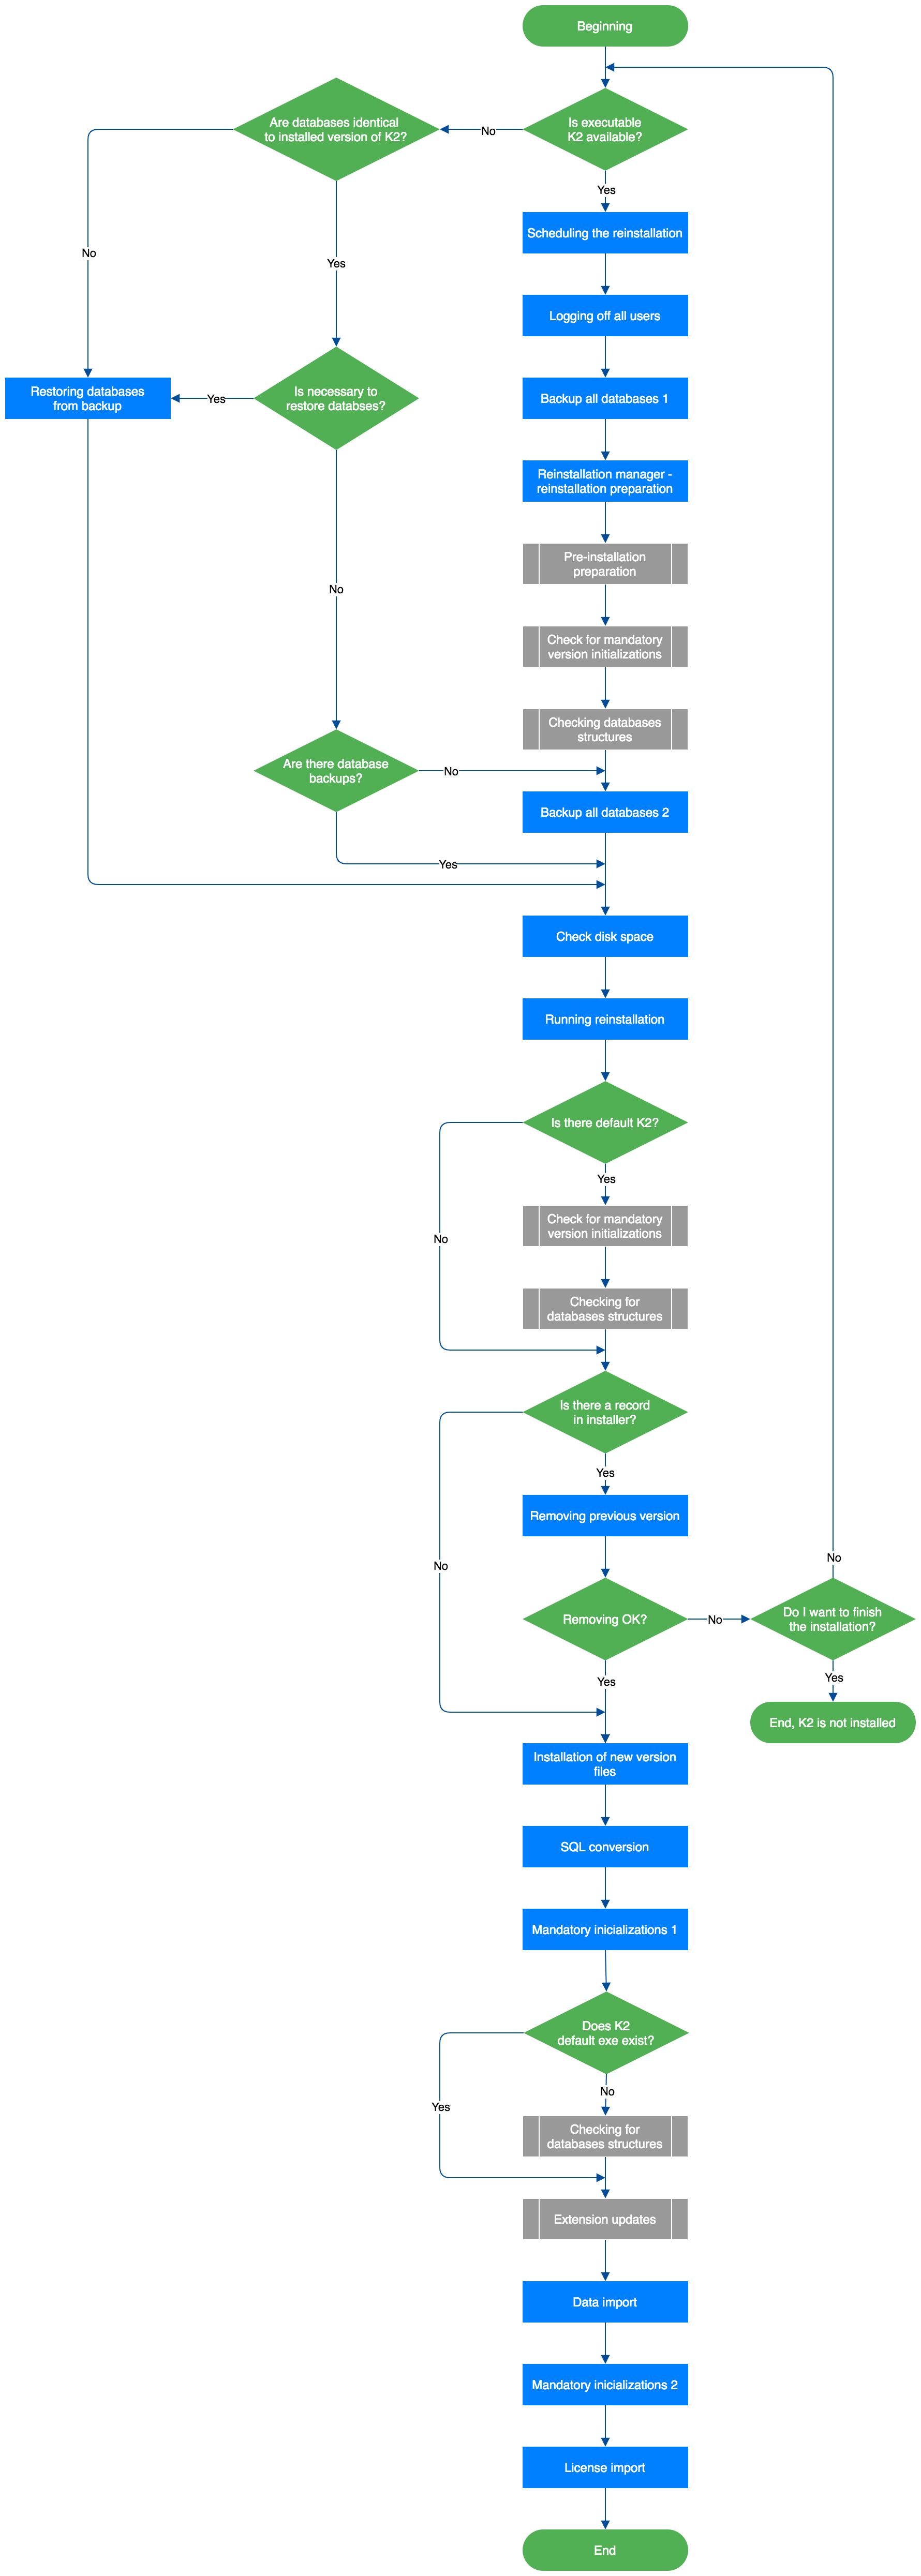
Picture: K2 reinstallation scheme
The scheme in its main branch shows the reinstallation without any problems on the installed K2.
The other branches, which you will find in chapters Check of required initialization of version Check of all databases structures and Update extensions, come in a non-standard situation.
|
|
|
Colors and shapes of blocks in the scheme
|
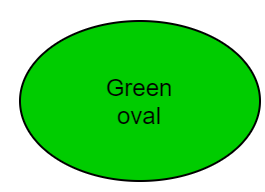
The beginning or the end of the scheme or subscheme. |
|
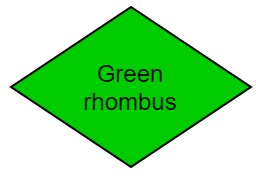
A decision block, when the scheme branches according to the specified condition. |
|
A block of the process. Performing an action. |
|
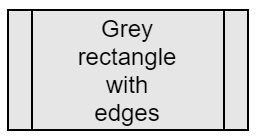
A block of the subprocess. A subprocess contains a subschema that contains multiple actions. |
|
Indicator of the direction of the scheme, including the result of the decision when this branch occurs. |


|
|
|
Use of the scheme
The scheme in its main branch shows the reinstallation without any problems on the installed K2.
Other branches come in a non-standard situation. Non-standard situations are understood when the reinstallation has been performed only partially, there was a problem during the removal of the previous version, a copy of the production K2 was created in order to test the reinstallation, etc.
|
|
|
Individual steps of reinstallation
In order for the diagram to be complete, it is necessary to explain each step of the reinstallation. You will learn what needs to be done at each level, what are the troubleshooting options, or where you can find support resources to solve the problem.
|
|
|
Decision making: Is the executable K2 available?
Decisive person: IS K2 administrator
Description: Executable K2 means the state when the complete K2 is located in the folder, which can be executed and can be worked on. At this point, it does not matter whether the folder was created by the installation or copied from the operating K2 as a copy. If the K2 is executable, continue with the point Plan the reinstallation, if it is not, continue with the point Decision making: The databases are identical to the installed K2 version.
|
|
|
Log off all users
Location: Information system K2
Start: IS K2 administrator
Authorization: Right - Administrator/General/Service actions (right number 1)
Condition: A mandatory action - cannot be reinstalled if users are logged in to K2
Description: All K2 users must be logged out before the reinstallation. Their list and the possibility to log out can then be found in the "License Administration", which is available in the "Administrator / System / License Administration" menu or as the function number 678.
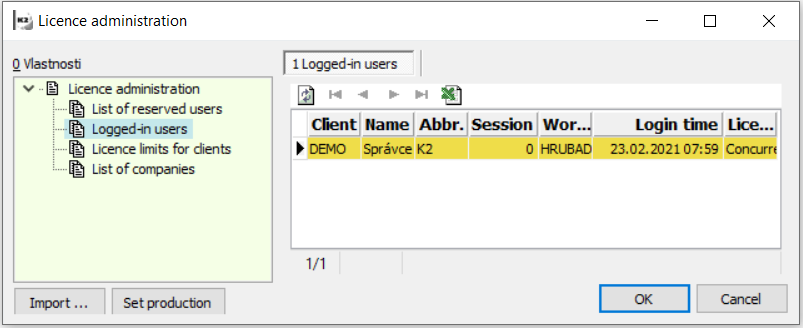
Picture: Licence administration and logged-in users
To log off the user, open the record detail and press the "Log off" button. Advantageously, running application servers can be shut down in this way without the need to connect to computers where the AS is running.
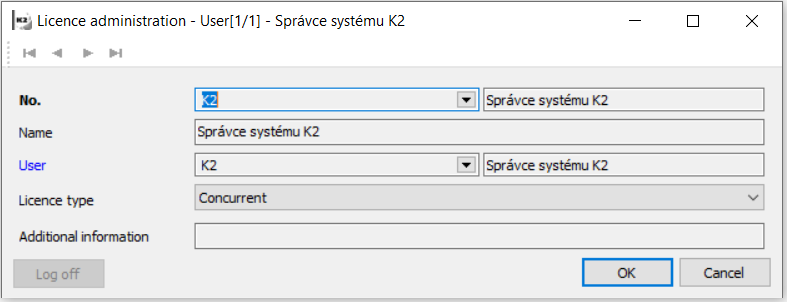
Picture: The logout users from the K2
Note
It is up to the administrator whether to disconnect the user directly from the form or to find out for each person in person if they have any records in progress. By pressing "Log off" button a user will be logged off without saving records in progress.
There may be situation where the user cannot log out under any circumstances and, in addition, it is found that the user does definitely not have the running K2. In this case, you need to "kill" the session on the SQL server. To find users on MS SQL, the sp_who command is used, which lists the table with existing connections to the server.
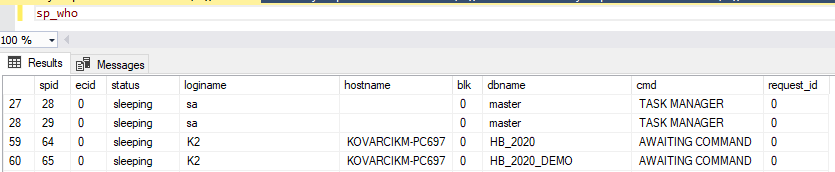
Picture: List of connections with MS SQL server
To terminate the relevant connection, it is necessary to know which database the user, who is not logged-out, is connecting to. Usually there are one or two records in the statement, depending on how many connections remain "hanging". The spid, status, loginame, hostname, dbname, and cmd columns are important. The spid column is the connection number we need to know to terminate it, status is the connection status, loginame is the user under which K2 logs into the database, hostname is the name of the computer from which K2 is or was started, dbname is or are the names of databases, to which K2 is connected and cmd is the command that is currently being executed. For safe termination the login, the status column should be in the sleeping state and cmd AWAITING COMMAND. The other previously listed columns must match the credentials and names of the unlogged-off user to disconnect the correct connection. The kill command is used for this, where the number of the connection we want to terminate is entered: kill 64.
Th following queries are used on Oracle:
select SID, SERIAL#, CLIENT_INFO, TERMINAL, LOGON_TIME FROM "SYS"."GV_$SESSION"
where USERNAME='K2' AND REGEXP_LIKE("CLIENT_INFO", 'K2/./.*/.*/.*/.*/.*')
order by TERMINAL
and
alter system kill session '19,46574';
For the kill command, the session values are 'SID, SERIAL #'.
|
|
|
Backup all databases
Location: Database Management Tool (SQL Server Management Studio)
Start: IS K2 administrator
Authorization: According to the permissions set on the SQL server
Condition: An optional action, this is a manufacturer's recommendation
Description: Before each reinstallation, the administrator should back up all databases that are affected by the reinstallation. It is a system database K2 - CONF and all company databases. Other databases such as INIT and DEMO do not need to be backed up. Backups can then be used in the event that an error occurs during the reinstallation, when it is necessary to return the K2 installation to its original state before the reinstallation. When it is necessary to restore the backup will be described in the next steps of the reinstallation.
Note
We use various client tools for database operations. For Microsoft, it is recommended to use Microsoft SQL Server Management Studio (SSMS). For Oracle, for example, data pumps or Oracle Recovery Manager (RMAN) are used.
|
|
|
Reinstall manager - preparing to reinstall

Picture: Pre-installation preparation
Location: Information system K2
Start: IS K2 administrator
Authorization: Right - Administrator/General/Service actions (right number 1)
Condition: A mandatory action - cannot be reinstalled if K2 is not set in reinstallation mode
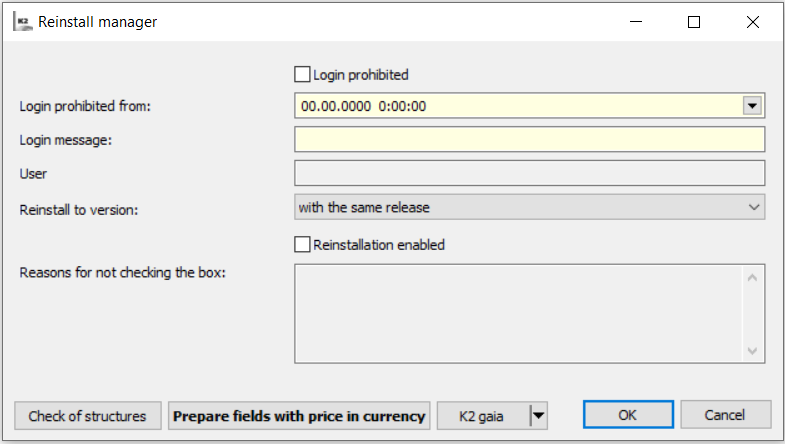
Description: The Reinstall manager is primarily used to set K2 to the so-called reinstallation mode. This is a situation where it is ensured that no users are logged in to the K2, new users cannot log in, and it is also true that K2 has passed all the checks that are implemented for the given version. The individual actions that are performed in the Reinstall manager are described in the following chapters.
Was it performed?
First of all, it is necessary to check whether there is a so-called "Pre-installation preparation" in the default version. These are operations that must be performed before the actual reinstallation to a higher version. If the preparation is not performed, it is not possible to reinstall.
If a higher generation version is not installed, the pre-installation preparation will not start!
Note
If a pre-installation preparation exists, there is a button with the given information on the form.

Picture: Reinstall manager - Pre-installation preparation
If there is a pre-installation preparation and it has not been performed, continue with the next point Perform pre-installation preparation. If it does not exist, you can continue with the point Check of required initialization of version for all databases.
|
|
|
Perform pre-installation preparation
Location: Information system K2
Start: IS K2 administrator
Authorization: Right - Administrator/General/Service actions (right number 1)
Condition: The required action if upgrading to a higher generation version - you cannot set the reinstall mode if it did not perform
Description: If there is a pre-installation preparation, it is necessary to apply it to the default version. Press the button to display the form with more detailed information or inputs for preparation.
Picture: Example of a pre-installation preparation
Note
Successful completion of the pre-installation preparation is one of the conditions for the upgrade to a higher generation version and is checked only by the installer, because only the installer knows for sure how "big" the reinstallation is.
|
|
|
Perform required initializations in clients where they are missing
Location: Information system K2
Start: IS K2 administrator
Authorization: Right - Administrator/General/Initialization of version (right number 755)
Condition: Mandatory action - you cannot set the reinstall mode unless all required initializations have been performed
Description: The start of required initializations is available in the "Administrator / Initialize version" menu or via the function 552. Then continue by pressing the "Required" button in the form. After successful initialization, we can return to the step Check of required initialization of version through all databases, which will perform a recheck.
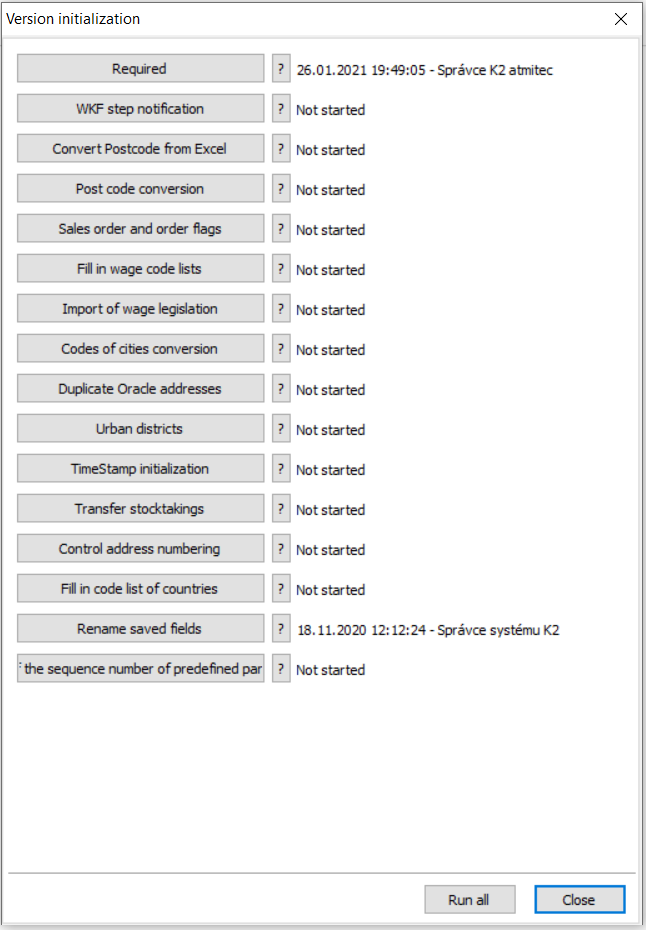
Picture: Starting the required initialization
Note
If the initialization is not successful, it is necessary to report the problem to K2. To solve the problem faster, it is advisable to log the manifestation of the error to a file, according to the instructions in the K2 technical documentation. In some cases, there may be an error in the initialization that is fixed in a higher build version. If it is a reinstallation of the build type, then the missing initialization can be ignored because the error is fixed and the initialization will be performed during the reinstallation. It is up to the user whether to ignore the check because he/she knows he/she will not reinstall to a higher release or generation version. If the check is ignored and nevertheless, the reinstallation to a higher release or generation version is performed, the instalator will draw attention to this situation and will not allow the ignoration any more.
|
|
|
Backup all databases 2
After repairing the database structures, it is recommended to back up those that have been affected. The step is defined in the point - Backup all databases. Continue with the point Check disk space (C, installation, database).
|
|
|
Decision making: The databases are identical to the installed K2 version
Start: IS K2 administrator
Description: This is the decision step to which we will get if the executable K2 is not available. See the Decision making: Is the executable K2 available?
If we have backups from the version that correspond to the installed version of K2 or from that it is possible to perform conversions to the installed version and at the same time there are k2.ini and sysk2.ini files with the correct values ??in the folder where we want to install, such a K2 torso can be considered a version to which it can be reinstalled. Further continue with the Decision Making step: Are there database backups?, otherwise we must take a step Restore databases from a backup.
A database restore is performed in the cases when errors occurred during the installation, especially in the SQL conversion section. Depending on the extent of the errors, it is possible either fix these errors or restore the database and solve the problems in the previous version so that the next conversion takes place properly. It is advisable to solve possible fixes with the technical department of K2. On the one hand, the correction may seem trivial, but it is followed by other logic, which could have taken place without an error message, but due to a previous error, it worked with bad data. Another reason is that the error did not appear during testing, but only on specific customer data.
|
|
|
Decision making: Are there database backups?
Start: IS K2 administrator
Description: In this decision step, we decide whether it is necessary to make database backups and we can continue with the step Restore databases from a backup or whether the backups are needed to made and then we continue with step Backup all databases 2.
|
|
|
Restore databases from a backup
Location: The database management tool
Start: IS K2 administrator
Description: The step is performed using the database management tools that allow you to make database backups and which were mentioned in the Backup all databases step.
|
|
|
Check disk space (C, installation, database)
Location: OS Windows
Start: IS K2 administrator
Authorization: Administrator authorization to administer the computer for the installation of K2 and the database server
Condition: Optional operation. This is a manufacturer's recommendation. It is advisable to prevent situations where on any of the affected disks runs out the space during the installation of K2.
Description: To avoid problems with insufficient disk space when reinstalling the K2, it is recommended to check the amount of free space on all affected disks. This is especially the C drive on the computer where the K2 is installed. The MSI file is copied to this system disk as installation media before reinstallation. This installation package is stored in the temporary Windows directories after reinstallation until the K2 is uninstalled.
If the K2 is installed on a disk other than the system disk, it is advisable to perform a check also in this location before the reinstallation.
The last place is the disks for databases directly on the SQL server. During the reinstallation, we work with databases, for example, data is imported, structures are converted, etc., so it is advisable to make the check here as well.
Note
The amount of space required on each disk depends on the size of the installation media and also on the size of the database. In some cases, a check, whether there is enough free space, is made, for example when starting the installation. There are situations when the check cannot be performed. It is therefore recommended to always check this information.
|
|
|
Start the reinstallation
Location: K2 Installer
Start: IS K2 administrator
Authorization: Administrator authorization to install applications on the given computer
Condition: The current version supports the upgrade to the selected newer version.
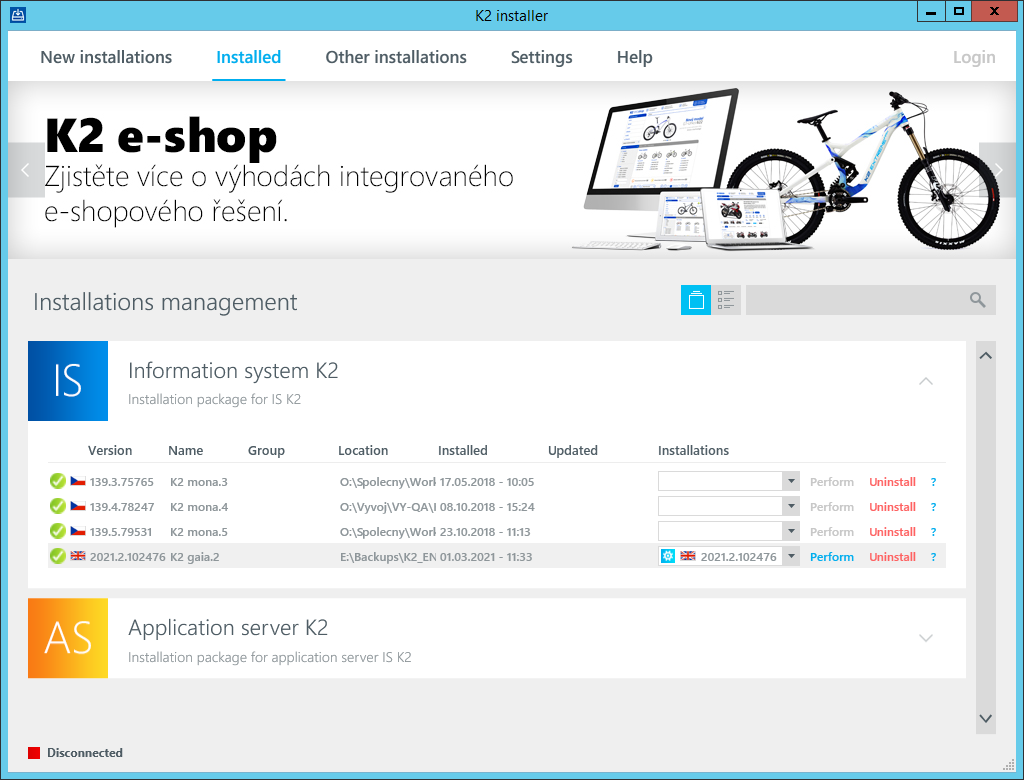
Picture: Records with K2 installations
The reinstallation can be done in two modes.
The first is the classic reinstallation, when there is a complete functional K2 version, which is available in the K2 installer on the "Installed" tab, see the Picture: Records with K2 installations. Above this installation, the update to the new version will start.
In the second case, it is a so-called new installation by taking over an existing K2 installation. This procedure involves a new installation, including the creation of a new entry in the K2 installer after a successful installation. This update is very similar to the classic variant, except that it is used in the following cases:
We only have a "torso" from the current K2 installation
This means that we do not have K2 binaries available, there are only data files, databases, configuration files, etc. The so-called a "torso" can be created, for example, after uninstalling K2. This state can occur, among other things, in a situation where the uninstallation takes place within the update and after the uninstallation itself, an error occurs during the subsequent update. In this case, the K2 remains in a state where it cannot be started and only data and configuration files remain on the disk.
There is no installation record in the K2 installer
The another reason is the missing installation record. In this case, we can not run the update because this option is not available. This can happen, for example, when the installation is being migrated to another server, or we need to reinstall from a different computer than before.
Note
We will use this installation in all cases where we do not have binary files available or there is no installation record.
Note
If we update the K2 in this way, when the situation does not require it, the installation will be OK, but the installation records will accumulate on the "Installed" tab in the K2 Installer and the installation files ("msi"), which the system uses for uninstallation, will accumulate in the Windows system. When we then run the uninstall over any duplicate entry in the K2 installer, the files are removed from the K2 directory, K2 will not be executable, and one installation file is released from the operating system. Other entries in the system remain as inconsistent data, including the remains of the installation file in the Windows system. Please note that each such file takes up about 1.7 GB of data. It is therefore recommended to perform the K2 updates in the form of a classic update over an existing entry on the "Installed" tab in the K2 Installer.
After evaluating the status of the installation, it is necessary to decide how we will continue. If it is necessary to perform a new installation as a so-called "takeover", continue with the Decision making: Is the executable K2 available? If a reinstallation can be performed in the standard way, then continue with the point Start the reinstallation.
Description
To upgrade to a newer version, there must be an entry with the current version, on which the update will start, in the K2 Installer.
The second condition is that the current version can be updated to the selected newer version. We will verify this fact by selecting the version to update in the K2 Installer. For the installation record, you can select the version in the drop-down menu in the "Installation" column. If no version is available in the menu, it probably may not be possible to update the current version to a newer version that is part of the K2 Installer.
If it is not available a version to select, it is possible to hover the mouse over the "?" on the right side of the installation record and the K2 installer displays information about the current installation, including why no version was offered. This makes it possible to find out over which version the user must update to continue.
Note
The K2 installer works in two modes. In the first mode, the K2 Installer is part of a zip archive with a specific K2 version downloaded from the K2 info service. In this case, only the option to update to the version for which the archive is intended is available. Thus, there will be one version or none in the offer to update, depending on the condition.
In the second mode, the K2 Installer is installed on the computer used for installations, the user logs on to the K2 FTP server after launch and has all currently released versions of K2 and other products available. In this case, there will be a version in the "Installation" drop-down menu, to which the given installation can be updated.
To start the K2 update, select the version and click on the "Execute" button in the installation record of the K2 Installer.
The installation continues with the next step.
|
|
|
Decision making: Is there an original K2?
Location: K2 Installer
Start: K2 Installer
Description: There is an executable K2 in the folder specified by the installer or selected during installation. If so, the checks of required initializations of version and checks of database structures are performed automatically. The procedure and possible corrections are described in the points Check of required initializations of version through all databases and Check of all databases structures.
|
|
|
Decision making: Is there a record in the K2 installer?
Location: K2 Installer
Start: K2 Installer
Description: This decision is made internally in the K2 installer and the user does not interfere in this decision. A record in the installer means that the installation was started from the Installed page, see the Picture: Records with K2 installations. If such a record exists, proceed to the next step, otherwise it continues to Install the new version files.
|
|
|
Remove an existing K2 installation
Location: K2 Installer
Start: K2 Installer Wizard (MSI file)
Description: The first step that the K2 Installer performs when updating K2 in the standard way is to remove the existing installation. This process removes all files that have been installed. The files that have not been added by installation, remain in the installation directory. If any file from the installation is modified, so it does not correspond to the file that was installed, it is also left by the Installer.
|
|
|
Decision making: Removal OK?
An error may occur when removing the original installation. Likewise, an error may occur in the next step when a new installation is started. If this happens, we are in a state where we do not have the K2 installation because it was removed, so we do not have a record to run the update that ended with an error.
If the removal of the installation was successful and the new installation has started, continue with the step Install the new version files.
If the removal or a subsequent update failed and the existing installation was removed, we return to the beginning of the reinstallation and continue with the point: Decision making: Is the executable K2 available? or we can terminate the installation process, but the K2 will not be available at this time.
|
|
|
Install the new version files
Location: K2 Installer
Start: K2 Installer Wizard (MSI file)
Description: The new installation is started after the successful removal of the previous installation, or if we update K2 by taking over the existing installation. In this step, the new files that are part of the K2 installation will be copied. After a successful copying, an installation record is created in the OS Windows.
After the successfully files copying, the update automatically continues with the next step, which cannot be influenced by the user. This is the SQL conversion step.
|
|
|
SQL conversion
Location: K2 Installer
Start: K2 Installer Wizard (MSI file)
Description: At this stage, the K2 installer runs the files with SQL conversion scripts which convert the database structure for the new version. Depending on what update it is, a different number of files are run.
The following table summarizes the list of files that run depending on the database platform and also on the scope of the update. In case of an upgrade to a new version, for example K2 mia › K2 luna, all these files are run. In minor updates, only some files are run.
File |
Platform |
Description |
New version |
New release |
New build |
K2_C2020.sql |
MS SQL |
CONF database |
X |
|
|
K2_C2020Ora.sql |
Oracle |
CONF database |
X |
|
|
K2_C2020Additional.sql |
MS SQL |
CONF database |
X |
X |
X |
K2_C2020OraAdditional.sql |
Oracle |
CONF database |
X |
X |
X |
K2_D2020.sql |
MS SQL |
company database |
X |
|
|
K2_D2020Ora.sql |
Oracle |
company database |
X |
|
|
K2_D2020Additional.sql |
MS SQL |
company database |
X |
X |
X |
K2_D2020OraAdditional.sql |
Oracle |
company database |
X |
X |
X |
In the conversion files that run when new version, it is a one-time, non-repeatable conversion. In these cases, there are large conversions which involve the transfer of data and so on. Such operations can no longer be re-run. This could damage database structures or cause inconsistencies in data.
Other conversion files are always run. These are usually operations such as adding a new field to a database table, new table, etc. These files are ready to be run again without the risk of damaging the database or its consistency.
If an error occurs during the conversion, each error is written to the output file "sql_inst.log", which is located directly in the K2 installation directory. If there is an error, this file is displayed to the user at the end of the conversion.
Note
If an error occurs during the update after the conversion has been made and the entire update needs to be performed again, the databases must first be restored from the backup. This is only a state where conversions are triggered that cannot be run repeatedly, see the table above. If the database was backed up only before the entire reinstallation and not after all the checks, you will need to install or restore the original K2 file system from the backup in order to perform all the checks and preparations.
After performing the database conversions, the update continues with the point Required initialization part 2/2.
|
|
|
Required initialization part 1/2
Location: K2 Installer
Start: K2 Installer Wizard (MSI file)
Description: As part of the required initializations of phase 1, only corrections of structures are performed, which could not be performed by running some sql script.
|
|
|
Decision making: Was there an original K2 exe?
Location: K2 Installer
Start: K2 Installer Wizard (MSI file)
Description: If the k2.exe startup file was missing in the folder where the new K2 is installed, and therefore the structure checks could not be performed before the reinstallation, these checks will be performed now. If the checks have already been run on the original K2, continue without these checks to the step Update extensions.
|
|
|
Data import
Location: K2 Installer
Start: K2 Installer Wizard (MSI file)
Description: New data for DEMO and INIT system clients are imported into the K2. Furthermore, system records for various tables are imported into all clients and the standard scripts are being updated.
|
|
|
Required initialization part 2/2
Location: K2 Installer
Start: K2 Installer Wizard (MSI file)
Description: This part of the installation performs actions that could not be performed within conversions, or that require K2 logic, or for which a new script is required.
|
|
|
Import license
Location: K2 Installer
Start: K2 Installer Wizard (MSI file)
Description: A new license is imported into K2 from the file that was selected during installation. This import is performed only when reinstalling the version or takeover of the installation.
|
|
|
News in version
|
|
|
News in version K2 ori.01
|
|
|
Universal Forms
|
|
|
Table formatting
Within the universal forms, we have added the option of formatting the table of records. With this function, you can adjust the table format to better fits smaller devices.
We apply the formatting to the table column.
|
|
|
New WebView component
A new WebView component has been included in the form designer. Use this component to display a web page on a form. The component is intended for use within Web K2.
|
|
|
Basic Code Lists and Supporting Modules K2
|
|
|
New Legislation code list
New Legislation code list has been created, which can be launched from the tree menu. The list of national legislations is displayed in the Legislation code list.
Clients parameters - Tax type and VAT rate for deducting the non-tax advance were moved to the Legislative code list.
|
|
|
Support for more legislation in K2 IS
In K2 IS, legislation can be assigned to your own company (in the Administration of Own Companies). As of version 2022.01, the assignment of legislation is mandatory (during reinstallation, the legislation will be fulfilled according to the state of the company).
The Legislation field has been added to book settings (sales, purchases, and more). It will be used in the case when within one of our own companies we issue documents according to various legislations (e. g. in the case of registration for a VAT number in other states).
Types of taxes, VAT rates, Customs Tariff and Statutory interest codelists were divided into legislation. When creating documents, only the values valid for the legislation that apply to the book in which the document is created are offered.
In the Customer, Article and other code lists, which contain a link to the above-mentioned code lists, values for individual legislations are entered. E.g. On the Article tabs, you can set the VAT Rate, Customs Tariff and Tax Types (for purchase and sale) for all legislation within which we issue documents. When creating documents, the values according to the legislation of the document are automatically filled in from the Article card.
|
|
|
Changes in Taxes types code list
Code list Taxes types was divided into legislation.
We have added to the code list:
- Can be used on advances check box. The field is checked for the types of taxes that may appear on advances (this field is followed by a check when confirming the advance).
- VAT lines items, in which the lines of the VAT return, in which the type of tax can be entered, are displayed.
We have created a bulk action Change of Legislation.
|
|
|
Import of tax types - new parameters
The script has been renamed to ImportTaxType.PAS.
New parameter:
- Legislation = "CZE" // Legislation
- Interactive (boolean) = Yes
After running the script, the input form of the function is displayed, in which the Legislation field (selection from the code list) can now be edited.
Taxes types are updated, in contrast to the lower versions, the Legislation field is also filled in, the Can be used on advance check box is selected, the VAT Line numbers are imported into the tax type items.
|
|
|
Changes in VAT rates code list
The VAT rate code list was divided into legislation.
We have added the Language description field to the code list.
We have created a mass action Changing Legislation.
|
|
|
Changes in Customs Tariff code list
Customs Tariff code list was divided into legislation.
We have created a bulk action Change of Legislation.
|
|
|
Changes in Statutory interest code list
Statutory interest on arrears code list was divided into legislation.
We have created a bulk action Change of legislation.
|
|
|
Changes in Suppliers / Customers code list
On the Basic data tab, the Other VAT Reg. number function is available, which displays the other VAT Reg. number entered on Suppl./Cust. tab. (You can then choose from other VAT Reg. numbers on the documents).
On the Taxes and Accounting tab, you can edit the Tax Type - Purchase and the Tax Type - Sale, and the VAT check box on the purchase / sale documents according to the legislation.
|
|
|
Changes in Article code list
In the Article code list, it is possible to edit the VAT rate, Customs Tariff, Tax type - sale and Tax type - purchase (including types of taxes for RCS) according to the legislation.
|
|
|
Changes in Cards of cash documents code list
In the code lists of the Cash Document Card and the Bank Document Card, it is possible to edit the Tax Type and the VAT Rate according to the legislation.
|
|
|
Change in Cards of other receivables / payables code list
In the code lists of the Other Receivables Card and the Other Liabilities Card, it is possible to edit the Tax Type and the VAT Rate according to the legislation.
|
|
|
Change in Card for Travel Orders code list
In the code lists Cards - fares and local transport, Cards - lodging expenses and Cards - necessary ancillary expenses, it is possible to edit the VAT rate according to the legislation.
|
|
|
Filter article book by category
Filtering by category in the article book allows you to display items only from the currently selected category or subcategory. It will therefore be easier to administer or find the article card in K2 as well as on the e-shop.
To display the tree of e-shop categories, a new field in the preview of the WEB record is used to display and edit data where it is necessary to enter the online store. The display of the online store is stored on the user. If no online store is selected, the e-shop category tree will not appear in the product book.
|
|
|
Marketing
|
|
|
Bulk change over Partners and Contact persons - Items change
In the universal forms, the bulk Change of items was added to the book of Partners and Contact persons. For marked records or records from the container, this bulk change can be used to set Marketing classification records and, in the case of Partners, also to set Branches.
|
|
|
Sale/Purchase
|
|
|
Advances - check tax type upon confirmation
When confirming advance, it is checked whether the document contains only the types of taxes that may appear on the advance ( Can be used on advances check box is selected on the tax type). If there is another type of tax on the document, the message "There is a type of tax on the document that cannot be used on the advance" is displayed.
|
|
|
Editing documents in Books according to legislation
The Tax Type, VAT Rate and Customs Tariff are now applied to the documents according to the legislation valid for the selected book.
Documents cannot be copied between books from different legislations.
If Statutory interest is enabled on the document, the percentage according to the statutory interest for the document legislation is added.
|
|
|
Date check for VAT self-assessment
When confirming the invoice, advances, OP / OR, cash and internal document, on which the Tax Type with the VAT Self-Assessment flag is switched on, the Acc. transaction date and the Date of Invoice date are checked.
In the case of a bulk confirmation, such documents will not be confirmed, the Acc. transaction date and the date of Invoice date are not identical shall be entered in the error log.
Tax types in the tax recapitulation are checked on the invoice, for other documents Tax type in items.
|
|
|
EKOKOM - log display
If, during the processing of EKO-KOM, article are found for which there is a defined packaging, but due to failure to meet the conditions for the set packaging restrictions (eg setting the packaging only for a specific supplier / customer or address key), these article will not be included in the calculation, then at the end of the calculation, a newly displayed log with a list of such article cards.
|
|
|
EKOKOM - The book Breakdown of packaging into items
In version K2 gaia.05, the table Breakdown of packaging into items was added to the EKOKOM module. This table shows the packaging items of each product from which EKO-KOM is calculated for a given period. Newly created reports and scripts are then run above this table, which can be the basis for audit control. The data in this table can be filtered in the standard way. If the table is to be filled, it is necessary to check the box Record partial values for S / P items when calculating EKOKOM.
The Export data to Excel script (EKOKOM_exportExcel.PAS) was created, which is run from the calculated book Breakdown of packaging into items and which exports grouped packaging items for article cards, units of measure and other similar packaging characteristics to Excel, including unit and total weight for packaging items.
The report (EKOKOM - sale) EKOKOM_Sale.AM then displays an overview of article sold for individual customers. A similar report EKOKOM_Purchase.AM is then specified for article that are reported on the purchase side. Both reports are also run from the Breakdown of packaging into item.
If EKOKOM is reported on the sales side, then the auditors may be required to output the suppliers of article that are reported in EKOKOM. For these cases, the EKOKOM_Suppliers.AM (EKOKOM - Article Suppliers) report has been added, which runs in the Container state on the Article book. The procedure for creating a container of article from the table Breakdown of packages into items is described in the manual for version K2 gaia.05 in a new chapter.
The last report is the EKOKOM - Overview of packaging for article (EKOKOM.AM) report. The report for each item entering EKOKOM displays grouped packaging items with packaging characteristics. This report is also run from the book Breakdown of Packaging into Items.
The original EKOKOM_Purch.AM report has been deleted and moved to the archive and will no longer be supported.
|
|
|
Price lists - new field In sales add gross prices
The field In sales add gross prices has been added to the price list header. If it is checked, then the exact gross amount from the price list will be added to the sale item and the net amount will be calculated over the tax rate. Thus, there is no situation where, due to the conversion to the net price and possible rounding, the total gross amount of the item with extra pennies is displayed.
|
|
|
Price lists - new field Catalog
The Use catalog price lists field has been added to the price list settings. If it is checked, then it is possible to check the Catalog field on the Basic data tab in the price lists. If it is checked, then within the determination of the catalog price (ie the Catalog field in the Prices section on the document item) it first tries to find a valid price list for the article with the Catalog flag. If it is not found, then the price is searched according to the original logic. The price list with the Catalog flag is not taken into account when searching for the selling price.
|
|
|
Discount coupons - possibility to apply more discount coupons for one contract / basket
It is now possible to apply more discount coupons to one order / basket, so it is possible to combine discount coupons, gift vouchers and the use of loyalty program points. In this context, the Gift Voucher option was added to the discount coupons. If the option is checked, the discount coupon will be used as a money order (partial payment).
|
|
|
EDI
A new EDI module has been created, which replaces the original scripts for EDI sales and purchases. Existing scripts for EDI are still supported in the K2 ori version, but will no longer be developed.
The principle of working with the new EDI module is to strive for the greatest possible automation of processes related to the exchange of electronic data. It is a unified management of all documents within EDI (incoming and outgoing), including the ability to resolve any error conditions.
The planned tasks running in the background then implement the actual export and import of messages. However, scheduled tasks are not a condition for successful export or import. These actions can also be performed by the user in the EDI Message Queue book.
The module is also ready for the possibility of special modifications to the processes of export and import of messages using modifications in the script.
The EDI module supports ORDERS (order), ORDRSP (order confirmation), DESADV (sending notification), RECADV (receipt confirmation), INVOIC (invoice) and APERAK (confirmation of receipt of messages) messages.
|
|
|
Logistics
|
|
|
Transport - new environment
Scheduled delivery orders - replaces the Delivery orders schedule, which could always be only one in K2 - this is now a document, which means that it is now possible to create more documents of planned delivery orders in K2. The documents are available in the form of new forms.
Delivery orders - functionality maintained in the environment of new forms, with the user choosing documents across several scheduled delivery orders.
Transport lines - new book Transport lines are used to create regular delivery orders and their definition. The field can then be filled in on a specific delivery. The line is then linked to the Customers code list, where on the Sales page, on the Transport tab, individual lines that serve the given customer can be displayed.
Vehicles - are newly rewritten in the environment of new forms, and a calendar is now available and after defining, the routes of the vehicle can be tracked in the calendar.
|
|
|
Maintenance
|
|
|
Possibilities of creating serviced devices and service tasks
Serviced devices can also be created outside the module of the same name. There are several options and approaches.
In the Article, Resources, Vehicles, and Assets books, new commands are available located in the ribbon on the Function tab in the Maintenance section. Above a specific line, a form can be called up to create a New Serviced Device. It is also possible to create related documents - Service Request and Planned Service Action - but the user must stand on a specific serviced device. The table of connected serviced devices is available in each of the mentioned modules on page 1 - Basic data on the Served devices tab.
The module is ready for inclusion among the serviced devices from sales items. So there is a possibility:
1. Create a new serviced device from the sales item - Orders / Sales Items and there is a context tab in the ribbon called Sales Items. From there, the user can create a New Serviced Device over a specific item. The user will again see a form where he has already filled in all the necessary fields: Abbreviation, Article, Description, Contact information, including Batch, Serial Number, Routing Variants and Supplier. Analytical axes (Center, Order code, etc.) are also transferred to the form.
2. Connect the Serviced Device to the sales item - All you have to do is fill in the Served Device field above the sales item and K2 will add the required information back to the sales item or serviced device. However, it must be the same article card, if the article card is not the same, then K2 will only connect the serviced device to the item sold and will not fill in any fields. If the condition of the same article is met, K2 will transfer the required data to the Serviced Equipment or back to the sales item. This entire action is performed only after saving the order record.
|
|
|
Task Definition Templates book
The book of service definition templates was created for the needs of clearly defined definitions of planned service actions for re-use. It is possible to create many definitions in the book and then easily use them across multiple devices, without the need to fill in the definition form repeatedly. When selecting from the Templates code list, the user is pre-filled with all mandatory fields Definition - Abbreviation, Book, Definition Description, Unit and Time Interval, Unit and Time of Action, or Attribute Set, Number of Repetitions and Action Entry. Therefore, the user only has to fill in the start date in the definition and, if necessary, select the employees who will perform this service operation.
|
|
|
Serviced equipment - Components - tree structure
Components tab offers the option of displaying all items (Components tab) in a tree structure. A new field named Superior Component has been added to the form for adding a new component (including copy and assigment). To be included in the tree, this field must be filled in when inserting the component.
|
|
|
Serviced equipment - Contracts
The contract tab has disappeared, it is now possible to register contracts on the last tab - Attachments. At the bottom of the form is the Contracts tab and all types of contracts can now be added (error correction).
|
|
|
Production
|
|
|
Opening of resources from job cards and manufacturing routings
If the book of Resources is opened as lookup (typically from the Resource field from manufacturing routing or from job card), is the book displayed in simplified format. It brings faster opening of the module. There are no calculated fields (capacities, utilization), the breakdown of capacities and utilization in the preview panel, and some tabs displayed in this simplified format.
|
|
|
Blocking materials with planning job cards
It is possible to block materials already on planning job cards. It means, there can be the release "l" flag on the items. This function can be activated with the Client parameter Block materials with planning job cards. If this parameter is activated, the programm automatically activates another parameter: Consider unconfirmed completion job cards. This parameter insures, that the actual values on planning job cards are updated already from unconfirmed completion job cards.
|
|
|
Planning job cards - actual values from unconfirmed completion job cards
There is the new Client parameter - Consider unconfirmed completion job cards. This parameter insures, that the actual values on planning job cards are updated already from unconfirmed completion job cards.
|
|
|
Finance
|
|
|
Homebanking - new options when exporting a bank order (HB_Order.pas)
The option to export several marked bank orders at once has been added to the HB - Bank order function (HB_Order.pas). The OneFile parameter sets whether only one export file should be created or a separate export file for each selected command.
It is now also possible to insert an export file as an attachment to a bank order. It is set by the ArchiveDocFile parameter and the document type for the connection must be specified, which must exist in K2).
|
|
|
Invoice offset and Corrective Tax Documents when creating Corrective Tax Documents
New functionality has been added to the function for creating Corrective Tax Documents (FA_DOB.pas). If a Corrective Tax Document for an unpaid invoice is to be created, it is now possible to create a straight internal document that will set off the invoice and the CTD.
In this context, new parameters have been added to the function that need to be set:
• InternalDocBook - Abbreviation of the internal documents books for offset (empty by default)
• CreateOffset - Create invoice offset and CTD internal document (default No)
|
|
|
HB - Grouping of bank order items
We have added the option to group only marked bank order items to the function for Grouping bank order items (HB_GroupOrder.pas).
|
|
|
Management reports
|
|
|
Creating dashboard by a wizard
You can now use the Dashboard Creation Wizard to create dashboards. This is a function that uses a universal form environment and allows you to create dashboards more easily and intuitively. The wizard is used to create dashboards from the very beginning, ie. including its elements (reports).
The function is available in the Dashboard Configuration book and is launched by the Create New Wizard Dashboard button, which is located in the ribbon.
Use the wizard at the beginning to set the layout of the elements within the dashboard.
Subsequently, the individual elements of the dashboard are set up in a clear environment.
|
|
|
Dashboards - presentation
We have created a new book Dashboards - presentations. In this book, you can set up dashboards that will appear as presentations in a web browser when you enter a URL.
|
|
|
New cube Statistics of mobile terminals
We have created a new cube for mobile terminal statistics. To include the cube in the OLAP export, it is necessary to set the MTStatisticCube parameter to Yes.
|
|
|
Accounting
|
|
|
Self-assessment of VAT according to the company's own document
The internal VAT self-assessment document is now created according to the parameters of the self-assessment documents, which are set for the document's own company. (So far, the document was created according to the settings of the current own company).
|
|
|
Posting keys – new parameter DISCOUNT for Amount
We have added the parameter "DISCOUNT" for the Amount to the Posting keys for posting invoices - a discount from the net price from invoice items is posted.
|
|
|
Posting keys - new field Post tax type and VAT rate
We have added the Post tax type and VAT rate check boxes to the posting keys for posting invoices, advances, other receivables and payables, bank statements, cash and internal documents. If checked, the Tax Type and the VAT Rate are posted on the VAT documents, and the Tax Type is posted on the non-VAT documents.
|
|
|
Accounting document - new fields Tax type and VAT rate
We have added the Tax Type and VAT Rate fields to the accounting document item. These fields are filled in automatically when posting invoices, advances, other receivables and payables, bank statements, cash and internal documents if the field Post tax type and VAT rate is checked in the Posting keys header. Tax documents and the VAT rate are posted on documents with VAT, and tax types are posted on documents without VAT.
|
|
|
New parameters for the Import Tax Types script
The script has been renamed to ImportTaxType.PAS.
New script parameters:
- Legislation = "CZE"
- Interactive (boolean) = Yes
After running the script, the input form of the function is displayed, in which the Legislation field (selection from the code list) can now be edited.
The types of taxes are updated, in contrast to the lower versions, the Legislation field is also filled in, the Can be used on advance check box is selected, the VAT Line numbers are imported into the tax type items.
|
|
|
Modernization of the VAT module
We have created a VAT module in universal forms.
|
|
|
VAT books
In version 2022, the Group Member is replaced by a Book, so VAT documents are created in different books just like other documents in K2. The VAT calculation parameters are now set in the VAT Books.
We have added new rights for VAT Books in the Administrator module:
- Viewing VAT books
- VAT book change
In the VAT Book Settings it is possible to edit:
- Company - within one client we can calculate VAT for various entities,
- Legislation - we can choose the legislation of the state according to which VAT will be calculated.
- VAT calculation parameters,
- Setting parameters for the VAT return form.
The currency of the state is displayed in the Legislation.
Only books of primary documents with the same company and legislation as the VAT Book can be entered in the Calculation Parameters.
The parameter of calculation of the Book of Self-Assessment Documents was canceled, the parameter of calculation of Slovak VAT in Czech K2 was canceled and replaced by legislation.
|
|
|
VAT documents
VAT documents are created in the selected Book. The VAT calculation parameters are loaded from the currently set VAT Book.
If Document Books (invoices out and other types of documents) are specified in the calculation parameters, documents from these books are read, otherwise documents from books that have the same Company and Legislation as Company and Legislation in the VAT Book are read. The amounts will be calculated in the currency applicable to the Legislation.
Functions for individual types of VAT returns can be started from the ribbon. The keyboard shortcuts for Additional Return (Shift + F3) and Corrective Additional Return (Shift + F4) have changed.
The relevant line of the VAT return form is now also displayed on the VAT Document on the Custom VAT Items tab.
If the VAT Document is not followed by another VAT document (eg for a proper return, no corrective or additional return is created), then the document can be canceled
|
|
|
Items of VAT documents Book
The new book Items of VAT documents is included in the tree menu: Accounting - VAT - VAT - Items of VAT documents.
The VAT Document (F7) and Primary Document (Ctrl + F7) functions are available in the ribbon.
There is a factory PivotTable Items by tax type and VAT rate.
|
|
|
Update of default values of VAT calculation parameters
In the tree menu, the VATD_Init.PAS script is renamed to Update default values of VAT calculation parameters (originally Fill in default values).
|
|
|
Automatic VAT re-posting
We have created a function for automatic reposting of VAT if the document enters the accounting in one month and the VAT return in another.
In the VAT Posting Settings section, we have added in the VAT Re-posting section:
- check box Automatically re-post VAT applied in another month
- items Account for VAT re-posting applied in another month and Book of internal documents
If automatic VAT re-posting is enabled, when confirming a document that has an Accounting Case Date in a month other than the Invoice Date, 2 internal documents will be created (they are displayed on the Attachments tab in the Internal Documents section.)
- On the first internal document, the balance of the current month is transferred to account 343 as of the Accounting Date of the original document.
- On the second document, as of Invoice Date of the original document, i. e. the date when the invoice enters VAT, the amount of VAT from account 343 balance of the current month is transferred back to the relevant VAT account.
This ensures that in the General Ledger, the amounts of VAT on individual analysts correspond to the amounts in the VAT return and that the amounts not applied in a given month are 343 on the analyst's balance of the month.
|
|
|
Correction of penny balances of matching symbols
We have modified the script Correction of penny balances of matching symbols (MatchSymb_BalanceCorrection.PAS) - the correction will be performed only for matching symbols that do not have movement after the date of correction (Accounting transaction date from the input form).
|
|
|
Balance sheet checks
We've added the following checks to the Balance Sheet (UCT_EA_Balance.PAS) and Shortened Balance Sheet (UCT_EA_BalanceS.PAS) scripts:
- If the total assets and liabilities do not match, the message "Total assets and liabilities in the current period are not the same" or "Total assets and liabilities in the previous period are not the same" is displayed.
- If the Economic result of the current period in liabilities does not match the Economic result of the profit and loss, the message "Economic result of the current period in liabilities does not match the result in the analysis of the income statement." If the SetPastPeriod parameter is set to "No" in the Balance sheet script (i. e. the current and previous period are entered in the input form), the economic result is also checked for the previous period.
In connection with the control of the economic result, we added parameters to the scripts:
- ProfitLossStatement - abbreviation of the analysis, in which it is checked whether the economic result is identical with the economic result in liabilities. The income statement line specified in the ProfitLossStatementProfitLossRow parameter is compared with the line in liabilities specified in the LiabilitiesProfitLossRow parameter.
- ProfitLossStatementProfitLossRow - designation of the line Econimit result in the Profit and Loss Statement.
- LiabilitiesProfitLossRow - Designation of the line Economic result in Liabilities.
Default parameter values in the Balance Sheet script:
- ProfitLossStatement = Výsledovka,
- ProfitLossStatementProfitLossRow = 55,
- LiabilitiesProfitLossRow = 98.
Default values of parameters in the Balance Sheet script in an abbreviated range:
- ProfitLossStatement = Výsledovka Z,
- ProfitLossStatementProfitLossRow = 25,
- LiabilitiesProfitLossRow = 21.
|
|
|
One Stop Shop - VAT Return
The following scripts are prepared for creating a VAT return in the One Stop Shop mode:
- OSS VAT return - EU scheme (OSS_VatReturn_EUScheme.PAS),
- OSS VAT return - Import scheme (OSS_VatReturn_ImportScheme.PAS),
- OSS VAT return - Non-EU scheme (OSS_VatReturn_NonEUScheme.PAS).
The scripts can be run from the tree menu: Accounting - VAT - One Stop Shop.
|
|
|
OSS - Creation of an Internal Document for a domestic VAT return
We have created a new script Creating an Internal Document for the domestic VAT return (OSS_CreateInternalDocument.PAS).
The net document amounts from all OSS (One Stop Shop) regimes in the currency of the company's own company, which have Invoice Date in the period for which it is obliged to pay domestic VAT, are loaded into the internal document. The amount of these amounts is reported on line No. 26 of the domestic VAT return.
To create an Internal Document, you must first set the OSS Parameters:
- Basic settings - Sales books
- Types of taxes for individual regimes
- Creation of an internal document for a domestic VAT return - Book of internal documents (internal document will not be charged), Tax rate "N", tax type "VS" (for a Czech VAT return).
|
|
|
Intrastat
|
|
|
Modernization of Intrastat module
The Intrastat module in universal forms has been created
|
|
|
Intrastat books
A member of the group is replaced by the Intrastat Book, intrastat documents are created in various books as well as other documents in K2. If we perform intrastat calculation for different subjects within one client, these subjects must have their Intrastat Book in which the parameters will be set. Now the intrastat parameters are set in the Intrastat Books.
In the Intrastat Book Settings it is possible to edit:
- Company - within one client we can perform intrastat calculation for different subjects.
- Legislation - we can choose the legislation of the state according to which the intrastat will be calculated.
- Intrastat calculation parameters - only invoice books with the same company and legislation as the Intrastat Book can be entered.
|
|
|
Intrastat documents
Intrastat documents are created in the selected book. The intrastat calculation parameters are read from the currently set Intrastat Book.
If book of Invoice out / in are specified in the calculation parameters, documents from these books are read, otherwise documents from books that have the same Company and Legislation as the Company and Legislation in the Intrastat Book are read. The amounts will be calculated in the currency applicable to the Legislation.
Functions for individual types of intrastat reports can be started from the ribbon.
|
|
|
Assets
|
|
|
New report Asset history statement
We have created a new Asset History statement (AssetHistoryStatement.AM) report that displays data based on depreciation history. The report is used if the cards have been converted from Old Assets in the Assets module and a statement of assets as of the date of conversion or an earlier date must be displayed.
|
|
|
Payroll
|
|
|
Attendance system
New Attendance System module was created in the K2 Information System. This allows employees working time data to be securely stored directly in your system without the need for third-party systems.
|
|
|
Web and e-shop
|
|
|
Smart Search Search Extension
Thanks to the Smart Search technology, thanks to the faceted search system, it is possible to precisely filter article depending on the selected filter parameters in the e-shop. It will provide the customer with information about the offered article immediately. The customer will get a better overview of the offered assortment.
Another extension of Smart Search is that even after displaying the search results, it is possible to further filter the products and sort them according to needs.
|
|
|
Templates for e-mail - K2 formatting wysiwyg
The advantage of K2 formatting wysiwyg (formatting) editors is that the resulting template, including all graphic adjustments, can be seen right in the editor, without any export. The goal is to facilitate the writing and editing of source code, custom formatting selection, the ability to search for text fields and the ability to change the language editing. The editor supports all common text operations, whether it is paragraph formatting, color changes, indents, creating numbered lists, etc. Of course, inserting images and hyperlinks.
|
|
|
Use of discount coupons
For e-shop customers, there is the option of using multiple discount coupons within one store, where the e-shop administrator has the option of setting up targeted use in the K2 information system.
|
|
|
K2 e-shop
K2 e-shop is a modern platform for your solutions in the world of e-commerce based on the most modern technologies, which has a significant increase in speed and availability for your customers. It enables the automation of most routine tasks associated with ordering on the e-shop.
It contains the latest technologies in the field of Smart Search, thanks to which you can be sure that customers will find exactly what they are looking for.
It keeps data in one place and in one environment.
You can easily run multiple e-shops or B2B portals in one system.
It also includes complete active monitoring of performance, speed and possible errors, which is solved directly on the part of the supplier.
|
|
|
Administrator
|
|
|
New rights in Administrator module
We've added new rights in the Administrator module:
VAT books:
- Viewing VAT books
- VAT book change
|
|
|
New rights in Code lists module
We have added new rights in the Code lists module:
Legislation:
- Legislation editing - the user may create and change record in the Legislation code list.
- Change of legislation in code lists - the user may change the Legislation field in code lists divided according to the legislation (eg type of tax, VAT rate, ...).
|
|
|
New contract rights
We have added new rights in the Code lists module:
Contracts:
• Edit a contract attribute
• Edit contract code
• Edit the type of financial performance
• Edit contract type
• Edit subject type
• View a contract attribute
• View the type of financial performance
• View contract type
We have added new rights in the Purchase module:
Contracts - purchase:
• Change of contracts in bulk
• New contract with copy
• Undo - confirmation of the contract
• Undo- cancellation of the contract
• Confirmation of the contract
• Cancellation of the contract
• Change of contract confirmation date
• Change of confirmed contract status
Contracts - other:
•Change of contracts in bulk
• New contract with copy
• Undo - confirmation of the contract
• Undo- cancellation of the contract
• Confirmation of the contract
• Cancellation of the contract
• Change of contract confirmation date
• Change of confirmed contract status
We have added new rights in the Sales module:
Contracts - sale:
•Change of contracts in bulk
• New contract with copy
• Undo - confirmation of the contract
• Undo- cancellation of the contract
• Confirmation of the contract
• Cancellation of the contract
• Change of contract confirmation date
• Change of confirmed contract status
|
|
|
New rights in Accounting module
In the Accounting module, we have added new rights to the VAT section:
- Viewing the VAT Document Items book
|
|
|
Load Balancer
Load Balancer is an element of the K2 architecture that can be used to distribute the load between multiple application servers. The K2 API thus has the option of connecting to multiple application servers simultaneously. When sending a request, the least busy server is evaluated first and it receives the request for processing.
|
|
|
Web K2
|
|
|
K2 Web optimization for mobile devices
Responsive design was applied for the K2 web, so that the user could make full use of it on any mobile device and all functions were fully functional. Specifically, these adjustments are:
Easily accessible and customized main area as a button at the bottom of the screen and subsequent switching of areas.
Modified ribbon displayed as a button bar.
Other ribbon functions can be found in the burger menu on the right side of the screen as part of the button bar.
Pop-ups appear from the bottom of the screen.
The lookup table appears from the left side of the screen.
The preview view is available as a button and can be found at the bottom of the screen.
Using gestures similar to those on the desktop, you can use the mouse to optimize the work with the grid, when you can change the order, width or delete a column.
The individual fields on the form are clearly arranged one below the other on the screen.
All horizontal spritters can be used as an arrow symbol button, where the button toggles between left and right content.
|
|
|
Dashboard display support
We have added support for displaying dashboards to Web K2. Individual dashboards can be displayed graphically directly from the Dashboard Configuration book. Dashboards are now available on any device via Web K2 and a web browser.
|
|
|
Virtual keyboard in web K2
You can create a button on the form that opens the keyboard.