|
|
|
Notification System - Conditions
The tab Conditions
If you have the specific requirements for the notification sending, here you can set your own conditions for each action on this tab.
Note: A user with the right Administrator - Access to settings level - Configure notification can create / edit / delete notification conditions for all users. A user who does not have this right can create / edit / delete only notification conditions in which he/she is single recipient.

Picture: The K2 Notification System form - Conditions tab
A new condition can be inserted by using Insert key or by using the button ![]() . This opens the form for definition of a condition.
. This opens the form for definition of a condition.
The tab General
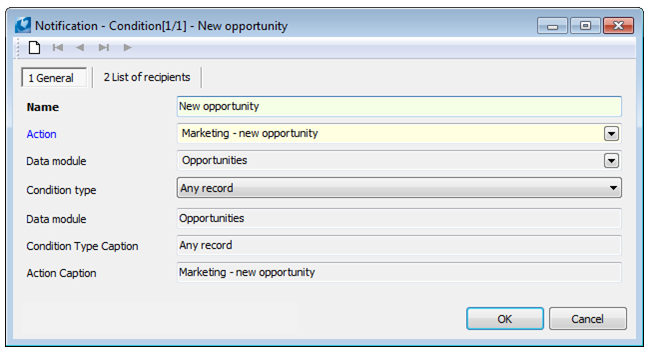
Picture: The form for a notification's condition definition
Fields' description:
Name |
A condition name. |
Action |
An action which will be run. It is selected from the form of actions. |
Data module |
The data module over which the action will be monitored. |
Condition Type |
Here select on which records the action will be run. |
It is necessary to check the "Notify" option on the specific status for the correct functioning of the condition Change of status. This option can not be enabled on system status (record number is greater than 2,000,000,000) by other way than by a special registered function.
Note: Upon receipt of the notification, the right to record is checked. If the user does not have the permission for the record (e.g. an invoice), the notification of the action will not be delivered to him/her.
Description of the checkboxes:
One-time condition |
If this option is checked, a condition will be deleted after first use. |
Valid |
The field is automatically checked, if a definition of the given condition is correct. |
Inactive |
If this option is checked, this condition is temporarily disabled. Such a condition does not have to include all the mandatory data, because its validity is not checked upon saving. The condition can be re-activated at any time by unchecking the "Inactive" option. |
If you select "All Meeting Conditions" as the Condition Type, the next tab Conditions will appear in the form.
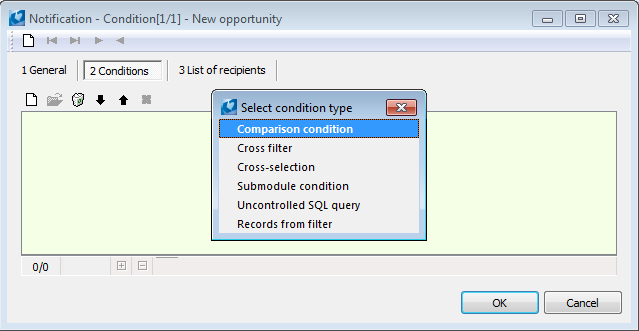
Picture: The form for a condition definition
After opening the tab and pressing Insert key or the button ![]() , the form for selecting condition type appears. We work with it just like if we were creating a filter (see the chapterFilters - Conditions tab).
, the form for selecting condition type appears. We work with it just like if we were creating a filter (see the chapterFilters - Conditions tab).
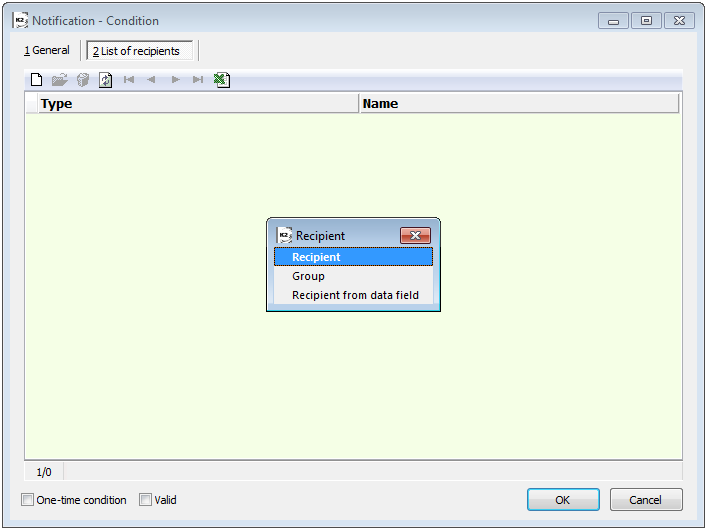
The List of recipients tab
The form for inserting a recipient or a group will appear. It works the same as when creating a recipient or group on the Groups tab in the initial Notifications form (the chapter Notification system - Groups). In addition, it is possible to insert recipients from the data field.
Picture: The form for recipients settings
The Recipient from data field item allows us to send a notification to the recipient directly or through a link from the data module record. After selecting this item, the Recipient from data field form appears.
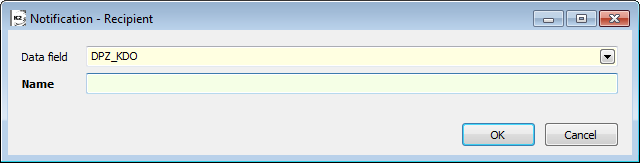
Picture: The form for setting a recipient from a data field
A data field, that refers to contact persons or users in which a contact person is set, is selected in this form. The filled Data Module field on the General tab is a prerequisite for setting the data field.
It is possible to enter more recipients from data field. Such a recipient can not be added in a group, but we can use it together with the "classic" recipient.
Recipient settings for the direct notifications
For the correct direct notification settings (when the Ignore the "Direct" flag option is checked), it is necessary to set the recipients from the given data fields for the selected actions:
Action name |
Data field |
Incoming task |
Owner |
Workflow - new step |
Owner.ContPerson |
Nonfulfilment of workflow step |
Owner.ContPerson |
Nonfulfilment of task - message to the assignee |
Owner |
Nonfulfilment of task - message to the submitter |
Client |
New email |
UserId |
Missed call |
ResponsiblePersonId |
The natScriptNotify and natMessage actions will always work without setting up the recipient.
Example: We want to send a notification about the activity confirmation to the responsible person, who is filled in in the selected activity.
Choose the "Activities" data module in the condition settings and in the Recipient from data field form choose the "ZodpOs" (Responsible person) data field. This field is referring to the Contact Persons code list.
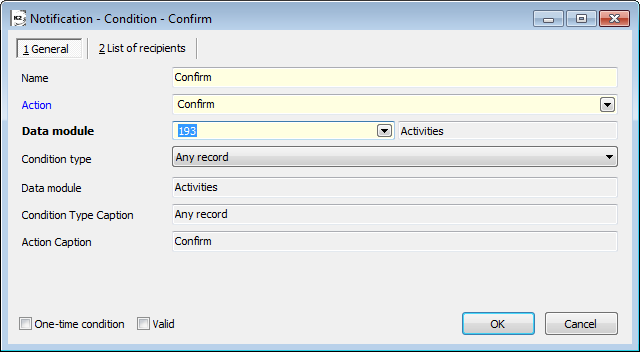
Picture: Setting the condition to confirm activity
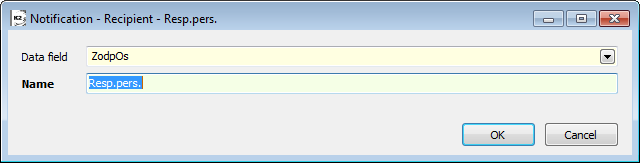
Picture: Setting the "Responsible Person" data field