Receipt Cards
Receipt Card is a document regarding the receipt of articles to stock. Receipt card enters accounting. Receipt card is confirmed by the physical receipt of articles to stock. A confirmed receipt card may be liquidated and posted in the the module Accounting.
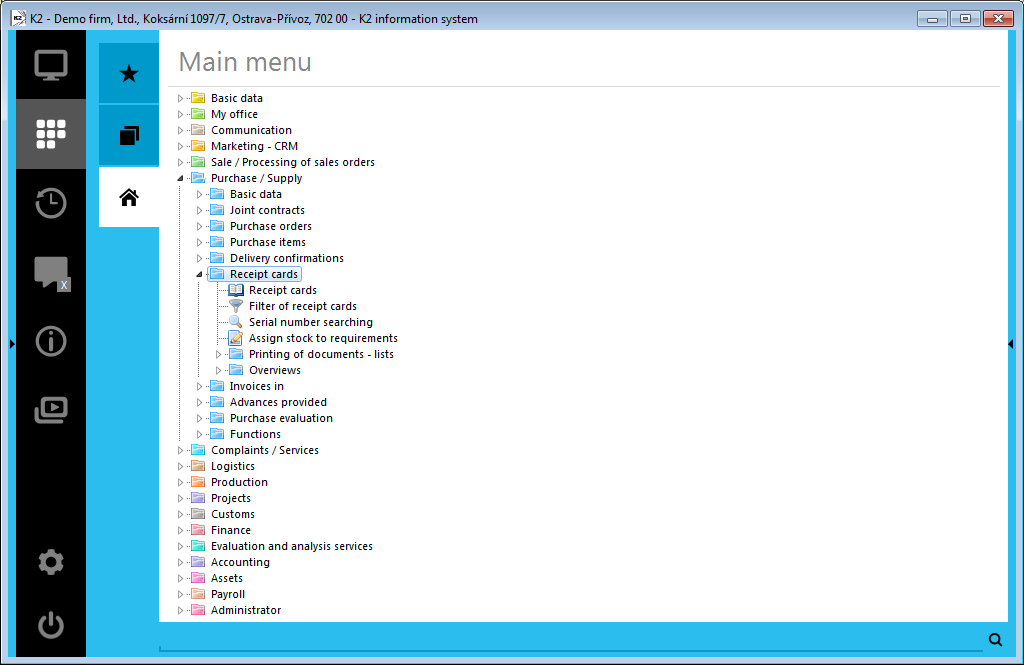
Picture: Open menu of the Purchase/Supplying - Receipt Cards module
Receipt Cards Book
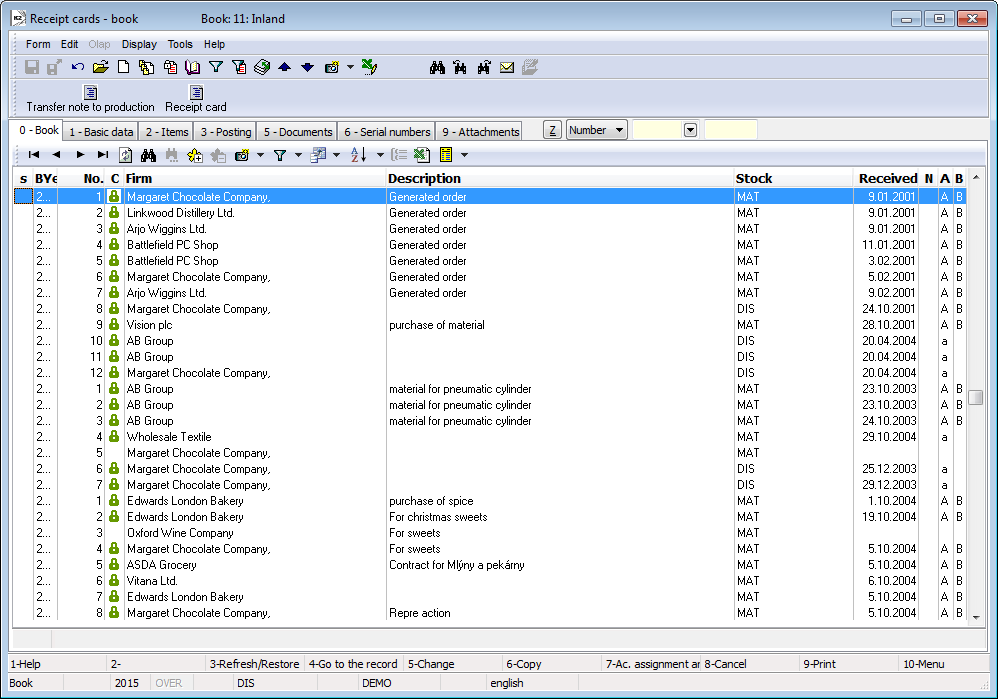
Picture: Receipt Cards Book
Stock Price at Receipt:
There are several existing variants of price entering. The ideal case occurs if you firstly have a confirmed Invoice to a received article. This gives us the exact price of the received articles. If any of the items is not on the confirmed Invoice, it initially has the stock price from the Articles database stated.
If we confirm the Receipt Card before the Invoice , we will be notified of this and the Receipt will be executed in the entered price which corresponds to the stock price in the Articles database, i.e. the one we had changed on the Receipt Card. The Invoice Price will then be saved only in the Invoice and it does not change the Stock price of the Receipt card any more. These price differences may be compared later via the Stock Recalculation function.
If we confirm the Invoice before the Receipt Card, the original stock price on the Receipt Card will be automatically overwritten by the Invoice price, and this cannot be changed any more.
The above mentioned does not apply in the case of stocks with the Fixed Stock Prices setting - during the Receipt Card confirmation, the articles will be priced with the Planned Stock Price from the Article card, and Stock Recalculation will not influence the price any more.
Receipt Card Document
Basic data (1st page)
There are basic data that serve the document identification on the 1st page of the Receipt Card. If the Receipt Card is created as a subordinate document, the data from the superior document, i.e. from the Purchase Order, are automatically added to its header.
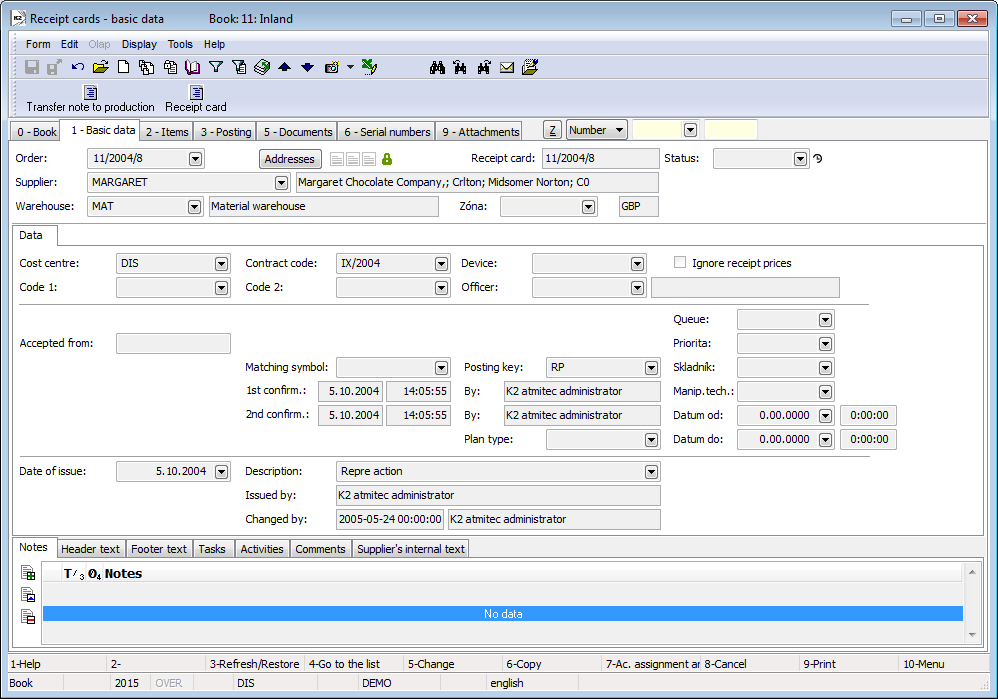
Picture: Receipt Cards - 1st page
Field Description:
Purchase Order |
If the Receipt Card has been issued as a subordinate document, the Purchase Order number which the Receipt Card is linked with, is displayed in this field. If the Receipt Card has been issued as a free document, this field is empty. |
Addresses |
The button displays an addressee or superior firms. For further information, see the Addressee chapter. |
Receipt Card |
The Book, Business Year and Number of a Receipt Card. |
Status |
Field for selection from a code list. This field enables to filter a document according to the status that the user has selected. |
Supplier |
Data about the supplier from whom we buy articles. This field includes a link to the Suppl./Cust. book. |
Warehouse |
Receipt Card Warehouse. Warehouse for a Receipt Card. Priorities of adding a warehouse into the header of a Receipt Card:
Physical stock: this is seen in the lower status bar of a program and before creating a stock document, it is possible to change it directly from the superior document by using Alf+F10 keys on the 2nd page. |
Zone |
A warehouse zone to which the receipt will be executed. Selection of location in items is limited by the zone in the document header. |
In the lower part of the form, it is possible to work with notes and supplements by using the Notes, Header Text or Footer Text tabs. Further description of the work with notes is stated in the Basic Code Lists and Supporting K2 Modules - Notes chapter. Supplier Internal Text tab serves to display the supplier's internal text. You can also use the folders Tasks and Activities. Closer description of work with the folders is stated in the Tasks - Document Folder and Activities - Document Folderchapters.
The Receipt Card document header contains only the Data tab.
The Data tab contains basic information of the document header.

Picture: Data - Receipt Card (page 1)
Field Description:
Cost Centre |
The abbreviation of the cost centre that has issued the Receipt Card. |
Contract Code |
The code that is further copied into the Receipt Card items. |
Device |
Reference to the Devices book. It is copied from the Purchase Order into the subordinate documents. |
Code 1, Code 2, Officer |
The fields enable the user identification, eventually a link to the Officers book. For the further description see the Basic Code Lists - Code 1, Code 2, Officer chapter. |
Handed over by |
From whom the articles were received. |
Matching Symbol |
This field serves for setting the matching symbol definition of the accounting documents (see the Accounting - Matching Symbols chapter). |
Posting key |
Posting key of a Receipt Card. If you do not enter a posting key in the items of a Receipt Card, then this posting key will be inserted into the particular items of the document when confirming this document. |
1st Confirmation |
The date and the hour of the 1st confirmation of a Receipt Card, including the person who has confirmed the document. |
2nd Confirmation |
The date and the hour of the 2nd confirmation of a Receipt Card, including the person who has confirmed the document. |
Plan type |
The selection from a Plan Type code list. The Plan Type that is defined in the Books of Purchase book on the 1st page in the Plan Type field is entered by default into new documents. If we create Receipt Card as a linked document to a Purchase Order, the plan type is copied from the Purchase Order. |
Queue |
The queue to which the document is assigned for processing. An example of a queue may be to divide warehousemen into certain groups. By entering the queue in the stock document, the order number for assigning to processing within the assigned queue will be generated when the document is saved. |
Priority |
The document priority for adding into a job queue. |
Whse-man |
The person who has processed the document. A warehouseman is selected from the Officers book. |
Date from / Date to |
The time interval stating for how long the warehouseman performed the logistical task (receipt). |
Date of Issue |
The date of issue of the Receipt Card. The current date is automatically pasted to the field. |
Description |
The arbitrary description of the document. |
Issued by |
The name of the employee who has issued the document. |
Changed by |
The date and name of the user who made the last change. |
Ignore the receipt price |
If this field is checked, the actual price of receipt items (positive items on Receipt Card) is ignored and the articles are valued as a release during the document confirmation, i.e. according to the Stock Valuation Method. |
Items (2nd Page)
The 2nd page shows a list of the items that are to be accepted in stock. Insert a new item in the Change mode or when creating a New Record by pressing Ins key. When issuing a free document, the Purchase Item form is displayed, into which you select the required articles and enter the required data. When issuing a linked document, select the items from the Heading Items book after pressing the Ins key. All items that are added on the Purchase Order and which have not been issued an invoice yet are stated here.
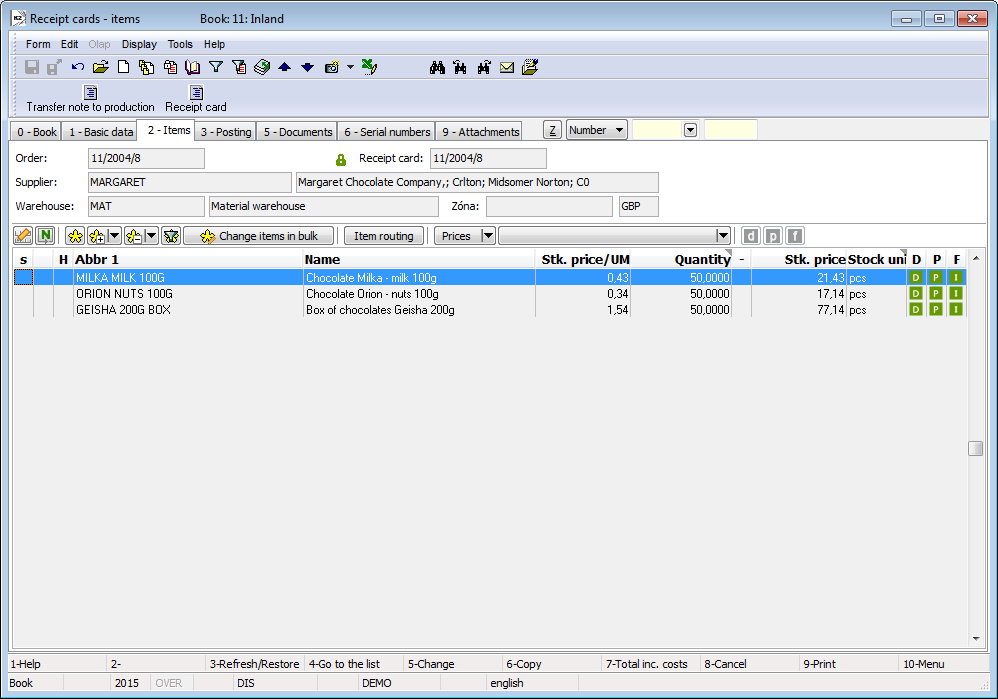
Picture: Receipt Card - 2nd page
The Purchase Item form can be also activated by pressing the Enterkey over the particular Receipt Card items, either in the Change mode or in the Browse mode. In addition, the Change mode enables to edit the data about the quantity, add the codes etc.
Values in the documents items including discount, can be adjusted in bulk by means of Bulk Change of Items button in the Change mode. For further description of this function, see the Bulk Change of Document Items and Purchase and Sale Items chapters.
Assignment (3rd page)
The 3rd page of the Receipt Card is used to assign and post the document. This issue is described in details in the chapter Accounting - Account Assignment and Posting. .
Documents (5th Page)
There is a list of all documents which are linked with this Receipt Card by means of the superior document (purchase order), on the 5th page of a Receipt Card card. You can move between the individual documents by pressing the Ctrl key and the initial letter of the document simultaneously. It is also possible to display the selected document by pressing the Enter key.
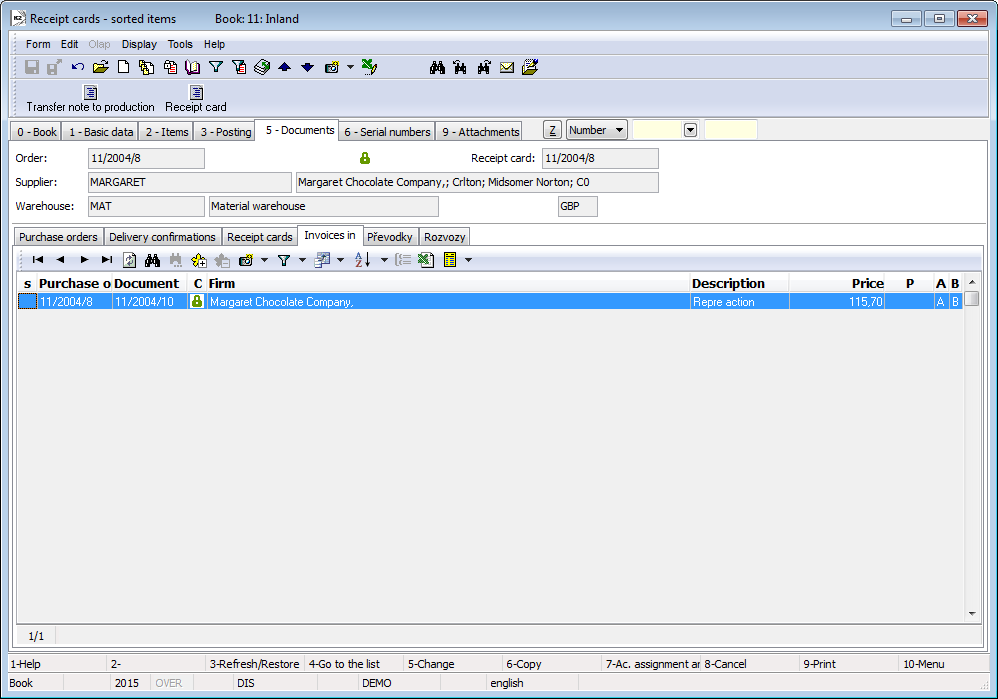
Picture: Receipt Cards - 5th page with the open Invoices In tab
Serial Numbers (6th Page)
The serial numbers defined on the 6th page of the Receipt Card item are displayed here. Detailed description of work with the serial numbers in the stock documents is provided in the chapter Shared Purchase and Sale Elements - Serial Numbers .
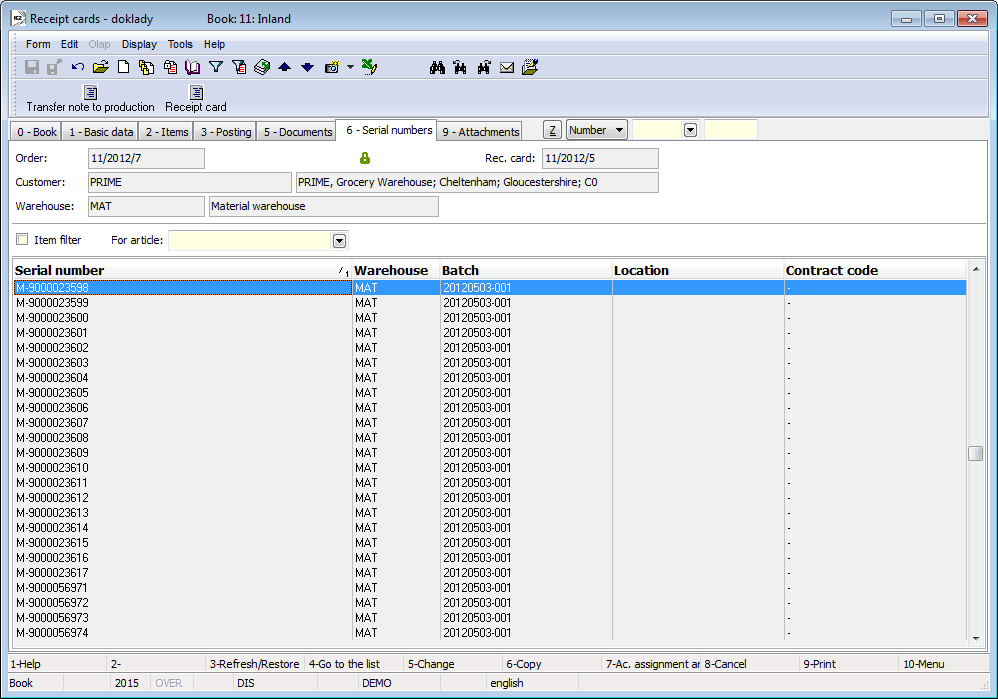
Picture: Receipt Cards - 6th page
Ext. Documents (9th page)
It is possible to attach any ext. documents and documents to Receipt Cards on the 9th page. Further description of the work with attached documents and ext. documents is stated in the Basic Code Lists and Supporting K2 Modules - 9th Page chapter.
Functions of the Receipt Cards module menu
Form - Bulk Actions - RECEIPT CARDS
Bulk actions can be run on records marked by asterisks or on records in container.
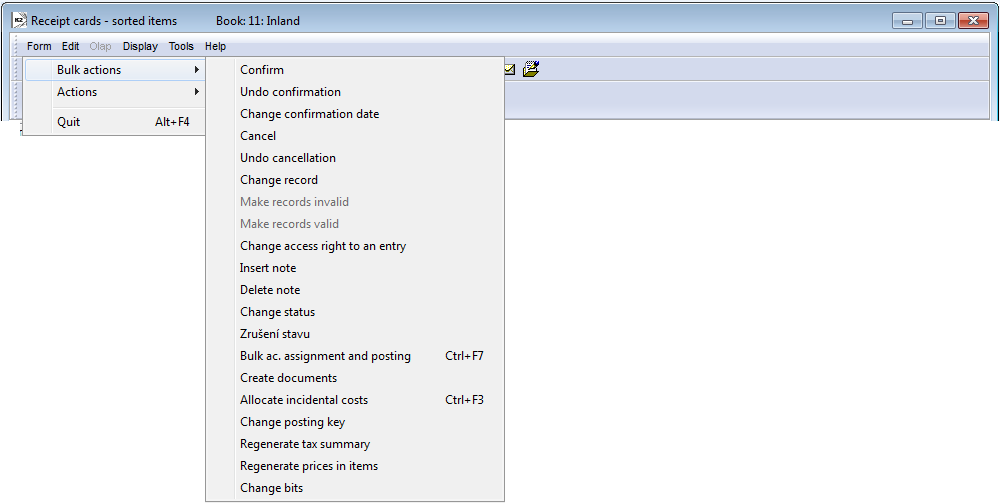
Picture: Functions of Receipt Cards module menu
Selected functions' description:
Change status |
It allows to bulk change the Status field of the selected entries. |
Change bits |
It contains the possibility to bulk change the option Ignore Receipt Prices of document. At the same time, you can choose whether the change has to be done on the confirmed documents too. The function ensures a change of the checkbox in the document header and a change of the value in its items. |
Functions above Receipt Cards
Alt+F5 |
Change a stock price on the confirmed document (2nd page, in the Browse mode). |
Alt+F6 |
Release from handling unit. The function serves to insert all items from the selected handling unit into the document (page 2 in the Change mode). Negative items are inserted into the Receipt Card. |
Ctrl+F3 |
Allocation of incidental costs (page 2 in the Browse mode). |
Ctrl+F5 |
Change confirmation date. The Check negative stock levels option allows you not to change the date in the event that there should be a negative stock level in the stock record. Users which have not the right Code lists / Articles / Set "Negative stock level allowed" checkbox, have this option activated and cannot edit it. Note: Negative level in serial number records is not checked. |
Ctrl+F6 |
Assign batches and locations into the items of release (page 2 in the Change mode). The functionality is identical to the functionality of the program when the option Assign batches and locations to releases when saving is activated in the specific Book of Purchase. |
Ctrl+Shift+F6 |
For the current marked item, it opens the form of Wizard of the stock record and allows to enter the selected combination manually (contract code + batch + location) to the document item directly from the rows of document items. (2nd page, in the Change mode). |
Alt+Shift+F2 |
Confirmation of a stock document with the negative stock level control off. If there is an Article card with serial numbers record on the document, the serial numbers are not solved (i.e. the serial numbers in stock level are not updated). There is a flag on such document, which indicates that the document contains incorrect serial numbers - there is an icon The execution of the function is always logged into changes. The function is accessible only to the users that are authorized in Code lists / Articles / Set "Negative stock level allowed" checkbox. |
Ctrl+Shift+F2 |
Undo the confirmation of a stock document with negative level control off. If there is an Article card with serial numbers record on the document, the serial numbers are not solved (i.e. the serial numbers in stock level are not updated). There is a flag on such document, which indicates that the document contains incorrect serial numbers - there is an icon The execution of the function is always logged into changes. The function is accessible only to the users that are authorized in Code lists / Articles / Set "Negative stock level allowed" checkbox. |
Ctrl+Alt+F5 |
The function enables to choose the document Status. |
Cancelling the Receipt Card:
If the invoice has been already saved (the number has been assigned to it), it cannot be deleted by any means. Only in the case of the invoice not being confirmed yet, it can be cancelled. Execute it by pressing F8 key. At the cancelled Release Note only its header with the flag of the cancellation will remain in the database. The Receipt Card items will be deleted. If you need to find out consequently what content was stated at the Receipt Card before its cancellation (by the reason of any check), it is possible to find it out from the Invoice In that is bound to that Receipt Card.
Receipt Card Reports
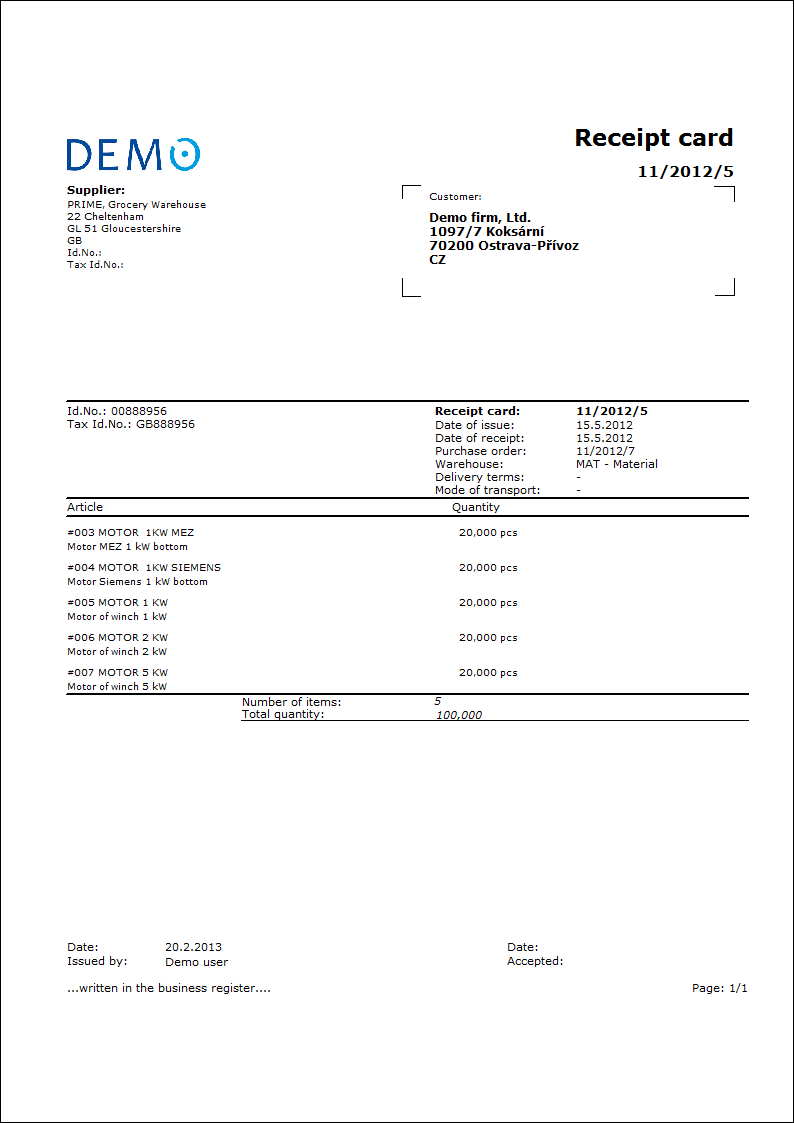
Receipt Card
Process No.: SKL001, ZAS009 |
Report ID: SZAS008 |
File: PRI_DOK01.AM |
Report description: Receipt Card. The report enables to save parameters into the „*.xml“ file. It is possible to export into the „*.pdf" file in bulk and send by e-mail. |
||
Address in the tree: [Purchase / Supplying] [Receipt cards] [Print Documents - Lists] [Logistics] [Receipt cards] [Print documents - Lists] |
||
Report parameters:
Assignment - No Yes - it displays booking documents (data from the 3rd page of the document). |
BarCode - Yes Yes - a bar code is displayed. |
Batch - No Yes - batches for an item are displayed. |
BatchAttr - 0 0 - nothing is displayed; 1 - batch parameters are displayed; 2 - required batch parameters are displayed. |
BusinessRegister - 1 Information about the Business register from the Administration of own companies is displayed. 0 – does not display information about the Business register, 1 – displays text about Business register of maximum two rows, 2 – displays text about Business register of maximum four rows. |
CodeAndCentre - 0 The cost centre and the code are displayed according to the setting: value 0 - nowhere, 1 - in the heading, 2 - in items, 3 - in both places. |
CodeOfCurrency - No Yes - a code of currency is displayed (e.g. USD). No - a mark of currency is displayed (e.g. $). |
ContactsFrom - 1 1 - Displays contacts of the user who has issued the document, 2 - displays contacts of the user who prints the document. |
CombineOrigItem - Yes Yes - merges the items with the same "OrigItemF" (if it is not different in price and other attributes). |
DefaultExport - No It is described along with other export parameters in the the Report Parameters for a Bulk Sending by Email chapter. |
Description - No Yes - it displays information from the Description field from the 1st page of the document. |
DescriptionFromItem - Yes Yes - a supplement that is entered into the Description field on a document item is displayed. |
DraftLabel - Yes Yes - a "DRAFT" is displayed at the background of the report if a document is not confirmed. No - a "DRAFT" is not displayed. |
Export_... - various parameters The report also includes export parameters described collectively for all documents in the Report Parameters for Bulk Sending by Email chapter. |
Interactive - No No - an input form to enter parameter values is displayed. |
K2Info - Yes Yes - displays informative text about the document issued by the K2 system. |
KeepEnvelopeFormat - No No - the empty place is hidden under the place for the envelope window. The saved place is multiplied if the "ShowBarCode" parameter is set on "No". This is useful when the user does not use the envelope window and does not want to fold the printed documents into envelopes by the line on the document. Yes - the place is not hidden - lines between items and the address part will be always in a one-third of a page. |
LangAccordToParams - No If the report is printed in the language that is set in the "Field language" and "Report language" parameters, then you have to set the value of the parameter to "Yes". |
LeftEnvelopeWindow - No Yes - the customer address is printed on the right side (intended for sending documents by mail in abroad, where the window for the envelope is on the left side); No - the customer address is on the left side. |
LeftShift - 5 By how many mm the edge of the report is shifted to the left (used for setting up printing on the printer). |
LogoPictureFooter - 0 The parameter corrects the footer logo. If the parameter is empty, the footer logo is displayed according to the parameter settings Picture in Footer in the function Administrator - Administration of Own Companies. 0 - nothing is displayed, but there is a free place (for a header paper), 1 - neither picture nor free place. File name with png suffix - particular picture in Pictures directory of a particular company. |
LogoPictureHeader - The parameter corrects the header logo. If the parameter is empty, the header logo is displayed according to the parameter settings Picture in headerin the functionAdministrator - System - Administration of Own Companies. 0 - nothing is displayed, but there is a free place (for a header paper), 1 - neither picture nor free place. The condition is to set the parameter KeepEnvelopeFormat to No. File name with png suffix - particular picture in Pictures directory of a particular company. |
Notes - Enter the comment type from the document header which is to be displayed in the report into the parameter. To display more comment types, it is necessary to separate the individual types by using the semicolon (e.g. MAIL;CMR). If more comments of the same type are found, all of them are displayed. |
NumberOfItem - 2 0 - displays no number, 2 - displays item number from Purchase order in the "#001" format. |
OneLineItem - No Yes - document item is always displayed on the 1st line. |
Price - 0 0 - no prices for the items are displayed, 1 - the planned price is displayed, 2 - the invoiced price is displayed, 3 - the stock price is displayed. |
PricesInFirmCurrency - No Yes - displays the prices in the currency of the company, No - displays the prices in the currency of the document |
ProportionalFont - Yes Yes - displays the supplements by the Verdana font, No - CourierNew type of font. |
SerialNumber - No Yes - it displays serial numbers at the items. |
Sign - @Vyst;;; The parameter has five places: 1st one marks the person, whose signature will be displayed. It can be the picture named by the Logname of the user, who has issued the doc (@Vyst) or who has printed it - or according to the current login (@akt) or particular Logname.
The value entered in the Stamp field in Administration of Own Companies is used by default. The path and the name of the file is entered here. The path may be entered by using the alias. Instead of entering the specific file name, it is possible to use %s. The picture must always be in the xxx.png format. If it is not filled in the Administration of Own Companies, the file will be searched in the Picturesdirectory.
An example of entered task in the Stamp field in Administration of Own Companies: via alias: k2*DEMO\Pictures\stamp.png (searches the picture in the Client's path. The file stamp.png in the Pictures directory) via %s: k2*DEMO\Razitka\%s.png (the value entered this way enables to display signed bitmaps to all users who issue documents or are currently logged in and have the file in the PNG format in the directory (in this case the user created Stamp directory).
2nd: height of picture. 3rd: distance from the left corner. 4th: distance of picture from the upper corner of the given section. 2nd: width of picture. Example: (Sign - @vyst;27;47;0;83) prints the signature of the user who has issued the document, height is 27 points, left indentation of 47 points, by the upper corner. The picture is 83 points wide.
If the parameter is set to 0, the stamp will not appear. |
SortBy - The field is filled with the value of the field from the sales items (e.g. C_Zbo;Zkr or CF_CeJePlM). Items on a document are sorted according to the parameter value. The parameter is empty by default. If the value of this parameter is specified, then the items are not combined, even if the CombineOrigItem parameter is set to Yes. |
StateOfOrigin - No Yes - a code of tariff and a country of origin are displayed for the items. If it is filled on a batch, the information from the batch are displayed; otherwise the data from the Article card are displayed. |
SupplFromArticles - 0 - Nothing is displayed, Empty value - a Business Text from an Article card is displayed. If the parameter is filled in, and if there is an existing comment type on the Article card that is identical to the parameter value, the text of this comment is displayed. If the given comment type does not exist, the entered type of supplement from the notes on the Article card will be displayed (e.g. the DB type). If both comment and supplement type are identical, the comment has priority over the supplement. |
ShowSupplFromCustomer - DZ 0 - Nothing is displayed, Empty value - a Business Text from a Customer card is displayed. If the parameter is filled in, and if there is an existing comment type on the Customer card that is identical to the parameter value, the text of this comment is displayed. If the given comment type does not exist, the entered type of supplement from the notes on the Customer card will be displayed (e.g. the DB type). If both comment and supplement type are identical, the comment has priority over the supplement. |
SupplFromItem - 0 - Nothing is displayed, Empty value - displays the entered text from the Text tab from the document item. If the parameter is filled in, and if there is an existing comment type on the document item that is identical to the parameter value, the text of this comment is displayed. If the given comment type does not exist, the entered type of supplement from the notes on the document item will be displayed (e.g. the TX type). If both comment and supplement type are identical, the comment has priority over the supplement. |
SupplFromMandant - TEXT The TEXT value displays the information from the General information from own company field. Otherwise it displays the entered supplement type from the Client parameters. |
Title - The entered value of the parameter is displayed as a title of the report. If the parameter is empty, an original name of a document is printed (e.g. Invoice). |
TotalAmount - No Yes - information about the total amount is displayed. |
TotalItems - No Yes - information about the total number of items is displayed. |
Weight - No Yes - the information about the total weight is displayed. |
